I vividly recall the moment I realized my kitchen wasn’t just brewing with aromas but was also battling an unseen force—air rushing back in through the range hood. It was late one evening, and instead of feeling the satisfying exhaust of cooked fumes, I noticed a strange draft. It baffled me. How could something designed to push air out be pulling it right back in? That realization set me down a rabbit hole of troubleshooting I’d never anticipated.
Why Your Range Hood Might Be Pulling Air Back Into the Kitchen
One common, yet often overlooked, culprit is the way your kitchen vents are installed or functioning. When a range hood pulls air out but the space isn’t properly vented or if there’s a blockage, a pressure imbalance occurs. Essentially, the air doesn’t have a way to escape efficiently, causing outside air to slip back in through the hood or other gaps. This isn’t just an annoyance; it can impact your home’s air quality and lead to increased energy bills as your HVAC system works harder to compensate.
From my own experience, failing to check the ductwork was the first mistake I made. I assumed the vent was clear until I noticed lingering smells and a persistent draft that no amount of sealing could fix. It turns out that many homeowners overlook simple issues like disconnected ducts, crushed vents, or even blocked filters. Interestingly, this problem can worsen if your home’s pressure balance is off, especially in tightly sealed modern homes.
Addressing this issue begins with understanding your venting system’s condition. Sometimes, it’s just a matter of cleaning or reconnecting a duct. Other times, it might require upgrading to a better vent or adjusting the installation. For a comprehensive overview, you might want to check out some professional insights on [how to avoid venting problems that ruin your kitchen](https://discountappliancehub.com/3-signs-your-dishwasher-inlet-valve-is-leaking-silently). But before diving into repairs, let’s talk about the common skepticism I hear from many homeowners about this issue.
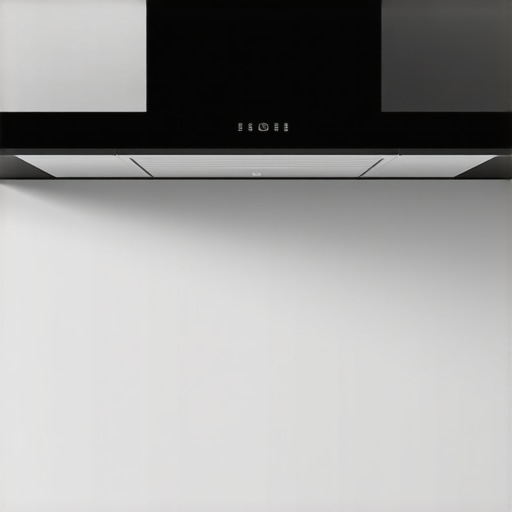
Inspect and Clean Your Ductwork First
Begin by locating the duct that connects your range hood to the outside vent. Remove any accessible panels or hoods to get a clear view. Use a sturdy flashlight to check for obstructions like debris, bird nests, or crushed sections. I once found a years-old spider web clogging the duct, which was causing a significant pressure buildup, pulling air back in. Clean out any blockages thoroughly with a flexible brush or vacuum hose. This simple step often resolves the draft issue and improves airflow efficiency.
Verify Proper Duct Venting and Sealings
Ensure that the duct has a proper slope—about 1/4 inch per foot—so that condensation and debris don’t settle and cause blockages. Confirm that the duct terminates outside your home with a proper vent cap that prevents backdrafts. Check the connections for airtight seals using metal foil tape or high-temperature silicone sealant—never duct tape. I once reapplied sealing tape around loose joints, which eliminated the reverse airflow. Proper venting prevents outside air from sneaking back through gaps, maintaining correct pressure balance.
Test for Air Leaks
After sealing, test for leaks by turning on the range hood with all other exhausts off. Light a stick of incense or a smoke pen and hold it near suspect areas—any smoke movement indicates leaks. Seal any detected leaks immediately. Remember, gaps around the hood, electrical boxes, or recessed panels can also cause drafts, so seal those as well. This step ensures your system maintains the proper pressure that keeps air flowing correctly.
Adjust Your Range Hood’s Settings
Some models have adjustable dampers or switches; consult your user manual to optimize airflow settings. If your hood has a variable speed control, set it to a higher setting temporarily while observing airflow. If you notice that the fan’s airflow seems weak, cleaning the fan blades or replacing worn-out filters can help. I recently replaced a clogged grease filter, which restored stronger airflow and eliminated the reverse draft phenomenon. Making these adjustments fine-tunes the ventilation and prevents outside air from entering through the hood.
Consider Installing a Backdraft Damper
A backdraft damper is a one-way valve installed in your vent pipe that prevents air from flowing back into your kitchen. If your current system lacks one, it’s a relatively straightforward upgrade that can provide a permanent fix to reverse airflow issues. This is especially vital in climates with high wind or in homes with negative pressure. I added a damper last year, and it immediately stopped the draft problem, ensuring that your exhaust only goes outward.
Consult a Professional if Issues Persist
If after these steps the problem persists, it’s time to call a professional. They can conduct a smoke-test or use specialized pressure measurement tools to identify leaks or installation errors. Sometimes, improper vent sizing or a poorly designed system causes ongoing issues. A quick professional diagnosis can save you time and prevent further damage. To learn about other appliance issues, check out [how to claim your warranty for a cracked glass cooktop](https://discountappliancehub.com/how-to-claim-your-warranty-for-a-cracked-glass-cooktop), which shares similar troubleshooting principles.
Many homeowners assume that requesting same-day appliance repair guarantees a quick fix without complications, but in my experience, this belief overlooks critical nuances that can impact the outcome. While swift service is appealing, it sometimes leads to overlooked details, especially regarding warranties and installation practices. For instance, rushing repairs without verifying if the technician uses OEM parts can void your warranty, leading to costly repairs down the line. A common misconception is that all technicians offer genuine parts; however, using aftermarket components can seriously jeopardize your warranty coverage, as highlighted in expert analyses on warranty terms. Additionally, many assume that all repair companies provide comprehensive warranty protection—yet, some exclude certain parts or repair types, which can trap uninformed homeowners. Another pitfall involves misunderstandings about installation protocols; for example, improper leveling of appliances like washing machines can cause excessive wear and void warranties, a mistake frequently made by DIY enthusiasts. Moreover, the assumption that warranties cover accidental damage is false in many contracts, so neglecting to handle appliances gently might lead to unnecessary expenses. Delving deeper, advanced consumers recognize that warranties often require regular maintenance, such as monitoring water hardness levels, since mineral buildup can damage appliances and invalidate coverage—see how water quality impacts warranties. To avoid these obstacles, ask your appliance technician specific questions about parts sourcing and warranty conditions before service. Also, consider the benefits of understanding your warranty’s fine print; it can save you from surprises if a repair doesn’t uphold its coverage. Ensuring proper installation is equally critical; professional setup often includes necessary components like anti-tip brackets, which might be omitted during amateur installation, risking damage and warranty voidance. The key takeaway is this: the perception of hassle-free, same-day repairs can mask complex nuances that determine your appliances’ longevity and warranty validity. Are you aware of how your warranty handles maintenance and repairs? Exploring these elements can save you money and headaches. Check out how proper appliance care, like maintaining optimal water hardness, keeps warranties intact and appliances running smoothly. Have you ever fallen into this trap? Let me know in the comments.Maintaining your appliances over the long term requires not only understanding common issues but also investing in the right tools and developing effective routines. Personally, I swear by a few specialized equipment pieces and software solutions that have saved me time and money on repairs and upkeep. One indispensable item is a digital multimeter. I use a high-precision model like the Fluke 115 to quickly diagnose electrical issues—it’s remarkably accurate and durable, making it perfect for troubleshooting everything from microwave controllers to refrigerator compressors. Pairing this with a thermal imaging camera, such as the FLIR E8, allows me to spot hot spots and potential failures before they escalate, especially in complex systems like HVAC units or smart appliances.
Investing in Quality Diagnostic Tools
Beyond hardware, I rely on software diagnostic apps like ApplianceIO, which can interface with certain smart appliances to provide error codes and maintenance alerts remotely. This proactive approach helps me schedule repairs before a minor glitch develops into a costly breakdown. When working on water-related appliances, I always carry a moisture meter to detect leaks or hidden moisture buildup, which can cause mold or electrical issues over time. For regular maintenance, I keep a set of precision screwdrivers and torx bits, as most modern appliances require specialized tools to avoid damaging delicate components.
Regular Software Updates and Monitoring
Another area where I emphasize maintenance is keeping my appliances’ firmware and software current. Manufacturers often release updates that improve performance or patch vulnerabilities, especially in smart appliances connected to your home network. Enabling notifications for firmware updates ensures I don’t miss critical patches. As the trend toward IoT integration grows, I predict that future appliance maintenance will lean heavily on remote diagnostics and AI-powered predictive analytics, making proactive upkeep more accessible and less time-consuming.
How do I maintain appliances over time?
Establishing a routine check-up schedule is vital. I set monthly reminders to clean filters, inspect seals, and test electrical connections with my multimeter. For instance, regularly monitoring the water inlet valve on my dishwasher prevents leaks and preserves the warranty—check out my detailed guide on [how to claim your warranty for a cracked glass cooktop](https://discountappliancehub.com/how-to-claim-your-warranty-for-a-cracked-glass-cooktop) to see how timely maintenance is key to warranty protection. Additionally, keeping tools like moisture meters and thermal cameras readily accessible allows me to catch issues early, reducing emergency repairs and extending appliance lifespan. To further safeguard your investments, consider integrating smart monitoring solutions. In the future, appliances could notify you directly of issues before symptoms even appear, making maintenance almost autonomous. Try implementing a daily visual inspection coupled with remote diagnostic tools—this small step can dramatically enhance your appliance reliability and negate unexpected failures.
Lessons I Wish I Discovered Sooner About Ventilation Repairs
- Never underestimate the power of a thorough duct inspection; a simple cleaning saved me hundreds in unnecessary replacements.
- Ensuring proper vent slope and sealing can prevent reverse airflow, saving energy and improving air quality.
- Professional help isn’t just a luxury—it’s essential when DIY fixes don’t resolve persistent drafts or odors.
- Understanding how pressure imbalances affect your range hood can make troubleshooting much more effective.
- Investing in tools like thermal cameras and moisture meters has transformed my maintenance routine, catching problems early.
My Go-To Tools and Resources for Ventilation Troubleshooting
- Fluke 115 Multimeter: Trustworthy for electrical diagnostics, helping me pinpoint fan or wiring issues.
- FLIR E8 Thermal Camera: A game-changer for detecting hidden heat spots indicating duct blockages or leaks.
- High-Quality Sealing Materials: Metal foil tape and high-temp silicone sealant ensure airtight connections that last.
- Expert Guides and Forums: Websites like the one I linked about venting problems provide insights that DIY videos often miss.
Time to Thrust Yourself Into Better Ventilation Awareness
Remember, proper airflow isn’t just a matter of convenience—it’s vital for your home’s health and efficiency. Asking the right questions, investing in the right tools, and knowing when to call in pros can turn a frustrating draft into a smooth and effective ventilation system. Don’t let a small annoyance linger—take charge and breathe easier today! How have you handled ventilation issues in your home? Share your experiences below!