It was late one evening when I finally learned my lesson the hard way. My washing machine, which had been acting up for days, refused to drain. The cycle would finish, but water stubbornly remained at the bottom. Frustration turned into realization—I had no choice but to crack it open and figure out what was wrong. That moment of discovery, embarrassingly enough, started with a simple mistake: ignoring regular maintenance and assuming my machine would fix itself. Have you ever faced a similar dread, wondering why your washing machine stubbornly holds onto water?
Why Your Washing Machine Won’t Drain Is More Common Than You Think
When your washing machine hangs onto water, it might seem like a frustrating mystery, but often, the fix is surprisingly straightforward. Over time, dirt, lint, and debris can clog the pump or filters, preventing proper drainage. Sometimes, a clogged hose or a faulty pressure switch can also be the culprits. Understanding what causes these blockages is essential because, as experts point out, routine maintenance can extend the life of your appliance and save you money. Interestingly, a report by Consumer Reports indicates that most drain issues are caused by simple clogs or minor component failures that homeowners can fix without calling in a professional.
Have you encountered the dreaded water leftover after a wash cycle? If so, don’t worry—this is one of the most common washing machine problems, and, in many cases, it’s easier to fix than you might think. Before you start panicking or considering replacement options, let’s look at a mistake I made early on that could have saved me hours of frustration.
I once assumed that if the washing machine kicked on, everything was fine. However, neglecting to check the pump filter or drain hose was a mistake. These parts can accumulate lint and debris, causing blockages. A simple cleaning can often resolve the issue and get your washer draining smoothly again. For more insights on related appliance issues, you might find this article about [why your ac drain line is backing up](https://discountappliancehub.com/why-your-ac-drain-line-is-backing-up-into-your-home) helpful, as it explains how minor clogs can cause significant problems.
In the following sections, I’ll walk you through the practical steps to diagnose and fix your washing machine’s drainage problem—no complicated tools required. Whether it’s cleaning out filters, checking hoses, or inspecting the pump, I’ll help you restore your appliance’s function with confidence. So, let’s dive into the simple, effective solutions that can have your washer draining properly again in no time.
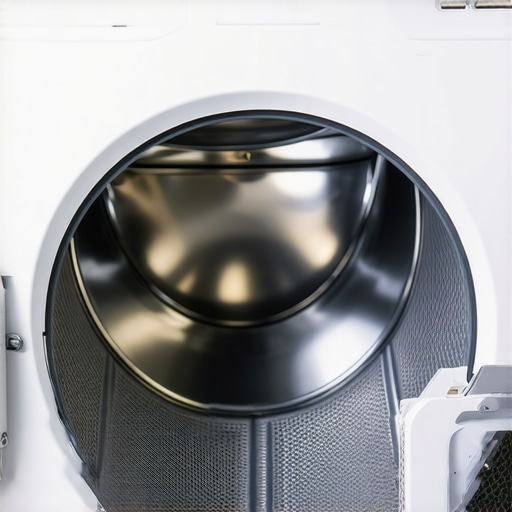
Empty the Drain Pump Filter to Clear Clogs
Start by unplugging your washing machine for safety. Locate the drain pump filter—usually at the front bottom panel—and unscrew it carefully using a towel or container to catch residual water. Remove any lint, coins, or debris lodged inside. I once had a build-up of hair and lint that caused the pump to clog, and cleaning it out instantly resolved my drainage problem. Regularly checking this filter can prevent future issues and extend your washer’s lifespan.
Inspect and Clear the Drain Hose
Disconnect the drain hose, which is typically behind the machine or at the back. Use a long brush or pipe cleaner to remove any blockages inside the hose. Check for kinks or bends that might restrict water flow. I once discovered a sock tangled inside the hose, which was blocking drainage. After clearing the obstruction, I reconnected the hose and ran a test cycle, and the water drained perfectly. Keep in mind that hoses can sometimes develop leaks; replacing a damaged hose prevents spills and further damage.
Test the Pressure Switch for Malfunctions
The pressure switch signals the washer to drain at the right time. If faulty, it can prevent proper drainage. To test, unplug the machine and locate the pressure switch—usually near the drum. Use a multimeter to check for continuity based on your model’s specifications. If the switch is defective, replacing it can restore normal function. I once had an issue where the switch stuck in the ‘full’ position, causing water to remain after the cycle. Replacing this component was straightforward and saved me from calling a repair technician.
Use Diagnostic Codes to Identify Specific Problems
Many modern washers display error codes indicating the underlying issues. For example, an error like E20 or similar code often points to a clogged drain pump or blockage. Consult your user manual to interpret these codes accurately. Once identified, targeting the specific component for cleaning or replacement accelerates repairs and minimizes downtime.
Perform Routine Maintenance to Prevent Future Clogs
Regularly clean the filter and inspect hoses every few months. Consider using a vinegar solution to clear mineral deposits and soap scum buildup. If your washer is near a sink or drain, maintaining clear pathways ensures smooth water flow. I learned that neglecting these simple steps led to repeated drainage issues. Integrating routine checks into your cleaning schedule will save money and keep your machine functioning efficiently.
When to Call a Professional
If after these steps your washer still doesn’t drain, it might be time to seek professional help. A licensed technician can diagnose less obvious issues like a faulty pump motor or electronic control board failures. Remember, attempting complex repairs without proper tools and knowledge can cause further damage or void your warranty. For urgent assistance, consider same-day service options available in your area that come with a warranty, ensuring peace of mind and quick resolution. You can learn more about protecting your appliances with proper wiring practices by visiting this guide on wiring errors.While many believe that professional installation guarantees trouble-free operation, this isn’t always the case. In fact, some common myths about appliance repair and warranties can lead homeowners astray, resulting in costly mistakes or missed opportunities for savings. Let’s unpack these misconceptions and reveal the nuanced truths that only seasoned repair experts understand.
One widespread belief is that all service warranties cover any repair issue. However, many warranties come with fine print, excluding certain damages caused by improper installation or neglect. For example, some warranties won’t cover damage resulting from incorrect power connections or ignored maintenance schedules. In the long run, understanding the specifics of your warranty—like the one explained at this detailed article—can prevent frustration.
A common ‘oops’ trap homeowners fall into involves rushing to call a technician at the first sign of trouble. While same-day service is tempting, it’s essential to recognize that not all issues warrant immediate attention. Sometimes, attempting a quick fix based on half-knowledge can invalidate your warranty or cause further damage. For instance, disconnecting your refrigerator’s water line without turning off the supply can lead to leaks, which might complicate repair claims later. To avoid these pitfalls, consider consulting expert guides or professionals before taking action.
Now, let’s address a question that often puzzles even advanced users:
What hidden risks come with DIY appliance repairs, and how can proper knowledge mitigate them?
Improper repairs—particularly those performed without understanding the intricate workings of appliances—can compromise safety and void warranties. For example, mishandling the electrical components in your smart kitchen gadgets can lead to short circuits or even fires, as discussed in this detailed analysis on wiring mistakes. Conversely, investing in proper training or consulting certified technicians ensures repairs are compliant and safe. Recognizing the difference between a simple gasket adjustment and complex control board replacement can save time and money.
Furthermore, misunderstandings about same-day service can cause disappointment. Many assume that same-day availability implies instant fixes, but in reality, scheduling depends on technician availability, parts stock, and the complexity of the issue. Choosing reputable service providers that transparently communicate timelines and warranty coverage—like those highlighted in various informative articles—can set realistic expectations.
In conclusion, debunking these myths and understanding the complex nuances involved in appliance installation, repair, and warranties equips you with the confidence to make informed decisions. Always read your warranty details carefully, and don’t hesitate to seek expert advice for complex issues. Have you ever fallen into this trap? Let me know in the comments and share your experiences with appliance repairs.Maintaining your appliances over time isn’t just about fixing issues as they arise; it’s about adopting the right tools and routines to prevent problems and extend their lifespan. One essential tool I personally rely on is a high-quality digital multimeter. I use it to test electrical components like thermostats and control boards, ensuring they function correctly before problems develop. For example, checking the continuity of the pressure switch on my washer helps prevent drainage issues down the line. Additionally, I invest in a set of specialty screwdrivers, such as Torx and Security Torx, which are vital for removing panels without damaging delicate screws—standard tools just won’t cut it for many appliances. Regularly cleaning and inspecting parts like filters and hoses with dedicated brushes and compressed air is another way I stay ahead of potential failures.
How do I maintain appliances over time?What I Wish I Knew Before Tackling Appliance Repairs
One of the toughest lessons I learned was that even simple drainage problems can hide complex causes, and rushing in without proper knowledge often makes things worse. The importance of thoroughly checking filters and hoses cannot be overstated—neglecting this step led me to unnecessary repairs and frustration. I’ve realized that patience, combined with a solid understanding of these components, can save time and money.
Another insight is the value of routine maintenance. Regularly inspecting and cleaning parts like filters, hoses, and pressure switches not only prevents issues but also extends the life of your appliances. It’s a small investment of time that yields significant peace of mind and cost savings in the long run—something I wish I prioritized earlier.
Finally, understanding when to call a professional is crucial. While DIY fixes are empowering, some problems, especially new error codes or mechanical failures, are best handled by experts. Knowing your limits, and having trusted service options, ensures your appliance gets the care it needs without risking further damage.
Tools and Resources That Changed My Approach
My go-to toolkit now includes a high-quality digital multimeter, vital for diagnosing electrical issues in appliances. I trust this resource for understanding the electrical components I encounter. Additionally, a set of precision screwdrivers, like Torx and security bits, is indispensable for safe disassembly without damage.
For step-by-step guidance, I rely on reputable online tutorials and manufacturer manuals. The site this guide on drain line issues helped me interpret error codes and identify specific problems swiftly. Investing in reliable tools and trusted information sources has transformed my maintenance routine from guesswork to confident troubleshooting.
Harnessing the Power of Preparedness and Knowledge
Your appliance journey is an ongoing learning experience. Embrace these lessons—inspect regularly, understand your tools, and know when to seek expert help. The confidence that comes with knowledge can turn frustrating repairs into manageable tasks and keep your appliances running smoothly for years.