Ever stood in front of your washing machine, mistakingly expecting it to finish the cycle and find soaked clothes still nestled in the drum? I’ve been there—a frustrating moment when, instead of the usual swish of agitation, all I heard was silence. That lightbulb moment hit hard: my trusty top-load washer wasn’t doing its job. It’s like expecting your bread to toast itself but finding the slot empty.
So, why does this matter? Well, a washer that refuses to agitate can turn laundry day into an all-day chore, pushing you into a spiral of inconvenience and, let’s be honest, a bit of stress. Whether you rely on your laundry machine daily or just on weekends, knowing how to troubleshoot this issue can save you money and months of frustration. Plus, it’s often simpler than you think!
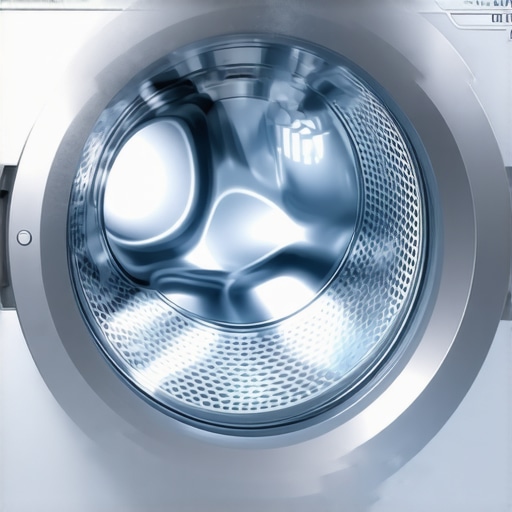
Why Your Top-Load Washer Might Stumble During the Spin
Is it really worth fixing yourself or calling in a pro?
Early on, I made the mistake of assuming I needed a new motor or costly repairs. Turns out, many common issues are DIY-friendly if you know what to look for. Did you know that sometimes a simple brush adjustment or a worn-out belt could be the culprit? According to appliance experts, about 80% of washer problems are caused by minor issues that homeowners can fix without professional help here.
Check the Power and Lid Switch
Ensure Proper Power Supply
Begin by verifying that your washing machine is properly plugged in and that the circuit breaker hasn’t tripped. I once found my washer silent because the power cord was loose; a simple push restored function. After confirming power, test the lid switch, as a faulty switch can prevent agitation. Use a multimeter to check for continuity, replacing it if faulty.
Inspect the Drive Belt and Motor
Examine the Belt for Wear and Tear
The drive belt connects the motor to the agitator. Remove the panel at the back or front to access it. Look for cracks, slack, or broken sections. In my experience, replacing a worn belt restored the agitation within minutes. Remember, a loose or frayed belt can slip or fail entirely, so replace it if any damage is evident.
Test the Motor Functionality
Ensure the motor is running smoothly. If it hums but doesn’t spin, it might be overheated or have electrical issues. Use a multimeter to check motor windings; if faulty, a replacement motor or professional repair may be needed.
Evaluate the Agitator Components
Assess the Agitator Clamps and Posts
Remove the agitator cap to inspect the post and clamps. Worn or broken parts can prevent movement. Tighten or replace damaged parts. I once fixed my washer by replacing a broken agitator post, which immediately restored effective agitation.
Clear Obstructions or Debris
Check for foreign objects lodged in the agitator mechanism, which can block movement. Remove any debris carefully to ensure free motion. Keeping this area clean avoids future issues.
Test the Control Circuitry
Inspect the Timer and Control Board
If all mechanical parts are functional, the issue might lie in the control circuitry. Use a multimeter to test components or consider replacing the control board if it shows signs of damage. This step is akin to troubleshooting the brain of your washer.
Consult the Manufacturer’s Guide or Contact Service
If after these steps the washer still doesn’t agitate, examine your warranty or user manual for specific troubleshooting steps. Sometimes, the issue is a quick fix, but persistent problems require professional service. For example, understanding the specific certifications or settings, like water softener configurations, can prevent misdiagnosis (here).
Many homeowners operate under the misconception that appliance repair and installation are straightforward tasks that rarely harbor hidden complexities. However, true expertise reveals a landscape riddled with nuances that can make or break your experience. One common myth is that all warranties cover every repair issue equally; in reality, many warranties exclude certain repairs if the installation wasn’t performed according to manufacturer specifications or if proper documentation isn’t maintained. According to a study by Consumer Reports, nearly 30% of warranty claims are denied due to improper installation or failure to follow maintenance protocols, underscoring the importance of understanding your warranty’s fine print.
Another trap many fall into is assuming that same-day service guarantees immediate resolution. While scheduling might be quick, the actual repair process can be delayed if technicians encounter hidden issues or require specialized parts. For instance, a simple circuit board replacement might seem straightforward, but if the technician discovers corrosion or wiring damage that isn’t evident initially, the repair could extend beyond the same day. It’s crucial to recognize that on-site diagnostics aimed at uncovering these hidden problems can add time, but ultimately save you from future complications.
As for installation, pitfalls such as improper leveling or insecure fittings can lead to recurring problems that aren’t immediately apparent. An example is the misuse of anti-tip brackets when installing ranges—a detail many overlook but which significantly impacts safety and appliance longevity. In fact, the absence of proper leveling can cause excessive vibrations, potentially damaging delicate components over time. This detail is often overlooked by DIY installers, emphasizing the need for professional oversight or thorough guidance.
From an advanced perspective, understanding the role of electrical grounding and the proper use of surge protectors can prevent costly damage. Expert advice suggests that poorly grounded outlets or inadequate surge protection can shorten appliance lifespan or cause intermittent failures. Homeowners often neglect these critical nuances, unaware that such oversights may void warranties or lead to future breakdowns. Checking your home’s electrical system and ensuring compliance with manufacturer recommendations can provide peace of mind and extend appliance life.
Engaging with the technical details of your appliances not only saves money but also prevents frustrating repeat visits. For instance, inspecting drain hoses or venting paths can reveal obstructions or improper setups that undermine performance without obvious signs. Regularly reviewing installation and maintenance procedures will help you stay ahead of potential issues that even some professional technicians might miss if unaware of specific manufacturer requirements.
Remember, the key is not just fixing things but understanding the intricacies that influence appliance longevity and performance. Always verify that service providers follow best practices, such as using correct wiring methods or adhering to code standards, as these seemingly minor details can ultimately make a significant difference in your appliance’s lifespan and warranty validity. For example, improper drain line installation can void your washer’s warranty—more details on how to avoid this common misstep can be found here.
Have you ever fallen into one of these traps or overlooked a crucial nuance? Let me know in the comments, and stay vigilant to ensure your appliance investments pay off in durability and efficiency!
Keeping Appliances Running Smoothly: Essential Tools and Techniques
Maintaining your appliances over time is crucial to ensuring efficiency, longevity, and peace of mind. From simple inspections to advanced diagnostics, having the right tools can dramatically streamline repairs and prevent costly failures. One tool I personally rely on is a high-quality digital multimeter. It allows me to quickly check circuit continuity and voltage levels, helping to pinpoint issues like faulty control boards or bad wiring without guesswork.
Another invaluable device is a flexible inspection camera, often called a borescope. I use mine to peek inside inaccessible areas—like behind a dryer or inside the condenser coils—without dismantling the entire unit. This saves me hours of disassembly and helps identify problems such as lint buildup, which can cause overheating or inefficiency. Investing in reliable, insulated screwdrivers—preferably with a magnetic tip—also earns its keep, especially during delicate replacements like replacing a refrigerator’s defrost sensor or fixing a dishwasher’s drainage loop.
Tools aside, software diagnostics have become increasingly vital. Many modern appliances feature smart diagnostics apps or built-in self-test modes, which can save a lot of troubleshooting time. For example, some high-end fridges have display boards that can run self-checks, pinpointing issues like flashing error codes—saving you from unnecessary parts replacement. Regularly updating the firmware when available ensures these diagnostic tools operate with the latest features, aiding in proactive maintenance.
Looking ahead, I believe the integration of IoT (Internet of Things) technology will further simplify appliance maintenance. Sensors embedded within appliances could alert homeowners to issues before they become critical—think of a smart water leak detector that notifies you via your phone or a predictive maintenance system that recommends service schedules based on usage patterns. Staying ahead of the curve means embracing these innovations now.
How do I maintain appliance health over time?
Routine checks and preventative care are your best allies. For instance, regularly inspecting and cleaning your appliance’s filters, seals, and vents prevents dirt buildup and maintains airflow—crucial for units like dishwashers and refrigerators. Additionally, scheduling professional inspections once a year can catch potential problems early. Using generic brushes or cleaning tools isn’t enough; I recommend investing in specific cleaning kits tailored to your appliances—like brush sets with nylon bristles designed to reach sensitive components without damage. Proper maintenance not only prolongs appliance life but also sustains warranty validity. For example, many warranties require documented maintenance, which can be facilitated by keeping detailed logs or digital records of repairs and checkups. More details about warranty documentation are available here.
Don’t forget the importance of proper tool management. Keep your equipment organized in a toolbox or magnetic strip, making it easy to grab the correct screwdriver or multimeter when needed. This efficiency can be a game changer during emergency repairs or regular upkeep. As trends evolve, incorporate smart diagnostic accessories, such as Bluetooth-enabled multimeters that sync with your smartphone, providing real-time readings and troubleshooting guides—an advanced tip I encourage you to try today.
In most cases, a proactive approach saves you money and stress. For instance, cleaning the drain pump filter regularly or inspecting the drain hose loop can prevent water leaks and backups—issues I’ve seen escalate quickly if neglected. As appliance technology continues to advance, so should your maintenance strategy, harnessing tools and methods that keep your devices operating at peak performance for years to come.
Beyond the Basics: Lessons Only Veteran Repairers Learn
One of the most eye-opening lessons I encountered was realizing how seemingly minor issues, like a worn-out belt or loose wiring, secretly undermine the entire appliance. These small details can cause big headaches later, so paying close attention during repairs is vital.
I’ve also learned that warranties aren’t always as straightforward as they seem. Failing to document regular maintenance or improperly installing components can void coverage, making quick fixes more expensive. Always read the fine print and keep records—this has saved me more than once.
The toughest lesson—never assume a problem is beyond DIY reach. Many issues, even complex ones like control board failures, often have affordable, accessible fixes if you approach them with patience and the right tools. Gaining this knowledge transforms frustration into confidence.