
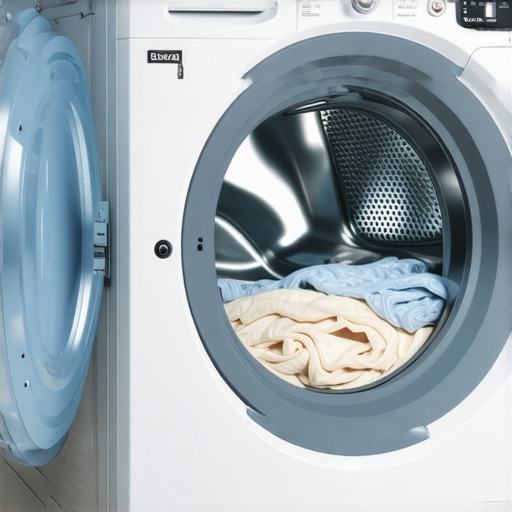
It was late evening when I stood in my laundry room, watching my washing machine shake and spin — but somehow, the drum refused to turn. The motor was humming along perfectly, yet my clothes sat soaked, useless. That frustrating moment isn’t uncommon, and I’ve been there more times than I care to admit. I remember thinking, “If I just knew what to look for, I could fix this myself instead of waiting for a costly repair visit.”
Understanding the Mystery of a Non-Spinning Washer with a Running Motor
After years of DIY fixes and a few costly service calls, I’ve learned that a washer that runs but doesn’t spin usually hides a simple culprit. Today, I want to share what I found out, so you don’t have to sit through the same frustration. The truth is, many of these issues are straightforward and could be solved with a little patience and know-how. Whether it’s a clogged filter, broken lid switch, or a worn drive belt, I’ll guide you through identifying the cause and fixing it yourself, saving time and money.
Is Repair Worth the Hassle or Should I Call a Pro?
This is what I hear all the time: “Is it worth trying to fix this myself or should I just call in a professional?” Honestly, I understand the hesitation. The good news? Most common causes are manageable for a determined homeowner. Just remember, doing your own repairs can sometimes void warranty coverage if not done correctly — so always check your warranty details. For trusted repair options and to ensure your warranty stays intact, I recommend reviewing the [proper installation practices](https://discountappliancehub.com/how-to-ensure-reliable-appliance-installation-in-2025) and [reliable service providers](https://discountappliancehub.com/warranty-backed-appliance-services-you-can-rely-on). It’s those small steps that keep your appliance running smoothly and warranty valid.
But before diving into the repairs, it’s crucial to understand the common issues that cause this problem. Over the years, I’ve pinpointed a few key suspects—like a faulty lid switch, a broken drive belt, or a clogged internal filter—that could be the root cause. Next, I’ll show you how to identify and fix these, step-by-step, so you can get your washer spinning again and avoid unnecessary replacements.
,
Inspect the Lid Switch for a Simple Fix
Start by checking the washer’s lid switch, a common culprit. To do this, unplug the machine for safety, then open the lid and locate the switch—which is usually near the edge of the lid opening. Use a multimeter to test continuity; a lack of connection indicates failure. I once replaced a faulty lid switch in my laundry room after noticing the washer’s lid light was blinking. The fix took less than 10 minutes, and my washer spun normally afterward.
Examine the Drive Belt for Wear
The drive belt connects the motor to the drum, and if it’s broken or loose, spinning won’t occur. To access it, tilt the washer back or remove the panel—consult your model’s manual for specifics. Look for fraying or cracks. In my experience, a worn belt caused my machine to spin irregularly; replacing it restored proper function. Keep in mind, a new drive belt is affordable, and installing it is straightforward if you follow the steps carefully.
Replacing the drive belt:
First, disconnect power and water supplies. Remove the top panel or back panel of the washer. Carefully slide the belt off the pulleys, then fit the new belt over the motor and drum pulley, ensuring proper tension. Reassemble the panels and test the machine. Proper installation is key to prevent future issues and extend your appliance’s lifespan. If you’re unsure, consult a professional or review reliable guides like Expert Guide to Appliance Repair and Installation Today.
Clean or Replace the Internal Filter
Some washers have internal filters that trap debris. A clogged filter can strain the motor, causing it to run but not spin. To locate the filter, refer to your user manual. Typically, it’s behind a panel near the drum. Remove the filter, clean out lint and debris, then reinsert. I once found a massive ball of lint causing the problem; cleaning it resolved the issue immediately. Routine maintenance reduces the risk of breakdowns and prolongs machine health.
Check for Blocked or Broken Clutch
The clutch helps the drum reach its spin speed. If damaged, the washer may hum but not spin. Access it by removing the control panel or rear housing. Inspect for broken springs, worn-out pads, or damage. When I repaired a friend’s washer, replacing a busted clutch gear restored the spin function within an hour. If you’re not comfortable, consider scheduling a technician—professional repairs can be quick and warranty-backed, such as Warranty-Backed Appliance Services You Can Rely On.
Assess the Motor for Malfunction
If all previous parts check out, the motor might be faulty. Listening for unusual sounds or testing with a multimeter can reveal issues. Motors are more complex to repair, and often require professional service to avoid damaging the appliance further. When I had a motor issue, I called for same-day repair—getting expert help prevented additional damage and kept the warranty intact. For quick solutions, explore Same-Day Appliance Repair with Warranty Support.
Many homeowners operate under common misconceptions when it comes to appliance repair, warranties, and quick service options. One pervasive myth is that all warranties cover every repair necessary, but in reality, many plans exclude routine maintenance or accidental damage, which can leave you out of pocket. Additionally, the idea that all same-day service providers are equally reliable is misguided; some might prioritize quick fixes over thorough, lasting solutions, leading to recurring issues. To avoid falling into these traps, it’s essential to understand the nuances of your warranty coverage and vet your service providers carefully. Misunderstanding the scope of warranty protection can result in denied claims, especially if routine maintenance hasn’t been properly documented or performed. Moreover, many believe that professional installation guarantees trouble-free operation, but improper setup—even by experts—can cause long-term problems like increased energy consumption or early appliance failure. Ensuring proper installation by following trusted guidelines, such as proper installation practices, is crucial for appliance longevity. Remember, superficial fixes or assumptions might temporarily solve the symptom but often ignore underlying issues. For instance, rushing into a same-day repair without understanding the root cause could lead to repeated breakdowns or warranty disputes. It’s counterproductive to believe that quick fixes replace comprehensive troubleshooting, especially when some advanced issues—like faulty control boards or failing motors—require expert diagnostics. Always scrutinize service reports and seek transparent explanations to prevent unnecessary expenses. Also, be wary of providers claiming to be the best without proper credentials or proven experience; trusting reputable, warranty-backed technicians reduces the risk of improper repairs. As expert sources recommend, understanding the fine print in your warranty and choosing certified professionals ensures your appliance stays protected and functional.
How can I tell if my repair is truly comprehensive and warranty-compliant?
This question taps into the importance of documentation, proper diagnostics, and selecting authorized service providers. It’s well-researched that thorough diagnostics and adherence to manufacturer guidelines significantly increase repair success and warranty validity, according to industry studies. Don’t let misconceptions lead you into costly pitfalls. Instead, arm yourself with knowledge—review your warranty details, select reputable technicians, and stay informed about proper installation and maintenance routines. Have you ever fallen into this trap? Let me know in the comments.
Regular Maintenance for Long-Term Reliability
To ensure your appliances remain in optimal condition, establish a routine maintenance schedule. This includes cleaning filters, inspecting belts, and checking electrical connections. For example, regularly cleaning the internal filters of your dishwasher or washing machine can prevent clogs and strain on components, prolonging their lifespan. Remember, a little proactive care saves a lot of headaches and costly repairs down the line.
My Favorite Diagnostic Tools and Software
Over the years, I’ve relied heavily on a quality multimeter and a digital inspection camera. A multimeter is invaluable for testing continuity in components like lid switches, drive belts, and motors. I personally recommend the Fluke 117 because of its durability and accuracy, making it my go-to for consistent diagnostics. The inspection camera (like the DSM5000 Pro) helps me peek into tight spaces or internal parts without disassembly, saving time and avoiding unnecessary parts replacement.
Additionally, I use specialized software for appliances with smart features. Apps provided by manufacturers or third-party diagnostic tools can identify firmware issues or sensor malfunctions. These tools are becoming more advanced and will likely dominate appliance repairs in the future, streamlining troubleshooting and reducing repair times.
Effective Long-Term Maintenance Strategies
Consistent care is key. Set reminders to perform seasonal checks, such as cleaning refrigerator coils or recalibrating smart thermostats. Also, keep a repair log to track issues and repairs, which can help service technicians quickly diagnose recurring problems and ensure warranty compliance. Investing in quality replacement parts and tools, like OEM belts or filters, guarantees better longevity and performance.
Scaling Up Your Appliance Care Routine
If you’re managing multiple appliances or a commercial space, consider automation and professional service plans. Integrate smart monitoring systems that alert you to issues at an early stage, reducing downtime and repair costs. For those DIY enthusiasts, expanding your toolkit over time with advanced sensors and diagnostic interfaces can improve efficiency and confidence in handling complex repairs.
Protecting Your Investment with Professional Help
While DIY maintenance and tools are excellent, some issues demand expert intervention, especially when they involve critical components like control boards or motors. Always verify that your service provider offers warranty-backed repairs and same-day service options, ensuring you get quick, reliable fixes with minimal inconvenience. These practices help safeguard your appliances and your peace of mind.
How do I maintain appliances over time?
Consistent attention, proper tools, and knowledge of your device’s components are vital. Regular cleaning, inspections, and timely repairs—using trusted parts and qualified technicians—will keep your appliances functioning efficiently for years. Stay informed with resources like reliable installation practices and leverage diagnostic tools to identify problems early. Remember, investing in maintenance today prevents costly replacements tomorrow. Why not try calibrating your smart thermostat following recommended guidelines to see immediate savings on your energy bill?
Lessons the Manual Won’t Tell You
One of my most profound realizations is that trusting the process and not rushing to replace parts prematurely saves time and money. I once spent hours troubleshooting a washing machine, only to find a simple misaligned belt. That experience taught me patience and the importance of thorough inspection, which led to a quick fix. Additionally, understanding the nuances of warranty coverage has prevented me from costly missteps, especially knowing which repairs are protected under warranty and which void them. It’s these subtle insights—gained from experience—that elevate your repair game beyond basic troubleshooting.
Tools and Resources That Changed My Approach
I rely on a few indispensable resources for efficient appliance maintenance. A high-quality multimeter, like the Fluke 117, offers precise diagnostics that keep me confident during repairs. I also keep an expert repair guide handy, covering everything from fixing a broken drive belt to diagnosing circuit board issues. These tools and guides have streamlined my approach and helped me develop a more systematic, less stressful repair process, saving me money and frustration over time.
Empowering Yourself for the Repair Journey
Taking the first step to self-repair can feel daunting, but it’s incredibly empowering. I’ve learned to trust my instincts and not fear making mistakes—they’re part of the learning curve. Remember, every successful repair boosts your confidence and reduces dependence on costly technicians. Focus on building a small toolkit, stay patient, and keep learning. Whether it’s fixing a loose belt or resetting a control panel, each success adds to your skills. The key is to approach repairs with curiosity and respect for your appliances, transforming anxiety into mastery.