
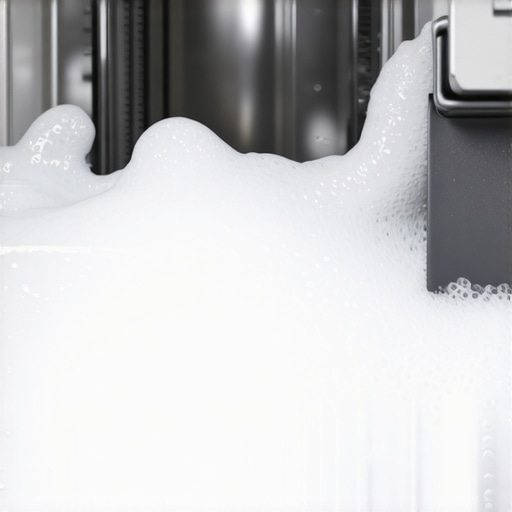
Have you ever finished a laundry cycle only to open your washer and be greeted by an unexpected mountain of suds? I remember the first time it happened to me—thinking I had somehow managed to overload the machine with soap or, worse, caused a leak I’d have to call a repair tech for. That lightbulb moment struck when I realized the problem was much simpler but equally frustrating: my washer was still full of soap suds after the rinse cycle. It felt like I was caught in an ongoing laundry nightmare.
Why Does My Washer Still Have Soap Suds? Here’s the Real Deal
When that bubbly chaos happens, it’s easy to assume your machine is malfunctioning or that you used way too much detergent. But often, the culprit is something much less obvious—like using the wrong type of detergent, overloading your washer, or a simple issue with the rinse cycle itself. If your laundry comes out with a bubbly residue that just won’t go away, it’s not only annoying but can lead to longer drying times, mold growth, and even damage to your machine over time. I’ve been there, and I want to help you avoid that hassle.
One common mistake I made early on was assuming that all detergents are created equal. Using high-efficiency (HE) detergents in a traditional washer, or vice versa, can cause excess suds. According to Appliance Experts, using the wrong soap is the leading cause of suds left behind after rinsing, which can cause issues with the machine’s internal sensors and drainage system. Honestly, it took me some trial and error to get this right—but now I know exactly what to check first.
Is It Really Worth Fixing or Just a Waste of Time?
This is a question I hear all the time, especially from folks who have been burned by overhyped solutions or unnecessary repairs. Let me tell you—understanding these simple causes can save you a ton of money and stress. Sometimes, it’s just a matter of replacing the detergent or adjusting your load size. Other times, the fix might be as straightforward as cleaning the filter or running a cleaning cycle. Want to get your washer back to its bubble-free glory? Stick around, because in the next section, we’ll explore practical steps you can take today to clear up those suds and keep your laundry routine stress-free.
If you’ve faced this bubbly mess more times than you care to admit, you’re not alone. And trust me, there’s a solution—simple, effective, and worth every minute of your effort. For emergency repairs or to get expert help, check out same-day appliance repair solutions that support warranty-backed services. Let’s dive into what might be causing those persistent suds and how to fix them now.
Start with the Right Detergent and Loading Technique
First, always use high-efficiency (HE) detergent if your washer recommends it. I once overloaded my top-loader, thinking bigger loads meant cleaner laundry, but I ended up with excess soap residue. To avoid this, measure correctly and don’t overload—make sure wet clothes move freely. These simple steps prevent excess suds from forming in the first place.
Run a Cleaning Cycle with Vinegar or Special Cleaners
Next, run an empty wash cycle using white vinegar or a commercial washing machine cleaner. I once poured a cup of vinegar and ran a hot cycle after noticing residual suds—results were remarkable. Vinegar breaks down soap scum and mineral deposits, helping your machine rinse out leftover suds and residues effectively.
Check and Clean the Drain Filter Regularly
Keeping the drain filter clear is crucial. During a troubleshooting session, I removed and cleaned mine with a brush, discovering that gunk buildup worsened suds issues. Regular cleaning prevents clogs and ensures proper drainage and rinsing—imagine trying to drain a bathtub clogged with hair; your washing machine works the same way.
Verify Proper Rinse Cycle Functionality
If suds persist, ensure your rinse cycle is functioning correctly. I manually ran an extra rinse, noticing less suds afterward. Sometimes, the rinse cycle isn’t completing because of a faulty sensor or drain problem. Inspect those components or consider scheduling a professional check—quick fixes can save future headaches.
Inspect and Replace Faulty Parts
In my experience, defective water inlet valves or sensor issues can cause improper rinsing. Checking these parts might sound daunting, but with a multimeter and a basic guide, you can identify faulty components. Replacing them often restores proper rinsing, eliminating those stubborn suds.
Prevent Future Bubbles by Adjusting Detergent Usage
The most effective long-term solution is correct detergent use and load size. Remember, more soap doesn’t mean cleaner; it often leads to more suds. When in doubt, use less detergent—your washer, skin, and wallet will thank you. Proper usage is particularly critical if you use high-efficiency units, as they require low-sudsing cleaners.
Following these concrete steps—using the correct detergent, running cleaning cycles, inspecting key components, and adjusting your load habits—can dramatically reduce or eliminate soap suds. For more detailed assistance or urgent repairs, consider checking same-day appliance repair solutions that include warranty-backed services. Taking proactive measures ensures your laundry stays fresh and bubbly-free, saving you time and frustration in the long run.
 When it comes to same-day appliance repair, many homeowners operate under assumptions that can hinder their chances of a smooth resolution. One widespread misconception is that requesting a same-day service automatically guarantees priority or higher quality. However, in practice, the rapid turnaround often depends on the technician’s availability and the complexity of your issue, not just the promise of quick service. According to industry insiders, misaligned expectations about service speed can lead to frustration and, ultimately, dissatisfaction—so always clarify what “same-day” truly entails before booking.
Another myth is that warranty coverage covers all repair costs and parts without question. Reality is, warranties often come with fine print that excludes specific damages or parts, especially if the repair resulted from misuse or neglect. To truly maximize your warranty benefits during emergency repairs, it’s crucial to understand what is covered and how to document issues properly. For expert guidance on this, visit the comprehensive warranty guide.
A significant oversight many make during installation or repairs involves overlooking subtle but critical nuances—like ensuring the appliance is correctly grounded or that the electrical outlets meet manufacturer specifications. These details might seem minor but can directly impact the longevity and safety of your appliances. For example, improper grounding can cause unexpected electrical surges, leading to costly damages. My experience shows that working with technicians who follow detailed checklists, such as outlined in professional installation protocols, greatly reduces risks.
The complexities of warranty claims often trap homeowners into a web of confusing procedures. Many assume that simply reporting an issue guarantees swift resolution, but delays can occur if proper documentation isn’t submitted or if the claim falls outside warranty parameters. An advanced tip is to keep detailed records—photos, receipts, and detailed descriptions—that support your claim. For more expert advice on navigating these waters, see how to ensure reliable appliance service in 2025.
Let’s consider the advanced question: How does the choice of parts influence the longevity of repairs under warranty? Studies suggest that using OEM (original equipment manufacturer) parts significantly extends the life of the repair compared to aftermarket components, which might be cheaper but often lack the same durability. Suppliers like appliance warranty providers recommend insisting on OEM parts to prevent recurring issues—saving time and money in the long run.
Understanding these nuances and debunking common myths isn’t just cerebral—it directly benefits your pocket and peace of mind. Have you ever fallen into this trap? Let me know in the comments, and remember, arm yourself with the right knowledge to make your appliance experience smoother.
Maintaining Your Appliances for the Long Haul
Keeping your appliances running smoothly requires more than just occasional calls to repair services; it’s about investing in the right tools and adopting effective maintenance habits. From specialized diagnostic devices to routine cleaning processes, having a well-curated toolkit empowers you to address issues early and extend the lifespan of your appliances.
The Power of a Digital Multimeter
I personally rely on a high-quality digital multimeter for diagnosing electrical issues in appliances. A multimeter allows me to verify voltage, continuity, and resistance, helping pinpoint faulty components like thermostats or sensors without unnecessary part swaps. Brands like Fluke are renowned for durability and accuracy, making them an indispensable part of my repair arsenal. Regular use of this tool can reveal lurking electrical problems that, if left unchecked, could lead to costly breakdowns.
Leveraging Smartphone Apps for Routine Checks
Modern appliances often come equipped with Wi-Fi connectivity, enabling remote diagnostics and maintenance reminders through dedicated apps. I recommend using manufacturer apps or third-party monitoring tools that track appliance performance, alerting you to anomalies before they escalate. These digital aids can log error codes, schedule maintenance, and provide troubleshooting guides, turning your phone into a command center for appliance health management.
Scheduling Preventive Maintenance
Integrate routine tasks like cleaning filters, inspecting hoses, or checking for leaks into your calendar. For example, cleaning the dryer vent annually using a specialized brush can prevent fires and improve efficiency, as outlined in venting maintenance tips. Consistency in maintenance routines not only reduces emergency repairs but also preserves your warranty coverage, ensuring long-term protection.
Preparing for Long-Term Success
Advanced tools like leak detectors or thermal cameras can help identify hidden issues such as moisture buildup or overheating components. Investing in these technologies might seem optional now, but future trends suggest they’re becoming standard for proactive appliance care. As appliance technology evolves, integrating smart diagnostics will become even more critical for homeowners aiming to maximize their investment.
How Do I Maintain My Appliance Care Over Time?
The key to sustained appliance performance lies in consistent upkeep and knowledge. Regularly updating yourself with the latest maintenance techniques—like checking firmware updates or learning to interpret error codes—can make a significant difference. Consider subscribing to expert blogs or tutorials, such as the comprehensive repair guides, which keep you informed about evolving best practices. Remember, a small investment in proper tools today saves you from costly repairs tomorrow.
If you’re ready to take your appliance maintenance a step further, try utilizing a digital multimeter to troubleshoot your washer or dishwasher. Accurate diagnosis can save time and money, and with the right approach, you might even prevent the next breakdown. For professional assistance when needed, don’t forget to check out same-day repair services that include warranty-backed support for peace of mind.
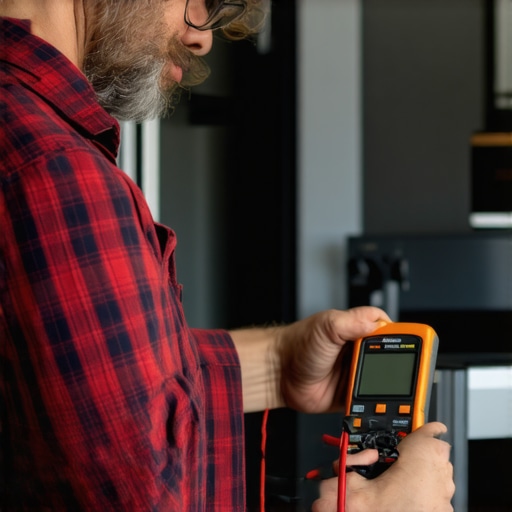
Image description: A homeowner using a digital multimeter on an appliance panel to diagnose electrical issues, illustrating proactive maintenance practice.
Lessons That Changed My Approach to Same-Day Service and Warranties
- Patience Pays Off: Rushing through repairs often leads to mistakes, so I learned to pause, diagnose thoroughly, and communicate clearly with technicians. This approach saved me time and money in the long run.
- Warranties Are Worth a Second Read: I realized that understanding warranty coverage upfront prevents surprises during emergencies. Being informed allowed me to leverage warranty benefits effectively and avoid unnecessary out-of-pocket expenses.
- The Power of Prep: Regular maintenance and keeping records make emergencies manageable. Documenting repairs and routine check-ups help build confidence and streamline claim processes if issues arise.
- Technology Is Your Ally: Using apps and diagnostic tools enhances awareness of appliance health. These tools give early warnings, enabling proactive maintenance that extends lifespan and improves performance.
- Choosing Trusted Professionals Matters: Every repair or installation is an investment. I found that working with reputable, warranty-backed service providers ensures quality, accountability, and peace of mind.
Tools and Resources That Keep Me Ahead
- Digital Multimeter: A versatile device for diagnosing electrical issues, helping me identify faulty sensors or wiring without guesswork. I trust Fluke for durability and accuracy.
- Manufacturer Apps: They offer remote diagnostics and maintenance reminders. Staying connected helps me catch problems early and schedule repairs smoothly.
- Online Repair Guides: Invaluable resources like the expert repair and installation guides empower me to troubleshoot common issues confidently.
- Vented Toolkits: Keeping a set of tools designed for appliance maintenance allows me to perform simple adjustments, preventing bigger issues and reducing reliance on emergency services.
Your Next Step Toward Smarter Appliance Care
Taking charge of your appliance maintenance isn’t just about fixing problems—it’s about building confidence and ensuring longevity. Whether you’re tackling simple tasks with a multimeter or booking same-day service for complex issues, every proactive move adds up. Remember, a little knowledge today can save you from stressful breakdowns tomorrow. What small maintenance habit will you start implementing this week to keep your appliances running smoothly? Share your plans below and let’s support each other’s journey to appliance mastery.