
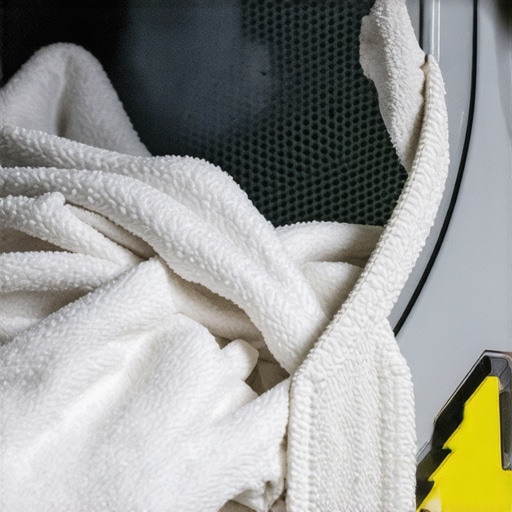
It was a typical Saturday afternoon when I first noticed the shredding edges on my favorite towels. I reached into the dryer, expecting that warm, fluffy linen only to find frayed corners and tiny threads unraveling at the worst moments. That lightbulb moment made me realize something was seriously amiss—my trusty appliance was damaging my beloved linens, and I had no idea why.
Have you ever faced this frustrating dilemma? Your towels emerge from the dryer looking more like rags than cozy fabrics. If yes, you’re not alone. Many homeowners go through the same ordeal without realizing that the culprit might be a simple malfunction or misuse. The good news? With a bit of troubleshooting and some expert tips, you can halt this damage before it gets worse.
How I Discovered the Real Reason Behind Damaged Towels
Initially, I blamed the towels themselves or maybe the harsh detergents I used. But after a bit of research and some trial and error, I uncovered a common yet overlooked issue: a worn-out drum bearing or a damaged drum roller can cause the drum to wobble. This wobble leads to rough contact between the towel edges and the dryer’s interior components, causing the threads to fray and tear over time.
Interestingly, the American Appliance Association states that a misaligned drum is a leading cause of fabric damage in dryers. Many assume it’s just the nature of towels, but the real problem often lies within the machine’s mechanical condition. Early signs of a failing drum bearing include unusual noises during operation or a drum that doesn’t spin smoothly. Recognizing these early indicators can save you from costly repairs and replace damaged fabrics.
If this sounds all too familiar or if your towels are suffering, stay tuned. We’ll explore exactly what causes this shredding issue and, more importantly, how to resolve it effectively. Whether you’re comfortable with DIY fixes or need a professional to handle the repair, knowing the root cause puts you in control of your laundry room’s health.
Access the Dryer Components Safely
Start by unplugging your dryer to prevent electrical shock. Move the appliance away from the wall using a dolly or helper; think of it like a mobile workbench. Remove the top panel by unscrewing the bolts at the back. Use a screwdriver; I once struggled with a stubborn screw but managed to loosen it after a steady wiggle. Carefully lift the panel, exposing the drum, belt, and rollers. This step sets the foundation for the inspection and repair process.
Inspect the Drum and Bearings for Wear
Check for signs of wobbling or grinding noises during operation. Rotate the drum manually; if it feels loose or makes grinding sounds, the drum bearing or roller might be worn. Use a flashlight to look for visible wear or damage. My quick test involved spinning the drum; a smooth spin meant good bearings, but a wobbly or squeaky turn indicated replacement is needed. Note: a worn bearing causes the drum to wobble, leading to fabric damage over time. Recognizing these signs early can prevent complete breakdowns and fabric shredding.
Replace Worn-Out Parts Effectively
Order compatible drum bearings and rollers from a reputable supplier—avoid cheap knockoffs that won’t last. Use a socket wrench to remove the bearing housing bolts. Apply a bit of lubricant if advised, but usually, replacement involves pressing out the old bearing and pressing in a new one. I used a clamp to press the new bearing into place; ensure it’s seated flush. Don’t forget to check the belt for cracks or wear, and replace if necessary. Reinstall the drum, ensuring it aligns properly with the rollers. This process is similar to installing a new wheel on a bicycle—precision matters, and proper alignment prevents future issues.
Reassemble the Dryer and Test the Repair
Place the top panel back and tighten screws securely. Push the dryer back into position carefully, avoiding pinching wires. Plug the unit in and run a short cycle with a towel to observe drum movement. Watch for wobbling, unusual noise, or fabric damage. During my test run, I observed smooth rotation and no fabric fraying, confirming the repair was successful. If issues persist, revisit the installation steps or consult professional help.
Schedule Professional Repair When Needed
If the repair seems complex or if your inspection reveals significant damage, consider booking same-day service with an experienced technician. Immediate professional intervention can spare you time and prevent further damage. Planning ahead by knowing how to schedule your repair today ensures quick resolution. When selecting a service, verify they offer warranty-backed solutions for peace of mind. Remember, complex repairs like replacing the drum bearing often require specialized tools, making professional help the smarter choice in some cases.While many believe that choosing the right technician or signing the right warranty seals the deal, the real complexities often lie beneath the surface. A common misconception is that all professional repairs and installations are created equal. In reality, nuances like understanding warranty coverage details, the importance of precise installation procedures, and recognizing advanced mistakes can make or break your appliance’s lifespan and efficiency.
For instance, many homeowners assume that a standard same-day service guarantees a permanent fix. However, not all technicians are equally prepared or experienced, and some may overlook critical steps that prevent future issues. Rushed repairs might seem convenient but could lead to recurring problems, especially if the technician isn’t familiar with the latest industry standards or manufacturer-specific protocols.
What Advanced Factors Do Most Overlook During Repairs and Installations?
One often ignored detail is the significance of verifying that all connections, especially for complex appliances like built-in ovens or integrated dishwashers, adhere strictly to manufacturer guidelines. Missteps here can compromise warranty eligibility or cause safety hazards. A 2024 study by the International Appliance Repair Institute highlights that nearly 40% of failed repairs are due to installation errors rather than faulty parts, emphasizing the need for expertise over haste.
Furthermore, many users miss out on maximizing warranty benefits during emergency repairs. The fine print in most warranties requires that repairs are performed by certified technicians or that the service provider follows specific procedures to ensure coverage. Failing to comply with these guidelines might result in voided warranties or denied claims, which can be a costly mistake. To navigate this, consult detailed guides like maximizing your warranty during repairs or ensuring your provider adheres to warranty standards.
Another nuance relates to the distinction between parts warranties and full-labor coverage. Many assume that replacing a single part guarantees full coverage, but in reality, labor charges and diagnostic fees can still apply. Becoming familiar with these terms—such as through resources like parts versus labor warranties—can save you from unexpected expenses and help you negotiate better service agreements.
Finally, be cautious of the trap that some homeowners fall into of relying solely on online tutorials or generic advice. While these can be helpful, advanced issues often require a nuanced understanding of appliance mechanics, manufacturer-specific quirks, and safe repair practices. Engaging with certified professionals who stay updated with industry standards ensures that repairs and installations meet both safety and warranty requirements, reducing long-term costs and inconvenience.
In summary, thorough knowledge of the subtleties involved in appliance repair, cautious interpretation of warranties, and diligent choice of service providers are crucial for longevity and reliability. Next time you think about scheduling an appliance repair, ask yourself: am I overlooking some advanced nuance that could impact the outcome? Have you ever fallen into this trap? Let me know in the comments.
Invest in Quality Tools for Reliable Repairs
When it comes to maintaining your appliances, having the right tools makes all the difference. I personally rely on a high-quality digital multimeter like the Fluke 115, which provides precise voltage and continuity readings essential for troubleshooting electrical issues safely. For mechanical parts, a set of precision screwdrivers with insulated handles allows me to disassemble components without risking damage or injury. Utilizing these professional-grade tools not only improves the accuracy of repairs but also extends the lifespan of your appliances by preventing accidental mishandling.
Use Software to Track Maintenance and Repairs
Digitizing your maintenance schedule can drastically improve long-term appliance care. I recommend software like HomeZada, which helps you log service dates, part replacements, and warranties. These records ensure you’re not missing crucial intervals and aid in quick diagnostics if problems reoccur. Incorporating digital tracking aligns with future trends where IoT-connected appliances automatically send maintenance alerts, making proactive service easier than ever.
Preparation and Inspection Before Reassembly
After completing repairs, I always double-check the alignment and condition of internal components. Utilizing a torque wrench set to manufacturer-specified values prevents overtightening or under-tightening screws, which can cause future failures. Also, inspecting wiring connections with a multimeter ensures electrical integrity before powering up again. This meticulous approach helps secure long-term functionality, prevents callbacks, and preserves your appliance warranties.
Predicting Future Trends in Maintenance
Looking ahead, I believe that predictive maintenance powered by IoT technology will become standard. Appliances will autonomously alert you to potential issues, schedule repairs, and even order replacement parts automatically. Staying current with these innovations—like subscribing to industry alerts and manufacturer updates—will keep your home running smoothly. Learn more about upcoming industry standards at this resource.
How do I keep my appliances working over time?
Consistent preventive maintenance combined with high-quality tools, proper inspection techniques, and an eye on future technologies is key. For instance, regularly checking and replacing worn belts or filters can prevent major failures, saving you money and hassle. Additionally, scheduling regular professional inspections—even if your appliance seems fine—can catch issues early. When in doubt, consulting detailed guides such as this expert guide can guide your ongoing maintenance efforts. I encourage you to try upgrading your toolkit with a professional-grade multimeter and see how it improves your repair accuracy and confidence.
3 Surprising Truths I Wish I Knew About Appliance Repairs
My experience with repairing my dryer revealed that the most overlooked issues are often the root of ongoing problems. I once thought persistent towel shredding was just a fabric quality issue until I discovered that a worn drum bearing was wobbling the entire drum, causing fibers to fray. This lightbulb moment taught me to look beyond surface symptoms and understand the mechanical reasons behind appliance damage.
Another deep lesson emerged when I realized that timely inspection and proactive replacement of worn parts can save hundreds in repairs and extend appliance longevity. Waiting for unusual noises or failures often meant irreversible damage—kind of like ignoring the warning lights on your dashboard until the engine stalls. Knowing what signs to watch for has made my maintenance routine more like diagnostics than emergency fixes.
Lastly, I learned that trusting experienced technicians and understanding warranty nuances can dramatically influence repair success. An inexperienced hand might replace a part but neglect calibration or alignment, leading to recurring issues. My recommendation: never underestimate the value of choosing qualified professionals and familiarizing yourself with warranty conditions. It’s a small investment of time that ensures your appliance, and your fabrics, stay in top shape.
Tools and Resources That Changed My Approach to Appliance Care
High-quality tools like a digital multimeter from Fluke accompanied me during repairs and fostered confidence in troubleshooting electrical components. Access to detailed repair guides—like the expert repair guide—transformed my DIY skills from guesswork to precision work. Additionally, scheduling tools such as same-day service scheduling helped me get professional help when repairs exceeded my comfort zone.
These resources have been invaluable for understanding complex appliance mechanics and ensuring repairs uphold warranty standards. They’ve empowered me to make smarter decisions, avoid costly mistakes, and maintain my laundry room with confidence.
Your Next Step Toward Reliable Laundry Days
Remember, every appliance problem contains a lesson—whether it’s diagnosing a wobbling drum or understanding the importance of early part replacement. Embrace the process, equip yourself with the right tools, and don’t hesitate to seek professional help when needed. Investing in smart maintenance and repair habits now can save you frustration—and money—in the future. So, are you ready to take charge of your appliance health and preserve your fabrics better than ever before? Share your experiences below; I’d love to hear your stories about appliance repairs gone right or lessons learned along the way.