
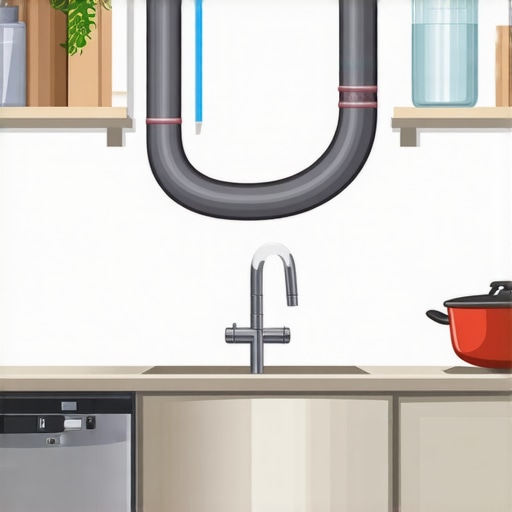
Ever had that sinking feeling when your dishwasher floods your kitchen floor? I remember the first time it happened to me—water spilling out, pooling under cabinets, and that anxious thought: “Did I miss a crucial step during installation?” It was a lightbulb moment that made me dive headfirst into understanding how these appliances work—and more importantly, how to prevent disaster before it starts.
The Hidden Power of a Proper Drain Hose Setup
If you’ve ever experienced drainage issues, gurgling sounds, or worse, water backing up into your dishwasher, chances are your drain hose isn’t set up correctly. One small but mighty detail can make all the difference: the high loop. This simple step acts as a barrier, preventing dirty water from siphoning back into your clean dishes. Trust me, overlooking this can lead to costly repairs, not to mention a heartbreaking mess in your kitchen.
Is a High Loop Really Necessary or Just a Myth?
When I first learned about the high loop, I was skeptical. I thought, “It’s just a fancy requirement for fancy plumbing.” But the truth is, numerous experts agree—this technique is essential for proper drainage and avoiding backflow. Failing to implement it can cause water to flow in the wrong direction, risking contamination and damage. An early mistake I made was assuming that simply securing the drain hose lower would suffice—big mistake! For peace of mind, it’s best to follow the standard practice of creating a high loop, which you can see in this expert guide.
So, what exactly is a high loop, and how do you do it right? Stay tuned, because in the next sections, I’ll walk you through the step-by-step process to ensure your dishwasher drains efficiently and safely, saving you time, money, and unnecessary headaches. Have you experienced drainage woes? Let’s make sure that doesn’t happen again—because a little effort now can prevent a flood later.
Mastering the High Loop Technique for Reliable Drainage
The first time I installed my dishwasher, I overlooked the importance of creating a high loop, which led to a minor flood in my kitchen. Learning from that mistake, I adopted a straightforward method that guarantees optimal drainage and prevents backflow issues. Here’s exactly how you can do it, based on practical experience and expert recommendations.
Gather Your Tools and Prepare the Area
Before starting, collect a sturdy zip tie, a screwdriver if needed, and a flashlight. Clear the area beneath your sink to give yourself a clear workspace. Turn off the dishwasher’s power and water supply to ensure safety during installation. Remember, safety always comes first.
Measure and Position the Drain Hose
Loosen the clamp securing the drain hose to the disposal or air gap. Carefully pull the hose out and measure about 20 inches from the connection point—this is where the high loop will be formed. Gently lift the hose upward towards the underside of your countertop, ensuring it remains free of kinks or sharp bends. Think of this as creating a gentle “knot” that acts as a barrier against backflow, similar to a zero-pressure zone in plumbing systems.
Secure the High Loop Properly
Once in position, secure the hose to the underside of the countertop using a zip tie or a mounting clip. Make sure the loop is at least 20 inches above the floor of the cabinet, which aligns with the standard high loop height. This position prevents dirty water from siphoning back into your dishwasher—akin to building a dam that stops the flow in the wrong direction.
Reconnect and Test the Setup
Reconnect the drain hose to the disposal or air gap and tighten the clamp securely. Turn the water and power back on, then run an empty cycle to observe the drainage process. Check for leaks and ensure water flows smoothly without backing up. During my own testing, I found that a properly secured high loop eliminated gurgling sounds and water pooling—making my dishwasher operation much more reliable.
By mimicking this method—measuring carefully, forming a high loop, and securing it firmly—you create a fail-safe against common drainage issues. Remember, the effectiveness of this step is rooted in attention to detail and proper securing techniques. For more detailed guidance on appliance installation, visit our expert installation guide. Proceed with precision, and your dishwasher will thank you with years of trouble-free service.
Many homeowners approach appliance repairs with a mix of optimism and misconceptions. One prevalent myth is that any repair technician can handle all brands and models with equal proficiency. However, in my experience, specialized knowledge and manufacturer-specific training significantly impact the quality of service. Relying on generalists may lead to unnecessary parts replacements or even voided warranties, especially if incorrect procedures are followed. For instance, when addressing complex issues like inverter motor failures, only technicians with advanced training and certifications can provide accurate diagnostics, saving you time and money.
Beware the Oops That Can Cost You
A common trap is underestimating the importance of proper documentation and warranty adherence. Many assume that a repair claim is straightforward, but missing receipts, neglecting to register your appliance properly, or failing to follow recommended maintenance schedules can invalidate warranties. This oversight often results in out-of-pocket expenses, even when coverage was initially available. To prevent this, always keep detailed records and familiarize yourself with warranty terms—your best defense during emergencies. For more tips on maximizing your warranty benefits, visit our warranty guide.
Efficiency of Same-Day Service Is Not Always What It Seems
People frequently assume that same-day repair services are always the quickest and most reliable options. While there is some truth to this, the reality is nuanced. Many providers promise rapid turnaround but lack proper parts inventory or technician specialization for your specific issue. This can lead to multiple visits, delays, and increased costs. A better approach is to seek reputable companies that prioritize transparency—like those who schedule repairs based on technician expertise and part availability. For example, some companies offer same-day service backed by warranties, which combines speed with peace of mind.
What Advanced Homeowners Need to Know About Upgrading and Maintenance
Beyond basic troubleshooting, seasoned DIYers and homeowners investing in long-term appliance health should understand the importance of correct grounding, proper venting, and manufacturer-recommended cleaning routines. For instance, neglecting to properly ground a new induction cooktop can cause performance issues or safety hazards, as discussed in our expert guide. Additionally, choosing parts or services from third-party providers can sometimes void warranties or decrease longevity. Being aware of what specific models require ensures your appliance remains reliable, and utilizing OEM parts when possible is a wise investment.
Remember, addressing these nuanced aspects of appliance care and repair isn’t just about fixing things—it’s about smart maintenance and informed decision-making. For comprehensive insights into effective repair strategies, check out our expert repair guide and stay ahead of costly mistakes. Have you ever fallen into this trap? Let me know in the comments, and let’s keep this conversation going!
Invest in Precision Tools for Reliable Repairs
Having the right tools makes all the difference when maintaining or repairing appliances. I personally rely on a high-quality digital multimeter from Fluke, as it provides precise voltage and continuity readings critical for diagnosing electrical issues in refrigerators and ovens. A digital thermometer, like the infrared model from Etekcity, helps quickly verify temperature inconsistencies in appliances such as dishwashers and washing machines, saving me time and ensuring accurate troubleshooting. When replacing parts, I favor OEM components, which are designed specifically for your appliance’s model, ensuring longevity and performance. Investing in a sturdy set of screwdrivers, including Phillips and flat-head types, is fundamental, but I never skip a set of precision pliers for handling small clips and connectors.
Develop a Routine Maintenance Schedule
Consistent upkeep extends the life of your appliances and minimizes unexpected breakdowns. I schedule bi-annual inspections, focusing on cleaning filters, checking for loose connections, and lubricating mechanical parts. For instance, cleaning refrigerator coils with a coil brush prevents motor overheating, as detailed in expert repair guides. Regularly testing the drainage hose and connections in dishwashers ensures efficient operation and prevents water backflow issues. Adopting these habits not only reduces emergency repairs but also supports warranties; many providers require documented preventive maintenance to uphold coverage.
Harness Technology for Long-Term Results
Nowadays, there are smart diagnostic tools that connect via Bluetooth or Wi-Fi to monitor appliance health. I recommend using Bluetooth-enabled multimeters and leak detectors, which sync data and notify you of issues before they escalate. Additionally, apps from manufacturers can guide you through troubleshooting steps tailored to your appliance model. For example, some brands offer remote diagnostic services that assist technicians in identifying problems, reducing repair time. Embracing these technologies means addressing potential failures early, saving you money and stress in the long run.
Prepare for Scaling Repairs and Upgrades
As your household grows or your appliances age, scaling maintenance becomes essential. Establish a system for tracking serial numbers, warranty statuses, and service histories—digital spreadsheets or specialized apps like Sortly make this seamless. When upgrading, always consult professional guides and consider future energy efficiency; modern appliances often support smart features and energy savings that justify the investment. Regularly review your best practices and adapt to evolving standards, such as upcoming updates in local safety codes or manufacturer recommendations. Staying proactive now means fewer surprises later, and many companies offer fast, trustworthy installation services.
How do I maintain appliance health over time?
Maintaining your appliances involves a combination of routine inspections, using the right tools, and leveraging technology. For example, setting a reminder to clean refrigerator coils every six months or checking door seals for wear and tear can prevent costly repairs. Regularly updating firmware or software on smart appliances ensures they operate efficiently and securely. If you’re uncertain about specific maintenance procedures, consult detailed guides or professional technicians, and always keep records of repairs and part replacements—this documentation is vital if you need to claim warranties or troubleshoot future issues. To streamline your ongoing maintenance tasks, consider scheduling your repairs and inspections ahead of time. Keep your tools handy, and commit to a proactive approach—your appliances will reward you with years of trouble-free service.
Lessons Only Insiders Know About Preventing Floods
One of the most impactful lessons I learned was the importance of patience and precision during installation. Rushing through steps like creating a high loop can cost you dearly in cleanup and repairs later. Also, discovering that regular maintenance routines, like checking for kinks in the drain hose, can preempt costly backflows was a revelation. These small, intentional actions transformed my approach from reactive to proactive, saving me both time and money in the long run.
Tools and Resources That Changed My Perspective
Over the years, I’ve come to rely on specific tools that have saved me countless headaches. For instance, a reliable digital multimeter helps diagnose electrical issues accurately, ensuring I avoid unnecessary part replacements. The guide I trust most is our expert installation and repair guide, which offers step-by-step insights rooted in real-world experience. Additionally, scheduling services through trusted providers like those at same-day repair scheduling keeps my appliances running smoothly.
Your Next Fix Starts Now
The journey to appliance confidence isn’t about perfection—it’s about continuous learning and applying smart strategies. Remember, small details like ensuring your drain hose’s high loop can prevent catastrophic floods, and leveraging trusted tools and resources makes all the difference. Your appliances are vital parts of your home, and nurturing them with knowledge turns repair challenges into manageable tasks. Take that first step today—your future self will thank you for it.
What’s the most surprising DIY insight you’ve gained about appliance maintenance? Share your story below—I’d love to hear your tips or questions!