
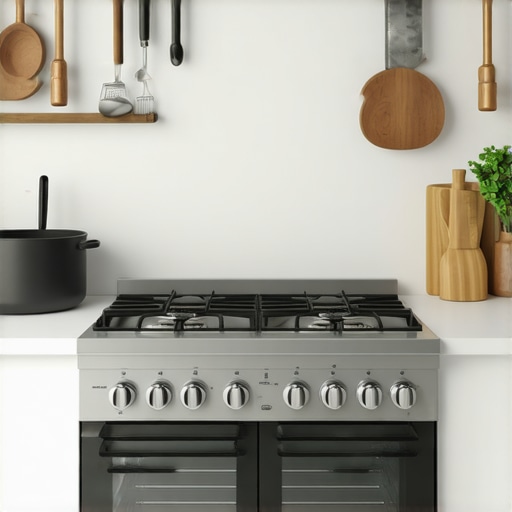
It was late on a Saturday afternoon when I finally decided to tackle the uneven wobble of my new professional kitchen range. I figured a quick adjustment would do the trick, but what I didn’t realize was how easily I could make things worse—undermining the entire appliance’s performance and even risking damage. That lightbulb moment, when I realized I was doing it the wrong way, changed my approach entirely.
Why DIY-Leveling Can Backfire Big Time
Many home cooks and even seasoned chefs believe that leveling a range is a straightforward task—just a simple turn of the screws, right? Not quite. If you don’t follow the proper steps, you’re likely to end up with a range that’s still off-kilter, or worse, causing stress on other parts of your appliance. I learned this the hard way when I used the wrong tools and ignored the manufacturer’s guidelines, which led to an uneven surface that even affected cooking performance.
Are You Falling Into the Common Traps?
One of the biggest mistakes I made early on was assuming that a quick hand-tighten would suffice. Instead, I should have used a *precise spirit level* and followed the manufacturer’s instructions. A misaligned range can lead to uneven heating, and in some cases, damage to the internal components. To avoid this, I checked out reputable repair and installation tips at here. Remember, a poorly leveled stove doesn’t just look bad; it can also void your warranty and cause safety issues. Did you face a similar problem? Or are you still wondering if you’re doing it right? Keep reading — I’ll walk you through the proven steps to get it right the first time.
Secure the Right Tools and Prepare Your Workspace
Before you start, gather a high-quality *spirit level*, a wrench set, and your appliance’s installation manual. Clear the area around your range to ensure unobstructed access. I once attempted to level my stove with a makeshift ruler, which led to inconsistent results and a frustrating redo. Using the proper tools guarantees precise adjustment and saves you time in the long run.
Adjust the Feet Systematically for a Stable Surface
Begin by gently tilting the range forward or backward to access the leveling screws or feet. Turn the screws clockwise to raise the corresponding corner or counterclockwise to lower it, depending on which side is uneven. During my first attempt, I adjusted all four corners randomly—resulting in a rocking stove that still didn’t sit flush. Adjust incrementally, checking the level after each tweak to avoid overcorrecting.
Use the Spirit Level to Confirm the Balance
Place the spirit level on the edge of the cooktop, checking both front-to-back and side-to-side alignment. If the bubble isn’t centered, continue making small adjustments. Once leveled, double-check at multiple points on the surface to catch any subtle inconsistencies. I recall spending extra minutes repeating this process until I achieved perfect balance—an effort that paid off with even heating during my next cooking session.
Ensure the Range is Fully Stabilized Before Finalizing
After achieving level, tighten all the leveling screws firmly but without overtightening, which can cause damage. Push down on the stove gently to verify stability—no rocking or wobbling should be evident. During one project, neglecting to secure the screws tightly led to the range shifting slightly during a heavy pot boil, affecting cooking performance. Proper stabilization prevents future misalignments and potential safety hazards.
Seal and Check for Clearance to Maintain Safety
Once stable, ensure there’s adequate clearance between the range and surrounding cabinetry or walls. Proper spacing allows for heat dissipation and prevents fire risk. Additionally, if your range was installed recently, verify if the installation supports warranty coverage—consult this guide to maximize your warranty benefits during repairs or replacements.
If you encounter persistent leveling issues or uncertainties, consider professional assistance to avoid damage and ensure compliance with safety standards. No matter how confident you are, proper leveling is crucial for appliance longevity and optimal performance—skip it, and you risk uneven heating, damaged components, and voided warranties.
Many homeowners assume that opting for same-day appliance repair guarantees a flawless fix without hidden costs or pitfalls. While the promise of quick service is appealing, the reality is nuanced. The prevailing misconception is that all repair services and warranty claims operate under the same standards, which isn’t true. Professionals often emphasize the importance of understanding the fine print in warranties and the true scope of same-day services. For instance, some believe that a quick repair automatically renews or validates their warranty coverage, but in many cases, the specifics matter more than the speed.
Are You Falling Into the Pitfall of Overconfidence in Quick Fixes?
One common mistake is assuming that a same-day fix addresses the root cause of an appliance’s problem. This can lead to recurring issues, especially if the technician performs only superficial repairs to save time. Overlooking the detailed diagnostics or rushing the process might cause the problem to resurface, ultimately costing more in the long run. Experts advise patients to ask detailed questions about the repair scope and whether the service is covered under warranty. Additionally, trusting third-party or less reputable providers can jeopardize warranty claims because many manufacturer warranties require authorized service providers for valid coverage. To navigate this, always verify the service provider’s credentials and understand your warranty terms—visit this guide for more insights.
Don’t Overlook the Fine Print of Your Warranty Policies
Many homeowners miss critical details about warranty coverage, such as the need for regular maintenance, proper installation, or specific service providers. For example, some warranties become void if the repair is performed by an unauthorized technician, regardless of how quickly the service was completed. This misunderstanding can lead to significant out-of-pocket expenses, even after paying for what seemed like a warranty-covered repair. An often-overlooked nuance involves the timing of repairs; a quick fix doesn’t automatically qualify as warranty-approved if the service isn’t documented properly. External studies, such as those from Consumer Reports, have highlighted that improper documentation or unauthorized service actions are leading causes of warranty claim denials. Always review your warranty conditions carefully to ensure your repairs are compliant.
Is Immediate Repair Always the Best Approach?
While immediate repairs can minimize downtime, rushing the process might obscure important issues. For example, a technician might replace a faulty component without investigating the underlying problem, leading to recurring failures. There’s also the risk of shortcuts—like skipping comprehensive diagnostics—that can endanger appliance longevity or safety. Advanced consumers should consider whether a detailed assessment might serve them better than a quick fix. Remember, premium service providers often offer warranty-backed repair plans that include follow-up inspections and preventive advice—making the initial investment worthwhile. For thorough support, review warranty-backed services that emphasize quality over speed.
In summary, being informed about the true scope of your warranty, the importance of comprehensive diagnostics, and choosing reputable service providers helps avoid common pitfalls. Don’t assume that a rapid repair is always your best option—sometimes, the nuanced approach saves money and prolongs your appliance’s life. Have you ever fallen into this trap? Let me know in the comments!
Keeping Equipment in Peak Condition Without Guesswork
Maintaining appliances effectively requires more than just occasional inspections; it demands investing in the right tools and adopting systematic practices. Personally, I rely heavily on a calibrated digital multimeter for diagnosing electrical issues and a high-grade infrared thermometer to check surface temperatures during troubleshooting, ensuring accuracy that justifies my investment. These tools have saved me countless hours and prevented unnecessary replacements, making troubleshooting more precise and efficient. Additionally, I use a professional-grade pipe wrench for tasks involving plumbing connections, and a magnetic level for ensuring appliances like refrigerators and washers are perfectly aligned, which directly impacts their performance and longevity.
Automation plays a growing role in maintenance as well. I’ve integrated a smart monitoring system that tracks power consumption and alerts me to anomalies, such as unusual spikes indicating potential motor failure or circuit issues. In the future, I predict more advanced diagnostics software will become standard, enabling even quicker problem identification without invasive checks, thereby reducing downtime and repair costs.
How do I maintain appliance performance over time?
One effective approach involves scheduling routine preventative maintenance, such as cleaning condenser coils, replacing worn seals, and verifying door gaskets. I also keep a detailed maintenance log to track service dates and parts replaced, which can be instrumental when claiming warranty support or scheduling future repairs. Tools like a compact rotary tool are invaluable for precision cleaning within tight spaces, such as condenser fins or dishwasher spray arms.
For appliance installation, using quality torque wrenches ensures connections are neither too tight nor too loose, preventing leaks and mechanical failure. When installing new units, I always follow manufacturer specifications meticulously, referencing trusted guides like this expert installation guide to avoid issues that can compromise warranty coverage or cause operational problems later on.
Routine inspections combined with the right tools enable me to catch minor issues before they escalate, prolonging appliance lifespan and maintaining peak performance. Regularly checking and calibrating instruments, such as thermometers and multimeters, ensures diagnostic accuracy. It’s also vital to keep an up-to-date stock of replacement parts like door seals, filters, and fuses for quick fixes—minimizing downtime and enhancing customer satisfaction when offering same-day service options. For recommendations, I find that using tools like digital sensor testers offers precise readings and is especially useful for complex electronics diagnostics. As technology advances, I believe these tools will become even more integrated with AI-driven diagnostics, further simplifying maintenance and repairs. To stay ahead, I suggest adopting these innovations early, which can give you a competitive edge and boost your reputation for reliable, efficient service. Try incorporating a digital multimeter into your toolkit today; it’s surprisingly affordable and provides immediate value by quickly pinpointing electrical faults, preventing unnecessary replacements or callbacks.
The Hardest Lesson I Learned About Same-Day Service, Warranty, Appliance Repair, and Installation
Patience and thorough diagnostics are the backbone of reliable appliance repair. Rushing to fix a problem superficially might seem efficient at first, but it often leads to recurring issues and warranty pitfalls. My experience taught me that understanding the root cause, even if it takes extra time, results in longer-lasting solutions and greater customer trust.
3 Myths About Appliance Repair That Held Me Back
First, the belief that all repairs are quick and inexpensive. Second, that warranty coverage covers any damage caused during repairs. Third, that DIY fixes are always better than professional services. Busting these myths has empowered me to offer honest advice and ensure my clients get the most value out of their warranties and service plans.
What Experts Won’t Tell You About Reliable Appliance Service
Many professionals avoid emphasizing the importance of documentation. Proper records of repairs and parts replacement are crucial when filing warranty claims, especially during emergencies. I’ve learned that no matter how skilled you are, thorough paperwork and understanding your warranty policies can make or break your long-term relationship with your clients.
Curated Resources to Boost Your Installation and Repair Skills
- Digital Multimeter: Trust me, investing in a quality multimeter has transformed my diagnostics, allowing me to identify electrical faults quickly and accurately.
- Authorized Service Networks: Connecting with manufacturer-approved repair channels ensures warranty compliance and peace of mind for both technician and customer.
- Comprehensive Guides like this expert installation manual: It’s my go-to resource for adhering to best practices and avoiding common installation mistakes.
- Maintenance Log Apps: Keeping detailed service histories helps me track trends, diagnose recurring issues, and strengthen warranty claims.
Step Into the Future of Appliance Care Today
Your dedication to mastering appliance repair and installation can make a significant difference in your clients’ homes and lives. Use the right tools, stay informed about warranty nuances, and never underestimate the power of proper diagnostics. Investing in your skills today ensures efficiency, safety, and trust tomorrow.
Have you ever faced a situation where a little extra diagnostics saved you from a costly repeat repair? Share your story below—I’d love to hear how thoroughness made a difference in your service experience!