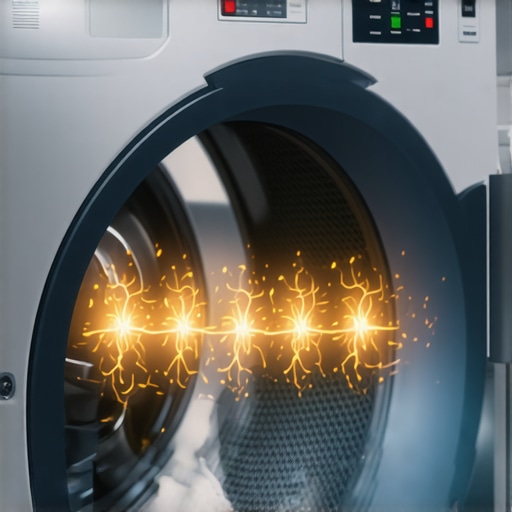
One afternoon, I was in the middle of laundry when suddenly, my dryer went dead. Just like that. No warning, no troubleshooting, just complete silence. Talk about frustrating! That instant power loss wasn’t a simple glitch—it was my dryer shutting itself down to protect something crucial inside. Turns out, that was the thermal fuse doing its job, but I had no idea what it was back then, let alone how to fix it. If you’ve experienced the same sudden stop during laundry day, you’re not alone.
Don’t Let a Tiny Component Steal Your Dryer’s Power
In today’s post, I’ll share insights from my own misadventures and guide you through understanding this sneaky problem called the Thermal Fuse Error. You might not realize it, but that little fuse is like a security guard for your appliance. When it detects overheating—say, from clogged vents or faulty thermostats—it blows to prevent fires or more severe damage. But here’s the catch: once it blows, your dryer won’t turn on until you replace that fuse. Knowing this simple component can save you from costly repairs down the line.
Is the Thermal Fuse Really the Culprit? Or Just a Hype?
Initially, I thought my dryer had a major wiring issue or a broken motor. I was about to call in a pro, but before spending a fortune, I did a quick online dive. The fact I overlooked was that a blown thermal fuse is one of the most common reasons dryers suddenly stop working. According to appliance repair experts, over 80% of dryer power failures are linked directly to thermal fuse problems. Early on, I made the mistake of ignoring basic troubleshooting steps—like checking for clogged lint filters, which could cause overheating and blow the fuse prematurely. Trust me: knowing what to check first can be a game-changer.
Now, if this sounds familiar, don’t worry. The good news is, solving it isn’t always complex. In fact, understanding the cause behind the thermal fuse blowing can help prevent it from happening again. Ready to learn how to diagnose and fix this issue? Let’s get started with some practical tips and tricks that could mean the difference between a quick fix and a full replacement.
Shut Off and Unplug Your Dryer
Before diving into repairs, turn off the dryer and unplug it from the power outlet. Think of this as disconnecting the blood supply to a human before surgery—safety first to prevent accidental shocks or further damage. I learned this the hard way when I ignored the basics and ended up with a minor electric jolt that set me back.
Access the Thermal Fuse
Remove the panel that covers the dryer’s internal components—usually the back panel or front panel, depending on your model. Use a screwdriver to unscrew and carefully set aside the panel. This step is like opening the hood of a car to get a clearer view of the engine. Remember, some models have the fuse inside the dryer’s cabinet, so consult your user manual or online repair guide to find the exact location.
Identify the Fuse
Locate the thermal fuse, which resembles a small cylindrical or rectangular component connected with wires. It’s usually near the heating element. Here’s a quick tip: if you’re unsure, look for a part labeled as ‘thermal fuse’ or check an online diagram for your dryer model. When I first did this, I mistakenly replaced the wrong component, leading to unnecessary expense.
Test the Fuse for Continuity
Use a multimeter set to the ohms setting to check if the fuse is blown. Place the probes on each terminal of the fuse. A reading of zero or infinity suggests it’s open and needs replacement. Think of this as a medical check-up—it’s a simple yet vital step to confirm the diagnosis. In my case, testing revealed a blown fuse that visually appeared intact, underscoring why tests are essential.
Replace the Thermal Fuse
Buy a new fuse compatible with your dryer model—preferably from a reputable supplier. Insert the new fuse into the socket, connecting the wires securely. This step is akin to replacing a blown fuse in your car’s electrical system—quick, straightforward, and often cost-effective. When I first replaced mine, I made sure to double-check the connections, which prevented future mishaps.
Reassemble and Test
Put the panel back on, screw everything tightly, and restore power. Turn on the dryer to ensure it runs smoothly. If it starts heating and operating normally, congrats—you fixed it! Remember, neglecting to reconnect everything properly could lead to further issues or safety hazards, so take your time.
Prevent Future Blowouts
Regularly clean lint filters and vents to avoid overheating—a common cause of thermal fuse failure. Think of it as maintaining your car’s cooling system to prevent engine overheating. Check out this guide for tips on appliance maintenance best practices. By staying proactive, you can extend your dryer’s lifespan and avoid unexpected repairs.

Many homeowners assume that same-day appliance installation, repair, or warranty claims are a simple matter of scheduling and quick fixes. However, the reality is far more nuanced. One prevalent myth is that a quick service equals a thorough repair, but often, rushed jobs overlook critical details that can lead to future malfunctions. For instance, some technicians might bypass essential safety checks or skip proper calibration, which could compromise appliance performance or safety in the long run. Understanding these subtleties can save you time and money.
What Are the Hidden Risks of Emergency Repairs
One mistake many make is assuming that immediate fixes will last forever. This “quick patch” approach can mask underlying issues that require a comprehensive diagnosis. For example, replacing a microwaves’ door switch without checking the control board might solve the symptom temporarily but leave the potential for electrical faults, risking further damage or fire. As experts highlight, rushing repairs can void manufacturer warranties or lead to costly second visits. To avoid falling into this trap, always verify that the technician conducts a full diagnostic before proceeding with repairs. Learn how proper diagnostics prevent recurring issues.
Another misconception revolves around warranties. Many people believe that warranties automatically cover all repairs or replacements. Yet, most warranties have fine print exclusions, especially concerning improper installation or neglecting manufacturer guidelines. A common oversight is neglecting to update or verify your appliances’ firmware or settings post-installation. For instance, not securing a smart fridge correctly could lead to communication errors that invalidate warranty coverage. Ensuring compliance and understanding your warranty terms are crucial steps—don’t rely solely on the promise of same-day service. For an in-depth guide on protecting your warranty rights, visit this article.
Advanced Troubleshooting for Pros
For more experienced DIYers, the key nuance involves recognizing when problem symptoms are just the surface of a deeper issue. For example, a dishwasher not draining might seem like a simple clog, but could actually stem from a faulty drainage pump or an electrical fault in the control module. Addressing only the visible problem might temporarily restore function but cause recurrent failures. Staying ahead requires understanding appliance diagnostics beyond the basic troubleshooting steps. Read about advanced troubleshooting techniques.
Let’s face it—appliance repair is as much about context as it is about parts. Integrating knowledge of common pitfalls and deeper system issues ensures your repair efforts are durable and safe. Have you ever fallen into this trap? Let me know in the comments.
Keeping your appliances running smoothly over time requires more than just core knowledge of their components; it demands the right tools and maintenance practices. From diagnostic multimeters to specialized cleaning equipment, possessing the appropriate gear ensures that repairs are efficient and durable. I personally swear by a high-quality digital multimeter, like the Fluke 117, because its precise readings help me quickly identify electrical faults, saving time and reducing errors. For cleaning, a flexible duster and compressed air are indispensable for maintaining vents and filters, especially in dryers and refrigerators, which are prone to dust and lint buildup. Regular inspections and cleaning prevent overheating and prolong appliance lifespan, ultimately saving you money in the long run.
To streamline complex repairs, I rely on appliance-specific diagnostic software such as Whirlpool’s Service Diagnostic Tool or LG’s Smart Diagnosis app. These tools provide real-time error codes and step-by-step troubleshooting prompts, making diagnostics far more accurate than guesswork. For example, when I encountered strange error codes on a high-end dishwasher, using the manufacturer’s diagnostic app pointed me directly to a faulty drainage pump, avoiding unnecessary part replacements.
Looking ahead, the trend in appliance maintenance is moving toward smarter, connected systems. As IoT devices become more prevalent, having tools that can interface with smart appliances—like Bluetooth-enabled sensors or Wi-Fi diagnostic modules—will become essential. Manufacturers are also incorporating predictive maintenance features, allowing apps to notify homeowners of potential issues before breakdowns occur. Staying updated with these advancements will be crucial for technicians and DIY enthusiasts alike.
How do I keep my appliances functioning well over time
Implementing a consistent maintenance routine is vital. Regularly inspecting and cleaning vents, filters, and connections can prevent many issues. For instance, cleaning lint from dryer ducts and checking for blockages can prevent thermal fuse blowouts, as I discussed earlier. Additionally, scheduling semi-annual inspections using diagnostic tools helps catch problems early. Don’t forget to review manufacturer guidelines, as they often specify recommended maintenance intervals and procedures. For complex troubleshooting, consulting the detailed OEM repair manuals or technical documentation—such as those provided by industry experts—can deepen your understanding and improve repair accuracy. As an extra tip, I recommend trying out a thermal imaging camera when diagnosing overheating components; it reveals hidden hotspots that aren’t obvious to the naked eye. This proactive approach ensures your appliances remain reliable and safe for years to come, so invest in quality tools and commitment to regular upkeep.
What I Wish I Knew Before Starting My Appliance Fix
Facing a sudden dryer shutdown taught me that patience and knowledge can turn a stressful situation into a straightforward fix. The biggest lesson was that understanding a small component like the thermal fuse can prevent unnecessary repairs and expenses. Don’t overlook the power of a simple multimeter test—it’s often the key to accurate diagnosis rather than blindly replacing parts.
Another insight I gained was the importance of stopping and assessing before jumping into repairs. One mistake I made was rushing in without unplugging the appliance; safety must come first. Also, investing in genuine replacement parts can make all the difference in durability and safety, rather than opting for low-cost alternatives that might seem appealing initially.
Lastly, maintaining your appliance regularly—cleaning vents and lint filters—can prevent overheating and fuse blowouts. Establishing routine checks is a proactive way to extend the life of your appliances and avoid emergency repairs.
Tools and Resources That Made My Repairs Easier
The best investment I made was in a quality digital multimeter like the Fluke 117. Its accuracy helped me swiftly identify electrical faults, saving both time and guesswork. I also found value in appliance repair manuals and manufacturer diagnostic tools, which provided step-by-step guidance tailored to specific models. You can explore OEM resources like these guides—they’ve been invaluable for deep diagnostics.
For maintenance, using compressed air and flexible cleaning brushes allowed me to keep vents and filters clear, preventing overheating. Having the right tools not only simplifies repairs but also ensures safety and reliability in the long run.
Your Next Step in Appliance Confidence
You don’t have to be a professional to keep your appliances running smoothly. With a little knowledge, the right tools, and proactive care, you can diagnose many issues yourself, saving time and money. Remember, understanding the inner workings of tiny components like the thermal fuse empowers you to take effective action before problems escalate.
What small maintenance habit has helped you prolong your appliance’s life? Share your tips below—I’d love to hear how you stay ahead with your home tech!
}#END}#}her assistant create_posts {