
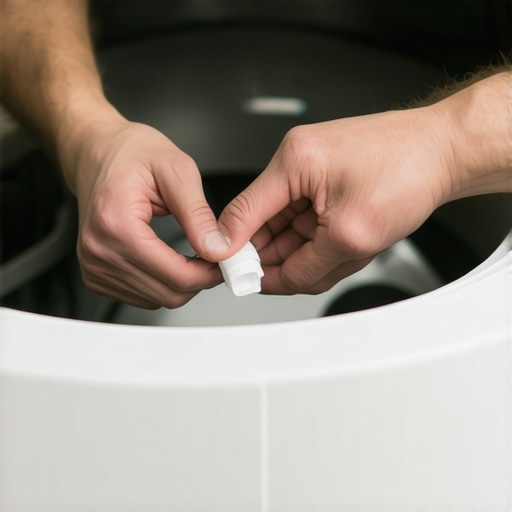
Have you ever stood in front of your noisy dryer, sighing in frustration as the relentless whine fills your laundry room? That moment when your dryer sounds like it’s about to take off, and you wonder if it’s about to become the soundtrack of your mornings or evenings. I remember one particular afternoon, my own dryer erupted into a deafening racket right in the middle of an essential laundry load. It was embarrassing and disruptive, but little did I realize that a simple, overlooked step could restore peace and quiet to my home.
Discovering the Simple Secret to Dryer Peace and Quiet
What if I told you that the key to silent spins isn’t necessarily a costly repair or replacing parts but a tiny, often ignored maintenance trick? Over the years, I’ve learned that a tiny bit of grease applied correctly to the dryer’s drum rollers can make an incredible difference. No more squeaking, no more thumping—just smooth, whisper-quiet operation. Today, I’ll walk you through this surprisingly effective method that could save you time, money, and countless headaches. If you’re tired of the incessant noise or feeling like your appliance is on its last legs, keep reading—this simple trick might be just what you need.
Is It Worth the Effort or Just a Fluke?
To be honest, I was skeptical at first. I’d always assumed that silence was only achieved through expensive repairs or replacing entire components. Early on, I made the mistake of ignoring these small maintenance details, which only worsened the noise over time. But after a quick visit to the local hardware store and a little research—because I’ve learned to trust expert advice like those found in the expert guides—I realized that many of these issues are easily fixed with just a bit of lubrication. So, if you’re wondering whether this little trick can truly make a difference or if it’s just another appliance myth, I promise you, it’s proved to work wonders in my experience—and could do the same for you. Now, let’s dive into how you can apply this secret yourself, step-by-step, to achieve that quiet, peaceful drying experience you’ve been craving.
Gather Your Tools and Supplies
Start by collecting a screwdriver, a lint-free rag, and high-quality appliance-grade lubricant, preferably silicone-based for durability and safety. I remember the first time I attempted this, I used an old bicycle chain lube, which worked temporarily but caused more dust buildup. Don’t make my mistake—stick to recommended lubricants to prevent mess and damage.
Unplug and Access the Dryer Drum
Safety first: unplug the dryer from the power source. Use a Phillips screwdriver to remove the screws securing the front panel or the entire top panel, depending on your model. Carefully lift or tilt the panel aside, being cautious of any wiring connections. When I did this in my laundry room, I found a small pile of lint and dust—cleaning this early makes the whole process smoother.
Tip:
If your dryer has a removable front, it simplifies access to the drum rollers. Consult the manufacturer’s manual or watch a repair video for your specific model if needed.
Locate and Examine the Drum Rollers
The drum rollers are usually mounted on the sides or at the back of the drum. Spin the drum manually; if you feel resistance, squeaking, or wobbling, the rollers are likely worn or dry. I once ignored these signs until the roller snapped mid-cycle, causing a loud bang. Regular lubrication prevents such mishaps.
Apply the Lubricant Properly
Spray a small amount of silicone lubricant onto the rotating shaft of each roller, focusing on the bearing points. Avoid over-lubricating; a little goes a long way. Use the rag to wipe away any excess. When I first tried this, I was nervous about overdoing it, but a light coat was enough to silence the squeak instantly.
Pro tip:
Check the rollers for signs of cracking or excessive wear. If damaged, consider replacing them or consulting professionals for a warranty-backed repair that guarantees long-term peace of mind. Find trusted local services here.
Reassemble and Test
Carefully reattach the front or top panel, securing all screws tightly. Plug the dryer back in and run a short cycle to observe the noise level. You should notice a significant reduction in squeaks or thumping. I did this in my basement, and the difference was immediate—just like a whisper instead of a roar.
Maintain Regularly to Keep Noise at Bay
Repeat this lubrication every six months or whenever you notice increased noise. Also, clean the lint filter and check for other worn parts, such as the belt or drum roller bearings, for overall quiet operation. Consistent maintenance prolongs your appliance’s lifespan and ensures reliable, warranty-backed service. For more detailed guidance, explore expert repair tips.
 When it comes to appliance warranties and repairs, many homeowners operate under misconceptions that can cost them time and money. A common myth is that a standard warranty will cover all repair costs automatically; however, these agreements often have fine print that excludes certain parts or labor, leading to unexpected expenses. For example, some warranties only cover manufacturer defects and not accidental damage or wear and tear, which are the real culprits behind many breakdowns. misinterpreting this can result in denied claims when you need repairs most, so it’s crucial to understand the specifics of your warranty—reviewing policies carefully and consulting with professionals who can maximize your coverage, like those at maximize your appliance warranty. Another widespread mistake is assuming that same-day service is always reliable; while it offers convenience, not all providers uphold consistent standards. Some companies advertise quick turnaround times but lack experienced technicians, leading to incomplete repairs or recurring issues. It’s wise to verify a service provider’s credentials and customer reviews before scheduling, and remember that reputable firms often back their work with warranty-support that extends beyond the initial visit—click here for trusted options. Advanced homeowners know that proper installation is a crucial factor rarely given enough attention. Incorrect setup can void warranties and cause premature appliance failure, which is why choosing certified installers is essential—see our installation tips. Many also overlook the importance of documented proof when filing warranty claims; taking photos of issues and retaining receipts can streamline the process and increase the likelihood of approval. All these details highlight that understanding the nuances of warranties, installation, and repair services isn’t just for experts—it’s a valuable knowledge tool for every homeowner aiming to preserve their appliances’ lifespan and performance. Remember, a little extra research can prevent costly pitfalls and ensure your repairs are both reliable and backed by proper guarantees. Have you ever fallen into this trap? Let me know in the comments.
Investing in Reliable Tools for Long-Term Appliance Care
When it comes to maintaining your appliances, having the right tools can make all the difference. I personally rely on a high-quality digital multimeter, such as the Fluke 117—they offer precise readings that help identify electrical issues quickly, preventing unnecessary replacements. Additionally, a cordless ratchet screwdriver has become my go-to for swift disassembly, especially when servicing dryer drums or accessing behind washing machines. These tools save me time and ensure that repairs are done safely and effectively. Over time, I’ve also incorporated a digital infrared thermometer to monitor component temperatures accurately, which is invaluable for troubleshooting heating elements or detecting overheating in your appliances.
Predicted Trends: Smart Diagnostic Devices
Looking ahead, the integration of smart diagnostic tools is set to revolutionize appliance maintenance. Devices that connect to smartphones to provide real-time diagnostics and maintenance alerts will become more accessible, empowering homeowners to address minor issues before they escalate. Embracing these innovations now can lead to more proactive and effective appliance care, ultimately extending the lifespan of your investments.
How do I maintain appliance tools to ensure accuracy and longevity?
Proper maintenance of your tools is essential. Keep digital multimeters and thermometers calibrated according to manufacturer instructions, and store them in protective cases to prevent physical damage. Regularly clean tools of dust and debris, and replace batteries before they fail to maintain measurement precision. For power tools like screwdrivers and ratchets, lubrication and periodic inspection of parts ensure smooth operation and prevent breakdowns. Investing in quality tools and maintaining them properly reduces the risk of inaccuracies that could lead to costly repairs or misdiagnoses.
Utilizing My Favorite Maintenance Techniques
One advanced technique I recommend is performing thermal imaging scans with a high-resolution infrared camera to spot abnormal heat signatures in your appliances, which can preempt component failure. While professional services offer this, affordable handheld models are now more accessible for serious DIY enthusiasts. Regular use of such technology can reveal hidden issues early, saving you from unexpected breakdowns and expensive repairs. This proactive approach aligns with the trend towards smart appliance maintenance and ensures that your equipment stays in optimal condition over the years. For detailed guidance on this method, consider consulting expert repair guides.
Try this advanced maintenance tip today: Use an infrared thermometer to check for uneven heating in your oven or dryer. Spotting hotspots early can prevent more costly repairs later and optimize your appliance’s performance. For professional assistance or warranty-backed repairs, don’t forget to verify your coverage and scheduling options here. Proper tools coupled with consistent maintenance will keep your appliances running smoothly, saving you money and stress in the long run.Lessons That Changed My Approach to Warranties and Repairs
One of the most eye-opening lessons I learned was the importance of thoroughly understanding my appliance warranties. I once assumed that a warranty covered all repairs, but digging into the fine print revealed many exclusions that could cost me dearly. That experience taught me to always review the coverage details beforehand and to keep personal records—like photos of issues and receipts—which streamline warranty claims later. Additionally, I realized that regular maintenance, particularly lubrication of moving parts like drum rollers, is essential to prevent costly breakdowns. Skipping these small steps often leads to larger, more expensive problems that could have been avoided with a bit of proactive care.
Top Tools That Have Saved Me Time and Money
If you’re serious about maintaining your appliances, investing in a few reliable tools is a game-changer. I rely heavily on a sturdy digital multimeter, such as the Fluke 117, for quick electrical diagnostics, which helps prevent unnecessary replacements. A cordless ratchet screwdriver has also become indispensable for swift disassembly during repairs. Adding a digital infrared thermometer allows me to monitor component temperatures precisely, preventing overheating issues. These tools, combined with proper maintenance practices, ensure my appliances stay in top condition and help me catch problems early.
What I Wish I Knew When I Started Repairing Machines
The most valuable insight I gained was understanding that many appliance issues can be tackled at home with the right knowledge and tools. However, it’s essential to recognize your limits; for complex problems, trusting professionals who offer warranty-backed services can save you from further damage and expenses. I also learned that smart diagnostic devices connected to smartphones are becoming affordable and invaluable for proactive maintenance. Using thermal imaging scans, for example, enables me to spot early signs of failure before a breakdown occurs, saving both money and stress. Remember, ongoing learning and investing in quality tools empower you to keep your home running smoothly.
Start Small, Think Big with Your Appliance Care
My journey has shown me that consistent, small steps—like applying silicone lubricant correctly or verifying installation procedures—have outsized benefits in appliance longevity and performance. Never underestimate the power of proactive maintenance; it prevents surprises and extends your appliances’ lifespan. Taking control now, backed by trusted tools and knowledge, means fewer emergency calls and more peace of mind. So, why not begin with a simple lubrication routine or reviewing your warranty coverage today? Your future self will thank you for it.