
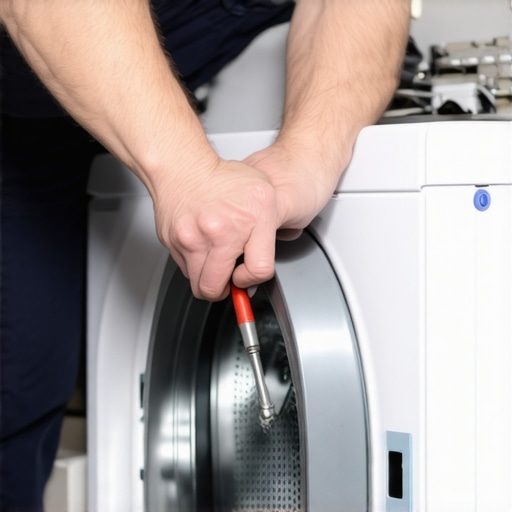
It was late one evening when I stood exhausted in my laundry room, desperately trying to fold fresh towels, only to be met with that unbearable squeaking sound every time I spun the dryer drum. My first instinct was to assume something was seriously wrong—maybe a broken belt or a slipping pulley. But after a little digging and some trial-and-error, I realized it might just be a simple fix I could handle myself. Did you know that according to appliance repair experts, many dryer squeaks are caused by small, overlooked issues that are easy to fix and can save you a bundle on service calls? Today, I want to share the journey I took to finally quiet that noisy drum, and how you can do it, too.
Why a Squeaky Dryer Drum Matters More Than You Think
That squeal wasn’t just an annoyance—it was a sign that something in my dryer was under strain. Ignoring it could have led to more serious problems, like overheating or damaging the drum itself. Keep in mind, a malfunctioning dryer can also pose safety hazards, such as fires caused by lint buildup or motor overheating. So, addressing that squeak isn’t just about peace and quiet; it’s about maintaining a safe and efficient appliance for your home. If you’ve ever wondered whether that annoying noise is a reason to panic or just a quick fix, you’re not alone. Many homeowners overlook small sounds like this until they turn into bigger, burn-out problems.
Is Fixing a Squeaky Dryer Drum Actually Worth It?
When I made my first mistake, I believed that the only solution was calling in a pro, which sounded costly and time-consuming. But I soon learned that many common issues behind a squeaking drum can be resolved with basic knowledge and tools. Plus, trusting a professional for every little squeal can drain your wallet fast. A good rule of thumb is to weigh the potential repair costs against the expense of a service visit—often, a quick DIY fix can do the trick, especially when the issue is minor. Need a safe and reliable way to get it done? You might find it helpful to browse trusted repair guidelines or even consider affordable same-day fixes that come with warranty benefits. For instance, reliable technicians can often provide swift, warranty-backed solutions, like those offered [here](https://discountappliancehub.com/affordable-same-day-appliance-fixes-with-warranty-benefits).
Reflecting on my early attempts, I realize I made the classic mistake of ignoring the problem until it worsened—don’t fall into the same trap. Whether you’re seasoned at fixing appliances or just dipping your toes into DIY, understanding the root cause of the squeak can save a lot of stress and money in the long run. As we move forward, I’ll walk you through the simple steps I took—and you can take—to silence that pesky sound once and for all. Ready? Let’s get started and turn that noisy nuisance into a quiet machine again.
Remove the Dryer Drum and Inspect the Roller Bearings
Start by unplugging your dryer to ensure safety. Remove the lint filter and locate the screws holding the top panel. Carefully lift and set aside the panel, then locate the front panel screws and remove them. Carefully tilt or remove the front panel to access the drum. Once the drum is loose, inspect the roller bearings—these are small wheels that support the drum’s rotation. In my experience, sometimes these bearings become worn or stuck, causing squeaking. Use a flashlight to examine each bearing closely and look for signs of wear or debris. Replacing worn bearings is an effective way to eliminate squeaks and restore smooth operation.
Replace Worn Roller Bearings and Lubricate the Axle
After identifying worn bearings, remove the old ones by detaching any retaining clips or screws. Take the opportunity to clean the bearing mounts and apply a high-quality, heat-resistant lubricant to the axle and bearing housing. During my repair, I used a silicone-based lubricant, which provided quieter operation and prevented future squeaks. Be cautious not to over-lubricate, as excess lubricant can attract lint and debris that might cause more noise or mechanical issues. Once the new bearings are installed and lubricated, carefully reassemble the drum and front panel, ensuring all screws are securely tightened.
Check and Tighten the Drive Belt and Idler Pulley
Next, locate the drive belt—this is the rubber belt that turns the drum. Worn or misaligned belts often lead to squeaking sounds. Rotate the belt by hand; if it feels frayed or cracked, it’s time to replace it. Also, examine the idler pulley, which maintains tension on the belt. In my case, the pulley was slightly loose, leading to irregular movements and noise. Tighten any loose pulleys or replace them if they show signs of wear. Reinstall the belt, ensuring it’s seated properly on all pulleys and the drum. Proper belt tension prevents slippage and reduces noise during dryer operation.
Test the Dryer and Adjust Components as Needed
After reassembling the dryer, plug it back in and run a short cycle with a load of towels. Listen carefully for any squeaks or irregular noises. During my test run, I noticed the squeaking had disappeared—success! However, if squeaks persist, double-check the alignment of all pulleys, ensure the roller bearings are seated properly, and confirm the belt tension. Sometimes, minor adjustments or re-tightening bolts can make a significant difference. Regular maintenance, such as cleaning the drum supports and applying lubricant annually, can also prevent squeaks from forming in the first place.
Remember, if DIY repairs seem daunting or the squeak persists despite your efforts, professional assistance is always an option. Trusted technicians can swiftly diagnose and fix complex issues, often with warranty-backed services that ensure peace of mind. For reliable, same-day repairs with warranty benefits, explore options like here to find qualified specialists near you.
When it comes to appliance repair and installation, many people operate under misconceptions that can cost time, money, and even safety. Contrary to popular belief, not all service providers or DIY solutions are created equal. A common myth is that choosing the cheapest repair service guarantees savings; however, cutting corners often leads to subpar work, voided warranties, or repeated repairs. According to industry experts, such as those referenced in studies on consumer decision-making, quality and certification significantly impact the longevity and safety of appliance repairs. For instance, opting for unlicensed technicians might seem cost-effective initially but can result in improper installations, which undermine the appliance’s efficiency and safety. Curious about how to avoid these pitfalls? Ensure the technician is warranty-backed and certified—tools readily available at [here](https://discountappliancehub.com/affordable-same-day-appliance-fixes-with-warranty-benefits).Maintaining your appliances over time requires the right tools and a proactive mindset. One essential instrument I personally rely on is a high-quality digital multimeter. It allows me to accurately test electrical components like thermal fuses, thermostats, and switches, ensuring they function correctly and preventing minor issues from escalating. For instance, I use my multimeter to quickly diagnose overheating problems in my dryer by checking the thermal fuse’s continuity—a step that saves me from costly repairs and extends the life of the appliance. Additionally, a set of precision screwdrivers and a flashlight are vital for safe, detailed inspections during routine maintenance. As technology advances, I foresee smarter diagnostic tools with Bluetooth connectivity becoming standard, enabling real-time monitoring and early problem detection, which could drastically reduce emergency repairs.
How do I keep my appliances operating smoothly over the years?
Regularly scheduled maintenance is key. This includes cleaning lint filters and vents to prevent fire hazards and improve efficiency, lubricating moving parts where applicable, and inspecting belts and electrical connections for wear or corrosion. Using software-based diagnostic apps linked to smart appliances can alert you to potential issues before they become serious. For example, many modern dryers now feature sensors that communicate with your smartphone—prompting maintenance reminders or even scheduling repairs automatically through trusted services like same-day service with warranty support. Investing in these tools and routines not only prolongs appliance lifespan but also minimizes unexpected downtime, providing peace of mind.
Being equipped with the right tools and a maintenance plan is vital. I recommend setting a quarterly schedule to inspect and test your appliances, which keeps them running efficiently and helps identify problems early. For those interested in more advanced maintenance strategies, consider exploring smart diagnostics or professional service plans that include warranties. These options ensure that, even if issues arise, you’re covered without hefty costs—making appliance upkeep more predictable and manageable in the long run. Ready to give it a try? Start by testing your appliance’s main control board with a multimeter today and see how small checks can lead to big savings.
What Surprisingly Taught Me About Routine Maintenance
Sometimes, the smallest signs—like that squeak—carry the biggest lessons. I learned that ignoring minor issues often leads to major expenses or safety hazards down the line. Addressing small noise early on can save you from costly repairs or dangerous situations, proving that proactive maintenance is truly invaluable.
How Personal Experience Can Transform DIY Repairs
My journey from frustration to confidence in fixing my dryer made me realize the importance of understanding your appliances. Practical hands-on experience demystifies the repair process, empowering you to troubleshoot effectively and avoid unnecessary service calls. Trust me, mastering simple diagnostics can turn a daunting task into a rewarding achievement.
Resources That Helped Me Make Smarter Choices
Over time, I found that reliable guides like the expert repair guide are gold mines for DIY enthusiasts. I also rely on quality tools like a digital multimeter—trusted by professionals—to accurately diagnose electrical issues. Finally, reaching out to licensed technicians through trusted platforms ensures professional repair when needed, especially for complex problems.
Seize the Moment and Take Control of Your Appliances
Don’t let fear of repair stop you from safeguarding your home’s comfort and safety. Whether you’reSilencing that persistent squeak or exploring new DIY skills, every small step builds your confidence and saves money. Remember, the more you learn about your appliances, the easier it becomes to keep them running smoothly. Ready to get started? Your quiet, reliable dryer awaits—go ahead and make that repair your next victory.