
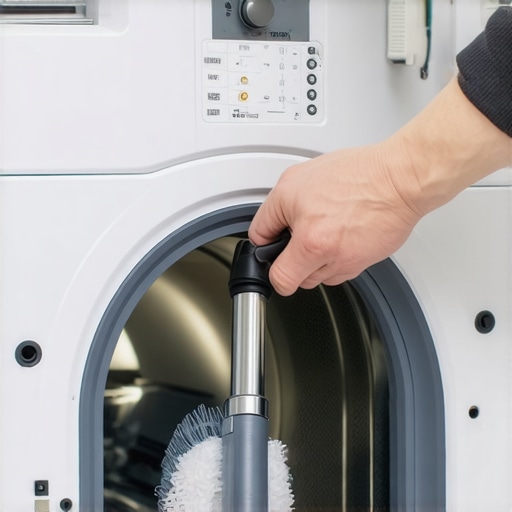
I vividly remember the moment I realized my careless approach to cleaning the lint out of my dryer could have turned into a disaster. It was a chilly Saturday afternoon, and I was hurriedly swapping loads of laundry, neglecting the internal crevices where lint seems to multiply like rabbits. Suddenly, I smelled burning—an unmistakable warning sign that I had overlooked something crucial. That lightbulb moment made me realize: I needed to understand the safest way to clean the lint out of my dryer’s internal cabinet.
Ensuring your dryer operates safely isn’t just about maintenance; it’s about protecting your home and loved ones from potential fire hazards. The lint that accumulates inside the machine isn’t just a nuisance—it’s a combustible material that can lead to dangerous situations if not properly managed. Despite common belief, simply removing the lint trap isn’t enough. The real challenge lies in cleaning the interior cabinet where lint quietly gathers out of sight.
Today, I’ll share my personal experience and guide you through the safest and most effective ways to clean your dryer’s internal cabinet. By the end of this post, you’ll understand why regular, proper cleaning is vital and how to do it without risking damage or safety. It’s a straightforward process, but one that demands attention and care.
Why Rushing the Dryer Cleaning Can Be Dangerous
Many homeowners overlook the importance of deep-cleaning the internal components of their dryer, preferring to just empty the lint trap after every load. This habit, while common, is like only trimming the weeds on the surface and ignoring the roots. Lint and debris can settle deep within the internal cabinet, blocking airflow and increasing the risk of overheating or even fires. According to the U.S. Fire Administration, failure to clean dryer vents is a leading cause of household fires, accounting for thousands of incidents annually.
A mistake I made early on was trying to use aggressive tools or chemical cleaners inside the cabinet, thinking it would save time. Not only was that ineffective, but it could have damaged sensitive parts of my dryer, leading to costly repairs. That’s why I emphasize gentle, methodical cleaning—taking your time and understanding the inside mechanics.
Have you ever faced a situation where your dryer suddenly stopped working or smelled suspiciously like burning? If so, you’re not alone. Many of these issues stem from neglected lint buildup. By thoroughly cleaning inside the cabinet, you’re not just enhancing efficiency but also significantly reducing fire risks.
In the upcoming sections, I’ll walk you through the safest techniques to access and clean your dryer’s internal cabinet, ensuring your laundry routine remains safe and stress-free. Ready to become your own appliance detective? Let’s get started.
Open the Dryer Panel and Access the Internal Components
Begin by unplugging your dryer to eliminate any risk of electrical shock. Locate the panel screws at the back or side of your dryer, depending on the model, and use a screwdriver to remove them. Carefully set the panel aside, revealing the internal workings. I remember a time when I struggled with a stuck panel, but gentle patience and proper tools made the process smoother. This step grants direct access to the internal cabinet where lint accumulates.
Inspect and Remove Large Debris
With the panel open, visually inspect for any large debris or lint buildup. Use a flashlight if necessary. Gently remove any visible lint or obstructions with your hands or a pair of tweezers. Be cautious not to damage sensitive parts or wiring. During my first attempt, I found a significant amount of lint near the blower wheel; removing it improved airflow immediately.
Use a Vacuum and Brush for Deep Cleaning
Attach a narrow nozzle or brush attachment to your vacuum cleaner. Carefully vacuum around the blower wheel, motor, and other accessible areas to suck up stubborn lint and dust. For stubborn spots, use a soft brush to loosen debris before vacuuming. I recommend doing this step thoroughly; in one case, my vacuum’s gentle suction dislodged a thick lint clog that was reducing efficiency. Regular use of a vacuum prevents lint from building up unseen.
Tip:
Avoid using compressed air, which can push lint deeper into the interior chambers or damage sensitive components. Stick to vacuuming and gentle brushing for safety and effectiveness.
Clean the Dryer’s Internal Surfaces
Use a damp microfiber cloth or lint brush to wipe down accessible surfaces inside the cabinet. This removes residual lint and dust, reducing fire hazards. I found that a lightly damp cloth easily picked up fine lint particles, leaving the interior spotless. Ensure the cloth is only slightly moist to prevent moisture from reaching electrical parts.
Reassemble and Test
Once cleaning is complete, reattach the panel securely using the screws you removed earlier. Plug the dryer back into the power outlet. Turn it on briefly to ensure everything is functioning correctly—listen for unusual noises or vibrations. Proper reassembly ensures safety and performance. Remember, if you’re unsure about any step, professional appliance services can ensure your dryer is inspected and cleaned thoroughly, maintaining safety standards and your warranty coverage. For expert assistance, visit this guide.
Many homeowners assume that requesting same-day appliance repair or installation guarantees quality and reliability, but in my experience, this isn’t always the case. A widespread misconception is that all quick services are equal, yet some providers cut corners or skip essential safety checks to meet tight schedules. For example, rushing to provide a quick fix may lead to overlooked warranty terms or incomplete installations, which could void your coverage down the line. Additionally, many believe that warranty coverage is automatic or comprehensive, but the fine print often excludes certain repairs or service providers, especially if the technician isn’t properly certified or authorized. This misunderstanding can leave you unprotected, even after paying for what seems like a premium, swift service.
One of the most insidious traps is misunderstanding the nuances of warranty activation and coverage. For instance, a repair might seem straightforward, but if the technician doesn’t follow proper procedures aligned with manufacturer guidelines, your warranty may be invalidated. According to experts, such as those from the National Appliance Service Association, failure to adhere to prescribed verification steps and documentation can compromise warranty claims. Therefore, asking whether your service provider is warranty-backed and taken from a trusted network becomes crucial.
Are you aware of the specific warranty terms for your appliances and how to maximize your coverage in emergency repairs? The fine detail matters because it can mean the difference between a covered repair and paying out-of-pocket. Also, many assume that warranty coverage applies universally, but some brands or providers might restrict certain repairs to authorized service centers only—highlighting the importance of verifying credentials beforehand.
In my years of experience, I’ve seen cases where consumers hurriedly accepted any quick service without consulting their warranty policies, leading to unexpected costs or delays. If you want peace of mind, I recommend researching the provider’s reputation, estimating the scope of coverage, and understanding the warranty’s claim process beforehand. For comprehensive insights, check out [this guide on top tips for same-day service warranty coverage](https://discountappliancehub.com/top-tips-for-same-day-service-warranty-coverage). Remember, being informed is your best defense against costly mistakes.
Have you ever fallen into this trap? Let me know in the comments.
Investing in Quality Tools for Longevity
To keep your appliances running smoothly, having the right tools can make all the difference. I personally rely on a set of professional-grade ultrasonic cleaners for small parts, which effectively remove stubborn grime without damaging delicate components. These cleaners save time and improve the lifespan of sensitive parts like control boards or sensors.
Additionally, a high-quality multimeter is indispensable for diagnosing electrical issues. I use a digital multimeter with auto-ranging capabilities, so I can quickly test voltage, resistance, and continuity without fumbling with settings. This proactive approach helps spot potential problems before they escalate, saving you costly repairs.
Effective Maintenance Methods That Make a Difference
Regularly scheduled maintenance techniques, such as cleaning condenser coils or replacing worn-out filters, are vital. I recommend setting calendar reminders to check these components quarterly. For example, a clean condenser coil in your refrigerator improves energy efficiency and prevents overheating, which can lead to breakdowns. Using a microfiber cloth combined with a gentle cleaning solution ensures thorough dust and lint removal without scratching surfaces.
Software Tools to Monitor and Schedule Repairs
Modern appliances often come with smart diagnostics apps that can track usage patterns and alert you to upcoming maintenance needs. I leverage these apps to monitor my appliances remotely, which is especially useful if you’re busy or away. For instance, some smart washers notify you when it’s time for a deep cleaning cycle, preventing issues that arise from neglect.
Furthermore, scheduling software like online booking tools ensures prompt service, minimizing downtime. These platforms often provide real-time availability, enabling you to secure same-day service — crucial when an appliance failure disrupts your daily routine.
Looking Ahead: The Future of Appliance Maintenance
As technology advances, expect more appliances to integrate AI-powered diagnostics, alerting homeowners to potential issues before they occur. This proactive trend emphasizes the importance of combining high-tech tools with traditional maintenance practices. By adopting these innovative strategies now, you can extend the lifespan of your appliances while simplifying repairs.
How do I maintain my appliances over time?
In the long run, consistent use of both physical tools, like multimeters and cleaning kits, combined with software monitoring, offers the best results. Scheduling regular inspections and staying informed about manufacturer updates ensures you’re always one step ahead. Don’t forget to check out how to maximize your warranty benefits for added peace of mind. I highly recommend trying out a digital diagnostic app on your next maintenance routine to preempt issues and enjoy uninterrupted service. Staying proactive now will save money and stress later!
Lessons I Didn’t Expect to Learn About Same-Day Appliance Repairs
- One of my biggest eye-openers was realizing that rushing through cleaning the internal dryer cabinet often leads to overlooked lint buildup, increasing fire risk—patience truly pays off.
- I used to think a quick vacuum around accessible parts was enough, but I discovered deep cleaning with proper tools makes a significant difference in safety and efficiency.
- Engaging with professionals taught me that understanding your specific appliance model’s needs helps prevent common mistakes, saving time and money in the long run.
- Finally, I learned that regular maintenance isn’t just about preventing breakdowns; it’s about developing a proactive mindset that keeps your home safe and your appliances lasting longer.
Tools and Resources That Changed My Approach
- Ultrasonic cleaner: This device gently cleans delicate parts like control boards, greatly extending lifespan and performance—trust me, it’s worth the investment.
- Magnetic multimeter: A reliable multimeter helps diagnose electrical issues accurately, avoiding guesswork during repairs or inspections.
- Expert repair guides: Online resources like the latest repair tutorials help me understand the intricacies of various appliances, making DIY maintenance safer and more effective.
- Professional service providers: Building relationships with certified technicians ensures I get quality service quickly, especially important in emergencies where same-day repair can prevent disasters.
Embrace Your Power to Keep Appliances Safe and Reliable
Taking control of your appliance maintenance journey isn’t just practical—it’s empowering. By applying these lessons, utilizing the right tools, and staying informed, you set yourself up for a safer, more efficient home environment. Remember, proactive care today means fewer worries tomorrow. So why wait? Dive into your next maintenance task with confidence, knowing you’re making a difference. Ready to master your appliances and enjoy peace of mind? Share your experiences or questions below—I’m here to help you succeed in your appliance journey!
What’s the first maintenance task you plan to tackle after reading this? Let me know below!
,