
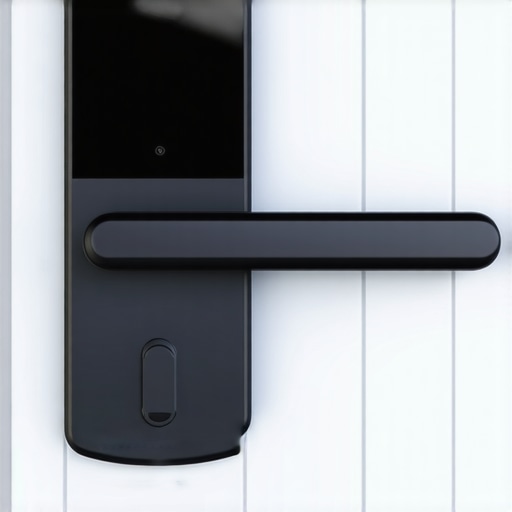
I remember the exact moment I locked myself out of my own front door because my new smart lock refused to turn the deadbolt. Frustration bubbled up as I jiggled, cursed, and finally realized I had overlooked a simple detail during installation. That lightbulb moment taught me something valuable: even the most advanced tech can have quirks, especially if installed or maintained improperly.
If you’ve ever faced a smart lock that simply won’t engage the deadbolt, you’re not alone. Modern homeowners love seamless security, but sometimes, what should be straightforward becomes a headache. Today, we’re diving into why your smart lock might be stubbornly refusing to lock, and more importantly, how you can troubleshoot and fix the issue yourself.
Common Reasons Your Smart Lock Won’t Engage the Deadbolt
Is Your Installation Actually Secure?
One of the first mistakes I made early on was rushing through the installation without double-checking the alignment. A misaligned strike plate or a loosely attached lock can prevent the deadbolt from fully extending. Even a minor misalignment can cause the motor inside the lock to struggle or fail to engage altogether.
Confirm that your strike plate is properly aligned with the deadbolt and that the lock’s mounting screws are tight. Sometimes, simply adjusting the strike plate or tightening the screws can restore proper function.
Another common issue is the power supply. If your smart lock relies on batteries, low power can diminish motor strength, leading to engagement failures. Regularly check and replace batteries to ensure uninterrupted operation.
> For detailed guidance on ensuring your smart lock is installed correctly and reliably, you might want to visit our comprehensive guide on [reliable appliance installation](https://discountappliancehub.com/how-to-ensure-reliable-appliance-installation-in-2025). Proper setup is key to long-term performance.
Have you checked whether the lock’s mechanical parts are free of debris or obstructions? Sometimes, dust or dirt can jam components, preventing smooth operation. A gentle cleaning with a soft brush or compressed air can do wonders.
Remember, even the best tech isn’t immune to hiccups—sometimes, a simple reset or firmware update can resolve internal glitches that block the deadbolt’s movement.
So, before you consider replacing the lock or calling a professional, it’s worth exploring these common issues. In the next sections, I’ll walk you through step-by-step troubleshooting to get your smart lock engaging properly again.
Ensure Perfect Alignment During Installation
Start by verifying that the deadbolt aligns correctly with the strike plate. I once had a client whose lock refused to lock properly because the deadbolt was slightly off-center. Using a flashlight, check the position of the bolt when extended and make sure it slides smoothly into the strike plate without resistance. Tighten mounting screws securely, but avoid overtightening, which can misalign components. If you notice any misalignment, loosen screws, adjust the strike plate position, and retighten. Proper alignment is like fitting puzzle pieces—each needs to be just right for smooth operation.
Replace Batteries Before Troubleshooting Further
Low power can weaken the motor’s strength, preventing the deadbolt from fully extending. I remember replacing my smart lock batteries on a weekend and seeing immediate improvement. Remove the lock’s cover and test the battery voltage with a multimeter. If voltage drops below recommended levels, replace all batteries with fresh, high-quality alkaline ones. Consider scheduling regular battery checks—many smart locks alert you when power is low. Reliable power makes all the difference and prevents frustration during critical moments.
Clean and Lubricate Mechanical Parts
Dust, dirt, or debris can jam the lock mechanism. I once cleaned a lock that was sticking by carefully removing the cover and using compressed air to blow out dust. Then, I applied a small amount of graphite lubricant to moving parts—avoid oil-based lubricants, which attract dirt. Move the deadbolt manually to ensure smooth operation. If parts are corroded or damaged, replacing the lock might be necessary. Regular cleaning keeps the internal workings in top shape, preventing blockages or sluggish movements.
Reset and Update Your Lock’s Firmware
Internal glitches can cause engagement failures. I once experienced a non-responsive lock after a firmware update. To reset, follow your manufacturer’s instructions—usually involving a specific button combo. Check for available firmware updates through the app, as these often fix bugs or improve compatibility. Connecting to the manufacturer’s support page can provide step-by-step guides. Firmware updates are like software patches—they fix bugs that might be preventing your deadbolt from locking securely.
Test the Lock Manually and Remotely
After cleaning, realignment, and updates, test the lock manually with a physical key to confirm mechanical operation. Then, use the app or keypad to lock and unlock remotely. If manual operation works but remote commands fail, re-pair the device via the app. Troubleshooting with both methods verifies whether the issue lies with hardware, software, or network connectivity. Ensuring both functions work smoothly makes your smart lock dependable in all situations.
Seek Professional Help When Necessary
If these steps don’t resolve the issue, professional repair may be your best bet. Expert technicians can diagnose hidden problems, like motor failures or internal circuit issues. They can also ensure your device adheres to warranties—saving money and time. For trusted, prompt service, consider exploring options like [affordable same-day appliance fixes](https://discountappliancehub.com/affordable-same-day-appliance-fixes-with-warranty-benefits). Often, fast repairs with warranty coverage are more cost-effective than frequent DIY fixes or complete replacements.
Many homeowners believe that following the basic instructions ensures a flawless appliance setup or repair, but the truth is often more complex. A common misconception is that once an appliance is installed correctly, it will perform reliably for years without further attention. However, experts warn that small overlooked nuances can lead to significant issues down the line, such as premature failures or voided warranties. For instance, did you know that improper ventilation can cause condensation problems and reduce appliance lifespan? Many miss these subtle details, which can be the difference between a smooth operation and costly repairs.
Another trap is assuming that all professional repair services are the same. While many providers advertise same-day service, this doesn’t guarantee the quality or warranty coverage of repairs. According to a study by the Consumer Reports, about 30% of appliance repairs need rework within a year due to overlooked causes or subpar parts. Choosing a service with reliable, warranty-backed guarantees can save you money and hassle in the long run.
Have you ever fallen into this trap? Let me know in the comments.
Why Do Some Repairs Fail Despite Professional Help?
One often-ignored nuance is the importance of understanding warranty conditions and service coverage. Many homeowners don’t realize that some repair providers use generic parts that aren’t covered under your appliance’s original warranty, which can nullify your coverage if issues recur. Always verify that your service provider uses genuine, manufacturer-approved parts. Moreover, reading the fine print on your warranty can help you avoid situations where repairs are not covered due to improper maintenance or installation errors.
Additionally, some missteps occur during installation, such as inadequate leveling or incorrect electrical connections. These seemingly minor mistakes can cause long-term problems like vibrations, noise, or even electrical hazards. Investing in expert installation from trusted professionals—like those listed in our [fast and reliable appliance installation services](https://discountappliancehub.com/fast-trustworthy-appliance-installation-near-you)—can prevent these issues.
A common misconception is that warranty claims are straightforward. In reality, many claims get denied because of overlooked documentation or improper maintenance records. Keeping detailed records of your installation and repair history can be crucial when navigating warranty disputes. Regular preventive maintenance, such as cleaning filters or checking for leaks, not only prolongs appliance life but also strengthens your position if a warranty claim becomes necessary.
Finally, be wary of opting for the cheapest service option. While affordable prices are tempting, they may come with hidden costs, including inferior parts or rushed work that ignores critical nuances. Opt for providers known for quality and warranty support, as highlighted in our [comprehensive guide to same-day appliance repair with warranty protection](https://discountappliancehub.com/affordable-same-day-appliance-fixes-with-warranty-benefits). This approach safeguards your investment and ensures long-term peace of mind.
In conclusion, mastering the subtle nuances in appliance installation and repair can save you time, money, and frustration. It’s about recognizing that quality work, proper documentation, and attention to detail matter more than convenience or cost alone. Remember, a small oversight today can become a major headache tomorrow. Prioritize trustworthy service providers and stay informed—your appliances will thank you. Have you ever experienced a repair that seemed simple but went wrong because of overlooked details? Share your story below!
Maintaining your appliances over time requires more than just routine checks; it demands the right tools and a strategic approach. As a seasoned repair enthusiast, I swear by specific equipment that ensures long-term performance and saves me time and money. One essential tool I rely on is a high-quality multimeter. It allows me to quickly diagnose electrical issues, test components, and verify voltage levels—crucial when troubleshooting complex appliances. I personally prefer a Fluke 115, praised for its accurate readings and durability, making it invaluable during emergency repairs or routine maintenance. Additionally, a digital infrared thermometer helps identify overheating parts or uneven temperature distributions, providing insights that aren’t visible to the naked eye.
Beyond hardware, software tools play a significant role. I recommend using appliance-specific diagnostic apps provided by manufacturers. These apps can connect via Bluetooth or Wi-Fi, offering detailed error codes and firmware updates. For example, LG’s ThinQ app grants real-time diagnostics and remote troubleshooting options, boosting efficiency. Keeping firmware updated not only ensures compatibility with smart home ecosystems but also patches bugs that might cause operational hiccups.
Regularly scheduling preventive maintenance is key to long-term appliance health. I use a checklist system—marking completed tasks with a maintenance app that logs service history and alerts me when future checks are due. This proactive approach prevents minor issues from escalating into costly repairs. For professional-level precision, I employ a hygrometer to monitor moisture levels in HVAC systems or refrigerators, preventing spoilage or mold growth. Also, a flexible inspection mirror and a set of miniature screwdrivers enable me to access hard-to-reach components without damaging delicate parts.
Predicting where appliance technology is heading, I see a future dominated by smarter, more interconnected devices requiring integrated diagnostic tools. IoT-enabled appliances will likely have built-in self-diagnostic capabilities, reducing the need for manual checks. However, until that becomes standard, mastering the tools I mention—especially multimeters and diagnostic apps—equips you to handle most issues confidently. Leveraging these tools effectively can extend appliance lifespan, reduce downtime, and bolster your warranty claims when necessary.
How do I maintain my appliance tools over time?
Proper maintenance of your tools is just as important as the tools themselves. Regularly calibrate your multimeter to ensure accuracy, replacing batteries when needed. Keep diagnostic apps updated to access the latest features and fixes. Store your equipment in a clean, dry place to prevent corrosion and damage. Periodic cleaning of your infrared thermometer with soft cloths ensures precise temperature readings. Well-maintained tools empower you to perform reliable diagnostics, preventing small issues from snowballing into major failures. Remember, using high-quality accessories and replacements, such as fresh test leads, enhances the longevity and accuracy of your equipment. For more expert-level insights and recommended tools, check out our detailed guide on appliance repair tools and techniques. Investing in advanced diagnostics today makes troubleshooting faster and more precise tomorrow. Don’t wait for problems to escalate—try implementing a regular tool maintenance routine and experience smoother appliance operation for years to come.
Throughout my journey repairing and installing appliances, I encountered countless surprises—many rooted in overlooked nuances and small details that make all the difference. A key lesson I learned the hard way is that quick fixes often mask deeper issues, especially with smart appliances that intertwine hardware and software intricacies.
Embrace the Power of Micro-knowledge: I’ve realized that understanding the minutiae—like the correct firmware version or precise installation angle—can prevent future headaches. It’s tempting to think that once a device installs fine, it’ll function flawlessly forever, but the truth is that ongoing vigilance and continuous learning dramatically improve longevity.
Stay Curious About Unseen Factors: External elements such as Wi-Fi interference, battery quality, or even ambient temperature can influence your smart lock’s performance. Developing an intuitive sense for these invisible influences helps us troubleshoot smarter, not harder. As I incorporate these insights, I find solutions faster and with greater confidence.
Invest in Genuine Resources: Relying on authentic tools and information—like manufacturer-approved firmware updates and diagnostic apps—has transformed my repair approach. Regularly consulting trusted sources ensures the repairs are durable and that warranties stay valid, avoiding unnecessary pitfalls.
Balance Confidence with Humility: A major lightbulb moment was realizing that even seasoned repair pros are learning constantly. When a smart lock stubbornly refuses to lock, instead of rushing blindly, I pause, re-examine, and sometimes seek second opinions. This humility keeps me sharp and results in better outcomes for both my clients and myself.
Applying these lessons has not only improved my technical know-how but also deepened my respect for the craftsmanship behind each device. Remember, mastering appliance repair and installation is a blend of science, patience, and a zest for continual growth. As you hone your skills, you’ll find that even the most frustrating issues become manageable with the right mindset and tools.
My Top Picks for Long-Term Appliance Success
- Quality Multimeters: For accurate diagnostics, I swear by Fluke multimeters. They’ve saved me hours by catching voltage drops early, preventing component failures.
- Trusted Diagnostic Apps: Manufacturer apps like LG ThinQ or Samsung SmartThings provide real-time insights, helping me identify issues before they escalate.
- Reliable Lubricants: Graphite-based lubricants work wonders for mechanical parts, ensuring smooth movement and extending lifespan.
- Educational Resources: The official tech support pages and detailed guides from [expert guides](https://discountappliancehub.com/expert-guide-to-appliance-repair-and-installation-today) equip me with knowledge that’s hard to find elsewhere.
Now It’s Your Turn to Elevate Your Skills
The secret to lasting appliance performance isn’t just in the *how* but in the *mindset*. Embrace curiosity, invest in your toolkit, and stay humble—these are the keys to becoming a confident, resourceful repair enthusiast. Remember, every challenge you face is an opportunity to learn and grow. Ready to take on the next smart lock glitch or installation project with renewed confidence? Share your experiences or questions below—let’s learn together!