
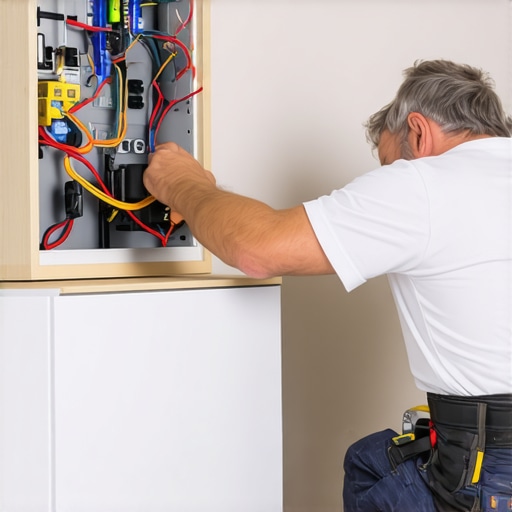
I remember the frustration well. One weekend, I decided to install a new electric dryer in my laundry room, thinking I could handle it myself. Fast forward a few hours, and I was knee-deep in wires, labels, and a creeping sense of doubt. I had missed a crucial step, and suddenly, my brand-new dryer wouldn’t start—and I was left questioning if I’d just made a dangerous mistake. That lightbulb moment made me realize: wiring a dryer outlet isn’t just a plug-and-play task. It’s a critical job that demands attention, proper tools, and a solid understanding of electrical safety.
Why Proper Wiring Matters for Your Dryer Safety and Efficiency
Imagine this: you’ve got a new appliance ready to roll, but if the wiring isn’t done correctly, it could lead to electrical hazards, inefficient operation, or even damage to the appliance itself. Electrical errors are more common than you think; a survey from the Electrical Safety Foundation International states that improper wiring is a leading cause of household electrical fires. That’s not something to take lightly.
Getting this right isn’t just about passing code or avoiding fines. It’s about protecting your home and loved ones from potential danger. Proper wiring ensures that your dryer functions smoothly, conserves energy, and lasts longer. Plus, it saves you the headache and expense of potential repairs down the line.
If you’re like me, you want to tackle the job yourself—but I’ll admit, I made a significant mistake early on: assuming all wiring setups are alike. It’s not. Different models and installations demand specific approaches; a generic method can be risky. That’s why I want to guide you through the process step-by-step, so you can do it safely and confidently.
By following a methodical guide, you’ll avoid common pitfalls and ensure your dryer outlet is wired correctly the first time. Whether you’re replacing an old outlet or installing a new one, understanding the basics makes all the difference.
Are you ready to learn the correct way to wire your electric dryer outlet and avoid costly mistakes? Let’s get started, and I’ll show you exactly what you need to do to get this right—so your dryer runs safely and efficiently for years to come.
For more detailed instructions and expert tips, don’t forget to check out our comprehensive guide on [expert appliance repair and installation](https://discountappliancehub.com/expert-guide-to-appliance-repair-and-installation-today). Now, let’s dive into the essential steps to wire your dryer outlet properly.
Prepare Your Workspace and Gather Tools
Before diving into wiring, ensure your workspace is safe and organized. Turn off the main power supply at the breaker panel to eliminate risk of electrocution. Gather essential tools: a voltage tester, wire stripper, screwdriver, pair of pliers, and appropriate electrical wiring (usually 10 or 12-gauge, depending on your dryer’s requirements). I once thought I could skip the voltage testing and ended up shocking myself; never underestimate safety.
Identify Existing Wiring and Connectors
Examine the existing outlet or the designated wall box. Look for its wiring configuration—whether it’s a 3-prong or 4-prong outlet—and note the wiring color codes: black (hot), white (neutral), and green or bare copper (ground). Remember, older models may use different setups, so double-check your dryer’s manual or consult an expert if unsure. I once found an unusual wiring color scheme in an old house, making me realize the importance of verifying every connection—assumption leads to hazards.
Turn Off Power and Test Circuits
Before touching any wires, verify that the circuit is dead by testing with a voltage tester. Confirm that no current flows through the wires to prevent shocks. This step is critical; I once restored power prematurely and got a mild shock, highlighting the importance of this safety check.
Disconnect Old Wiring Carefully
If replacing an existing outlet, carefully unscrew terminal screws and disconnect wires. Take note of how the wires are connected—photograph or label them if necessary. Keep the wires neat and avoid nicking the insulation. Once removed, assess whether the wire ends are too frayed or damaged. A quick inspection saved me from a future fire hazard when I replaced wires that had internal damage I couldn’t see at first glance.
Connect New Wiring Correctly
Attach the wires to the new outlet: connect black (hot) to the brass screw, white (neutral) to the silver screw, and green or bare copper (ground) to the green screw. Ensure tight connections to prevent arcing. If your dryer uses a 4-prong setup, follow the manufacturer’s wiring diagram precisely. I once mistakenly swapped hot and neutral wires due to overlooked instructions, leading to operational issues; double-checking prevents such mistakes.
Secure the Outlet and Restore Power
Mount the outlet firmly into the electrical box, tighten all terminal screws, and carefully push it back into the box without disrupting wiring. Reinstall the cover plate and turn the breaker back on. Test the outlet using a multimeter to confirm proper voltage before plugging in your dryer. I learned to always test with a multimeter after wiring, saving me from potential damage to the appliance.
Test the Dryer Connection
Finally, plug in the dryer and turn it on to verify proper operation. Watch for any irregular sounds or behavior, which could indicate wiring issues. When I completed my own wiring process, this final test ensured my safety and appliance functionality, giving me peace of mind.
For additional guidance on reliable appliance installation, visit our comprehensive installation tips. Remember, when in doubt, consulting a licensed electrician ensures safety and compliance with local codes. Proper wiring isn’t just a DIY task; it’s an investment in your home’s safety and your appliances’ longevity.
When it comes to appliance repair and installation, many homeowners operate under assumptions that can lead to costly surprises. While same-day service promises quick fixes, a widespread misconception is that it always guarantees quality or long-term solutions. In reality, some providers prioritize speed over thoroughness, leading to overlooked issues or subpar repairs. Experts warn that rushing through critical diagnostics can cause future breakdowns, emphasizing the importance of choosing reputable technicians, even if it means scheduling slightly later appointments. Similarly, many believe that warranties cover all repair costs; however, most warranties exclude certain parts or labor, especially if the repair was performed improperly or if the appliance wasn’t maintained properly. Understanding these nuances helps prevent false expectations and ensures proper protection for your investments. For instance, some repair companies may advertise fast service but lack comprehensive warranty support, risking additional expenses down the line. It’s essential to examine the fine print of your warranty coverage, as well as the credentials of your service provider. Moreover, selecting a technician based solely on price can be a trap—cheaper isn’t always better, especially with complex appliance issues. Prioritize companies that offer warranty-backed services and transparent pricing, like those discussed in our guide on warranty-backed appliance services you can rely on. Advanced homeowners understand that quick fixes without proper diagnostics or warranty considerations can lead to recurring problems and expenses. Therefore, the true expertise lies in balancing speed with thoroughness and ensuring your repair or installation is done right the first time. Don’t fall for the myth that all same-day services are equal; research and select your provider wisely. Have you ever fallen into this trap? Let me know in the comments. For more insights on how to navigate appliance repair options confidently, check out our comprehensive guide to appliance repair and installation.Maintaining your appliances over time requires more than just occasional cleaning; it involves using the right tools and adopting disciplined habits that prevent breakdowns and extend their lifespan. I personally rely on a few specialized items that make troubleshooting and routine upkeep much easier, saving me time and money. One indispensable tool I use regularly is a high-quality digital multimeter. Unlike basic testers, a good multimeter like the Fluke 117 provides precise voltage readings, which are crucial when verifying power supply issues or ensuring wiring connections are safe. I’ve seen homeowners attempt amateur fixes without this device, only to cause more damage or risk electrical hazards.
Another vital piece of equipment is a digital infrared thermometer. With this tool, I can quickly identify hotspots on components like motors, transformers, or even the compressor of an air conditioner, helping to diagnose issues before they escalate. For instance, detecting an abnormally high temperature on a motor bearing can prevent a costly failure, and using an infrared thermometer enables me to do this check from a safe distance, avoiding potential injury.
In terms of software, I highly recommend using manufacturer-specific diagnostic apps when available. Many modern appliances, especially high-end brands, come with companion apps that run self-diagnostic tests or provide firmware updates. Connecting my smart appliances via Wi-Fi allows me to run preventive checks remotely, schedule maintenance, and even identify emerging faults early.
Establishing a routine maintenance schedule is critical, and I’ve found that setting recurring reminders in my digital calendar helps me stay on top of filter replacements, cleaning condenser coils on refrigerators, and checking for loose wiring connections. Regularly inspecting and cleaning these parts without waiting for a failure reduces downtime and repair costs.
Prediction for the future points toward increased integration of IoT (Internet of Things) devices, which will make appliance maintenance more accessible and precise. As smarter appliances continue to evolve, expect tools like AI-driven diagnostic software and automated sensors to handle most routine checks, alerting homeowners proactively.
**How do I maintain appliance reliability over time?** Regular visual inspections combined with precise tools like multimeters and infrared thermometers keep my appliances running smoothly. This proactive approach reduces the need for emergency repairs, ensures safety, and prolongs appliance lifespan. If you want to get started with advanced diagnostics, try using a digital multimeter to verify your appliance circuit connections or test for power issues—it’s a game-changer.
For detailed guidance on implementing comprehensive maintenance routines and choosing the right tools, I recommend checking out our expert guide on appliance repair and installation. Remember, staying ahead of problems is the best investment you can make for your appliances and your peace of mind.
The Hardest Lesson I Learned About same-day service,warranty,appliance repair,installation
Trusting quick fixes without thorough checks can haunt you later. I once rushed a dryer outlet installation, skipping crucial safety steps, and paid the price with a blown fuse and a lot of head-scratching. That experience taught me that patience and attention to detail are invaluable in appliance wiring.
Never assume your home’s wiring is up to date or matches generic diagrams. Every property has quirks that can mislead even seasoned DIYers. Confirm your wiring configurations and always double-check against the appliance manual or a trusted expert to avoid costly mistakes.
Taking shortcuts in electrical projects might seem like saving time, but it can compromise safety and long-term appliance performance. Properly securing every connection and using the correct tools ensures you won’t face preventable hazards down the line.
In complex wiring jobs, a small oversight can lead to significant issues, from appliance damage to fire risks. Educating yourself on best practices—like verifying circuit integrity with a multimeter—protects both your home and family.
My Must-Have Tools for Simplifying Appliance Wiring
A high-quality digital multimeter is my top recommendation. It helps confirm power levels and ensures circuits are dead before working—saving me from potential shocks and damage. I’ve relied on the Fluke 117 for years, and its accuracy gives me peace of mind.
An infrared thermometer is another game-changer. Detecting hotspots on components like motors or transformers can prevent failures before they happen, saving money and downtime. I use it regularly during routine checks to stay ahead of potential troubles.
For smart appliances, pairing diagnostic apps with reliable Wi-Fi setup makes maintenance proactive and straightforward. Connecting via these tools has helped me catch issues early and keep everything running smoothly.
Combining these tools with a solid routine—like monthly visual inspections and cleaning—significantly extends appliance lifespan. Regular care isn’t just about fixing problems; it’s about preventing them.
Keep Moving Forward with Confidence
Learning to wire your dryer outlet safely and efficiently is within your reach, especially when you leverage the right tools and resources. Dive into our comprehensive guide on appliance repair and installation to build your confidence and skills. Remember, safety and patience are your best allies—never rush a job you don’t fully understand. With the proper approach, your DIY projects will become safer, easier, and more satisfying. Share your experiences or questions below—have you ever learned a lesson the hard way that now guides your repairs? I’d love to hear your stories.