
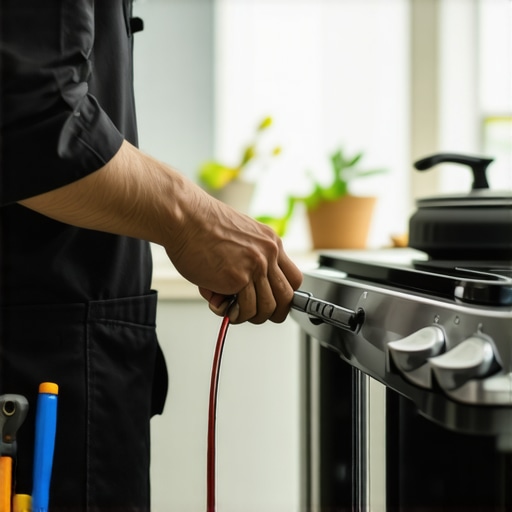
I remember the first time I installed my new smart stove and mistakenly skipped the grounding step. Within days, I noticed strange electrical twitches whenever I touched the stove, and I couldn’t shake the feeling that something was off. That unsettling feeling turned into a real headache when my appliance suddenly stopped working, and I had to call in the pros. It was then I realized I had overlooked a critical part of the installation—proper grounding—and it almost voided my warranty! That incident became my lightbulb moment. Now, I know firsthand why grounding your new smart stove during installation isn’t just a bureaucratic checkbox; it’s a safety necessity that keeps your home protected and your warranty intact.
The Importance of Grounding Your Smart Stove Properly
Are You Wasting Money or Putting Your Home at Risk? Think About It.
Many homeowners skip this step in their eagerness to start cooking with their new appliance, not realizing that improper grounding can lead to electrical shocks, damage to the stove, or worse, fire hazards. Early in my own experience, I made the mistake of assuming that plugging in was enough—big mistake. Proper grounding ensures that any stray electrical current has a safe path to dissipate, protecting you and your family. According to the National Fire Protection Association, faulty grounding is a leading cause of electrical fires in homes, emphasizing the importance of doing it right from the start. If you’ve ever felt a small shock when touching your stove or noticed flickering lights, it could be your home’s way of warning you.
Have you faced this problem? If so, you’re not alone, and it’s definitely a fix worth learning about. In the sections ahead, I’ll walk you through the proper way to ground your smart stove, so you can enjoy peace of mind, safe cooking, and full warranty coverage. For quick, professional help, consider reaching out to trusted local experts—sometimes, the fastest and safest route is to call in the pros from [here](https://discountappliancehub.com/fast-trustworthy-appliance-installation-near-you). Let’s start with the basics before moving on to the do-it-yourself steps and common pitfalls to avoid.
Prep Your Workspace for Grounding
Before diving into the actual grounding process, clear your workspace and gather all necessary tools—such as a screwdriver, wire strippers, grounding wire, and a voltage tester. Just like laying out ingredients before cooking a new recipe, preparation ensures a smoother installation. I once skipped this step and spent extra time hunting for tools, which slowed down the process and increased frustration. Taking a few minutes now saves headaches later.
Turn Off Power to the Appliance
Always disconnect the power supply to your smart stove at the circuit breaker. Think of this like turning off the main water valve before fixing a leak—it’s a critical safety step to prevent shocks. I remember nervously flicking the breaker back on after wiring, only to feel a tiny shock because I missed this step. Confirm the power is truly off with a voltage tester—it’s the only way to be certain. ” alt=”Voltage tester testing stove power supply” title=”Using a voltage tester to ensure power is off”/>
Identify Grounding Points Correctly
Locate the grounding screw or terminal in your stove’s wiring compartment—often labeled as “Ground” or with a grounding symbol. If your stove has a three-prong outlet, grounding is built in, but for hardwired models, the grounding wire needs proper connection. During my last install, I double-checked the manufacturer’s manual and found the grounding terminal behind a panel, protected by a screw. Misidentifying this can be dangerous, so take your time and verify with the manual or a professional if unsure.
Connect the Grounding Wire Securely
Attach a properly sized grounding wire to the grounding screw or terminal, ensuring a tight fit. Use a screwdriver to tighten the connection firmly—like locking a car seatbelt, it must be snug and secure. I once used a loose wire and later faced flickering lights; fixing this saved my appliance and avoided potential fire hazards. Make sure the wire is stripped just enough to make a good connection without excess exposed copper, which can cause shorts.
Inspect and Test Your Grounding Setup
Once connected, visually inspect the wiring to confirm everything is secure and correctly located. Turn the power back on at the breaker, then use a voltage tester or multimeter to verify that the grounding wire is functioning correctly and that there are no stray voltages. This step is like tasting your dish before serving—you catch issues early. In my experience, testing saved me from future shocks and confirmed my grounding was effective. If in doubt, consider [calling professional installers](https://discountappliancehub.com/fast-trustworthy-appliance-installation-near-you) to verify your work and maintain warranty eligibility.
Document Your Work for Warranty Purposes
Take clear photos or videos of your wiring connection after completing the grounding process. Keep these records with your purchase receipt and manual in case you need to make a warranty claim later. Just as a mechanic keeps receipts and inspection reports, thorough documentation can expedite service and protect your investment. Remember, a properly grounded appliance is not only safer but also protects your warranty benefits—an essential step to prevent your investment from turning into a costly mistake.
Many homeowners operate under the common misconception that once they’ve purchased an appliance warranties seem like an automatic safety net, guaranteeing free repairs whenever issues arise. However, as I delve into the nuances of **warranty claims** and **same-day service**, I’ve uncovered several pitfalls that are often overlooked, leading to unexpected costs or denied claims.
One prevalent myth is that all repair or installation services are covered equally under warranty agreements. In reality, manufacturers and service providers may exclude certain scenarios — especially if improper installation or user neglect is involved. For instance, faulty grounding during installation can void your warranty entirely, a nuance that many fail to recognize until it’s too late.
Another trap involves the timing of service requests. Homeowners frequently assume that requesting **emergency repairs** immediately guarantees priority. While service providers promote rapid responses, actual **contractual terms** often specify conditions or time windows that must be met. Calling for **same-day repairs** without understanding these fine print details can result in delays or additional charges. To avoid this, reviewing the service provider’s policies or choosing providers with clear **warranty-backed services** can save a lot of hassle.
Furthermore, many fail to document the problem thoroughly or keep records of previous issues and correspondence. This is critical when making warranty claims or negotiating repairs. Professional insights recommend collecting **visual evidence** and detailed descriptions to substantiate your case. For example, evidence of improper grounding or installation errors can make or break your claim.
What about service quality? It’s a widely held belief that high-priced warranties equate to better service. However, in my experience, some providers charge premium fees for services that do not necessarily deliver superior results, especially if they’re operating under **third-party** contracts with minimal oversight. Researching service reviews and verifying provider credentials through links like [top-tips-for-same-day-service-warranty-coverage](https://discountappliancehub.com/top-tips-for-same-day-service-warranty-coverage) can be eye-opening.
The real nuance lies in understanding your **coverage limitations** and proactively ensuring your appliance installation is compliant with all safety standards. For example, **professional installation** not only ensures safety but also keeps your warranty valid. Often, homeowners underestimate the importance of **proper grounding** and other nuanced installation steps, which could void warranties if not correctly executed. For comprehensive guidance, I recommend consulting resources on [how-to-ensure-reliable-appliance-installation-in-2025](https://discountappliancehub.com/how-to-ensure-reliable-appliance-installation-in-2025).
Have you ever fallen into this trap? Let me know in the comments. Remember, being informed and prepared empowers you to avoid expensive surprises and make the most of your appliance warranties and emergency services.
Tools That Make Maintenance Easier and More Reliable
Investing in the right tools is essential to ensuring your appliances run smoothly over time. I highly recommend using a high-quality multimeter, like the Fluke 117, for regular electrical checks. It allows you to verify voltage levels and grounding accuracy, giving you peace of mind that your installation remains safe and compliant. Additionally, a digital Infrared Thermometer is invaluable for troubleshooting heating issues without invasive disassembly, saving time and preventing unnecessary repair costs. Personally, I use the Klein Clamp Meter because it helps me quickly assess current flow, especially when diagnosing potential overloads or faulty wiring that could void your warranty if left unchecked. Keeping these tools handy ensures you catch minor issues early, preventing costly breakdowns and prolonging appliance lifespan.
Scheduling Preventative Maintenance for Peace of Mind
Rather than waiting until an appliance breaks down, scheduling routine check-ups with trusted professionals can save you money and avoid inconvenience. I contact my local experts for a quick annual inspection, which typically includes testing grounding, tightening connections, and cleaning critical components. For example, regular dishwasher drainage inspections can prevent overflows or leaks that risk water damage. To streamline the process, I use an online booking system that sends reminders and allows me to specify concerns. This proactive approach helps maintain your appliances under warranty, especially when combined with proper installation standards outlined in this guide to reliable appliance installation. Remember, a little preventative care today can stave off emergencies tomorrow.
Embrace Long-Term Results Through Consistent Upkeep
Maintaining appliances isn’t one-time work — it’s an ongoing commitment. I’ve found that logging maintenance activities, such as filter replacements or cleaning schedules, in a dedicated notebook or digital app helps me stay on top of tasks. For instance, consistent cleaning of refrigerator coils with a brush and vacuum significantly extends the unit’s lifespan and efficiency (see this expert advice). Moreover, keeping an eye on manufacturer-recommended service intervals ensures warranty validity. In the future, I predict smart diagnostic tools integrated with mobile apps will make maintenance even more intuitive, alerting homeowners to issues before they escalate. Until then, developing a routine and using precise tools will keep your appliances dependable for years to come.
How can I best maintain appliance performance over time?
Simple steps like verifying grounding with a multimeter, scheduling regular professional check-ups, and maintaining cleanliness are key. Investing in reliable tools and proactive routines not only preserves warranty benefits but also optimizes performance, saving money and stress. For detailed guidance on such maintenance strategies, consult trusted resources like this comprehensive guide to warranty-backed services. Try implementing a quarterly maintenance check, including testing grounding and inspecting critical parts; soon, you’ll notice fewer breakdowns and longer appliance life.
What I Didn’t Expect About Safe Appliance Installations
One of the most eye-opening lessons I learned was how easily overlooked details during installation could compromise safety and warranty coverage. Even a minor misconnection or neglect of grounding can lead to electrical hazards or void your warranty altogether. My biggest realization? Proper grounding isn’t just a technical step; it’s a safeguard that protects your home and your investment, often saving you money and stress in the long run.
Key Takeaways from My Personal Experience
- Never underestimate the importance of following manufacturer instructions—skipping steps like grounding can have serious consequences.
- Investing time in visual inspections and testing tools like a multimeter can prevent future costly repairs or hazards.
- Document your work thoroughly; photos and notes can be invaluable if warranty claims or professional audits are needed later.
Tools and Resources That Truly Make a Difference
I found that having a reliable multimeter and a good voltage tester transformed my ability to ensure safety. Brands like Fluke are trusted for their accuracy, which is critical when verifying grounding quality. Additionally, consulting professional installation guides and trusted service providers—like those listed on this page—can give you peace of mind, especially for complex appliances or high-end models.
Your Next Move Toward Safer, Smarter Living
Remember, taking proactive steps with your appliance installations and maintenance not only extends their lifespan but also keeps your home safe and your warranties intact. Dive into the details, use trusted tools, and don’t hesitate to seek professional help when needed. Your efforts today will pay off in peace of mind tomorrow. Are you ready to double-check your appliance grounding and secure your home’s safety? Let me know below, and share your experiences or questions to inspire others on their journey.