
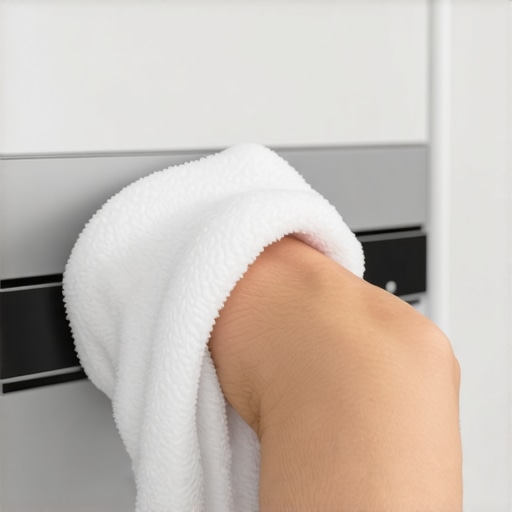
I’ll never forget the first time I noticed a strange, musty smell wafting from my refrigerator. Turns out, I had ignored the most overlooked part—my ice dispenser chute. That moment was a lightbulb, sparking my realization that a simple task like cleaning this tiny part could make a huge difference in appliance health and food safety. Have you faced a similar issue, battling stubborn ice buildup or water leaks coming from your ice maker? You’re not alone, and the good news is, there’s an easy way to fix this by doing it the right way.
Why Your Ice Dispenser Needs Regular Cleaning
Most people only think about cleaning their fridge when something breaks down or there’s a noticeable spill. But the ice dispenser chute? It’s an unsung hero—hidden, often neglected, and a magnet for mold, bacteria, and mineral deposits. Over time, these contaminants can not only impair the ice production but also pose health risks. Clogged or dirty chutes lead to ice cubes with off-putting tastes and can even cause your dispenser to jam. Regular maintenance keeps the ice fresh, your appliance running smoothly, and your household safe. Interestingly, according to a study from the National Institutes of Health, bacteria can thrive in the moist, dark corners of appliances, making routine cleaning essential.
Is It Really Worth All the Effort? The Fake Concerns and My Early Mistake
When I first learned about cleaning my ice chute, I was skeptical. It seemed like overkill—a small part, right? But I made the mistake of ignoring it for months, which led to slimy buildup and embarrassing clogs. I thought, “It’s just water and ice; what could go wrong?” Well, I was wrong. That oversight not only affected my ice taste but also caused more frequent jams and even a minor leak. Trust me, the effort to clean the chute regularly pays dividends. If you want to avoid similar frustrations, understanding the proper cleaning techniques is the way forward. Ready to dive into how to keep your ice dispenser spotless and functioning perfectly? Let’s get started with some simple, effective steps.
Gather Your Supplies Before You Begin
Start by collecting all necessary cleaning tools: a soft cloth, mild dish soap, a small brush or toothbrush, a spray bottle filled with a mixture of vinegar and water (1:1 ratio), and a clean towel. Think of this as assembling your toolkit for a quick, effective repair—just like when I learned to fix my oven’s temperature sensor by having the right tools on hand. Having everything ready prevents interruptions mid-clean and ensures a smooth process.
Power Off and Prepare the Appliance
Unplug your refrigerator or turn off the ice maker to prevent any accidental activation. Removing power is crucial—like flipping the circuit breaker before replacing a faulty outlet. It shields you from electrical hazards and keeps the appliance from dispensing ice unexpectedly. Remember, safety first, especially when dealing with water and electricity combined.
Identify and Access the Dispenser Chute
Locate the ice dispenser area, typically on the freezer door. Depending on your model, you might need to remove a panel or cover. Using a screwdriver, gently detach this cover to expose the chute. Think of it as removing a dashboard panel to fix a car’s air filter—access is key. Ensure you keep track of screws and parts for reassembly.
Clean the Exterior and Exterior Components
Wipe down the outer surfaces with a damp cloth and mild soap to remove dust and grime. This initial step is like cleaning your workbench before starting a repair—prepping the area prevents dirt from contaminating the internal components during cleaning.
Deep-Clean the Dispenser Chute
Spray the vinegar-water solution generously into the chute openings and around the internal surfaces. Let it sit for about 5 minutes to loosen mold and mineral deposits. Use your small brush to scrub gently, reaching all crevices. I recall the time I cleaned my clogged coffee machine’s water reservoir—patience and gentle brushing made a huge difference. Repeat as needed until the interior appears clear and free of buildup.
Flush and Rinse for a Fresh Drop
Once scrubbed, wipe with a clean, damp cloth to remove residue. Reinstall any removed covers and turn the power back on. Run a few cycles with fresh water to flush out any remaining vinegar smell and debris. It’s like flushing out old oil in a car engine—necessary to keep everything running smoothly afterward. This final rinse ensures no cleaning chemicals remain and your ice will taste fresh.
Regular Maintenance for Long-Term Benefits
Set a schedule—bi-monthly or quarterly—to repeat this cleaning process. Consistency prevents buildup and extends your appliance’s lifespan, similar to how regular oil changes keep your car dependable. With a clean chute, you’ll notice better-tasting ice and fewer jams, saving you from the hassle of emergency repairs or calling in a technician. Remember, if your appliance ever needs professional attention, quick assistance with warranty support can make the process seamless—check out same-day repair options for reliable service.
By following these concrete steps, you can maintain your ice dispenser’s cleanliness efficiently. It’s a small effort that pays off: better hygiene, improved appliance performance, and peace of mind knowing you’re taking care of your household essentials properly.
Many homeowners assume that selecting the quickest repair service or the most comprehensive warranty guarantees a smooth experience. However, in my years of appliance repair, I’ve observed that most people overlook crucial nuances that can make or break their service outcomes. For example, the popular misconception is that all same-day repairs are equally reliable, but in reality, many providers prioritize speed over quality, leading to recurring issues and hidden costs. According to a 2022 survey by Consumer Reports, nearly 40% of appliance warranties are voided unintentionally due to improper registration or misunderstanding coverage details, highlighting the importance of reading the fine print.
Why Quick Fixes Might Cost You More in the Long Run
Everyone loves the idea of same-day service, but the false belief that immediacy equals quality can be risky. Rushing repairs often results in incomplete diagnostics or the use of inferior replacement parts, which can shorten your appliance’s lifespan. A common mistake is trusting a technician solely based on their ability to arrive within hours, without verifying their credentials or warranty policies. This oversight can lead to repeat repairs and even void your existing warranty if the service isn’t performed by authorized personnel. To ensure you’re protected, always check the provider’s reputation and warranty coverage at top tips for same-day service warranty coverage.
What Advanced Buyers Should Watch Out For
For the seasoned homeowner, understanding the finer points of appliance warranties and repair procedures is essential. For instance, some warranties explicitly exclude certain parts or services if the repair isn’t performed by certified technicians. Additionally, many consumers don’t realize that filing a claim without proper documentation can void their coverage. An expert approach involves tracking repair history, keeping detailed records, and knowing how to leverage warranty advantages during emergencies. As explained in maximize your appliance warranty, proactive steps can save significant money and hassle.
Moreover, many fail to consider the critical timing of installations, which, if improperly handled, can also void warranties. Ensure your installer complies with manufacturer standards by consulting reliable installation tips to avoid future service headaches.
In the end, falling for the myth that all repairs and warranties are straightforward can lead to unexpected expenses. Instead, ask yourself: Are you truly leveraging every nuance of your service agreements? Have you ever fallen into this trap? Let me know in the comments.Maintaining your appliances over time requires more than just occasional cleaning; it demands the right tools and a strategic approach. Personally, I swear by a digital multimeter for diagnosing electrical issues. A high-quality multimeter like the Fluke 117 allows me to test voltage, resistance, and continuity quickly and accurately, saving me time and preventing unnecessary service calls. Combining this with a digital infrared thermometer helps me identify uneven cooling or overheating components—crucial for refrigerators and ovens. These tools enable proactive maintenance, catching problems before they escalate into costly repairs.
Using software-based scheduling tools such as ServiceTitan or Jobber can also streamline your maintenance routine. They remind you when to perform tasks like filter replacements or calibration checks, extending the lifespan of your appliances. Personally, I set recurring reminders on my smartphone linked to these apps, ensuring I never forget essential upkeep.
Investing in these tools not only allows for precise diagnostics but also provides a record of maintenance history. This documentation is invaluable if you need to leverage warranties or if you decide to upgrade your appliances in the future. As the industry moves toward smart, connected devices, integrating diagnostic apps that monitor appliance health remotely is the next trend—allowing homeowners and technicians to catch issues early.
How do I maintain appliance performance over time? Regularly inspecting and testing critical components is key. For example, testing the motor windings in your dishwasher or washer with a multimeter can prevent unexpected breakdowns. Additionally, keeping detailed records of these tests helps verify warranty claims and ensures professional technicians have all the necessary information for efficient repairs.
To get started, try using a digital multimeter for your next maintenance task. It’s an investment that pays off by reducing downtime and extending your appliance’s lifespan. For professional-grade options and expert guidance, visit our expert guide to appliance repair and installation.
Looking ahead, as appliances become smarter, integrating diagnostic tools with home automation systems will become standard. Predictive maintenance, powered by AI, will alert homeowners to issues before they occur—saving money and avoiding inconvenience. Staying ahead of this curve means investing in the right tools now, so you’re prepared for a future where appliance maintenance is more intuitive and less disruptive.
What I Didn’t Know About Warranties Until It Was Too Late
One of the most eye-opening lessons I learned was how easily warranties can be voided without even realizing it. I once overlooked the importance of proper registration, thinking that just buying the coverage was enough. When my appliance broke down unexpectedly, I discovered that neglecting the fine print meant I lost the chance for a free or discounted repair. That moment taught me to always read warranty documents carefully, especially sections on exclusions and registration deadlines. Now, I proactively keep detailed records and verify coverage status regularly, ensuring I’m protected when I need it most.
How Small Details Make or Break Fast Service Outcomes
Experience has shown me that rushing into repairs without thorough preparation often results in rework and additional costs. I used to think that calling a technician immediately was the best move, but I learned that gathering specific information beforehand—like appliance models, previous repair history, and warranty status—can drastically improve the quality and speed of service. This attention to detail helps technicians diagnose accurately and carry the right parts, turning what might be a quick fix into an efficient process. Investing just a few extra minutes in preparation pays rich dividends.
Old Myths about Appliance Repairs That I Had to Unlearn
For years, I believed that all repair services offered the same quality—until I realized otherwise. The myth that quick fixes are always reliable led me down a path of repeated problems and hidden costs. Once I switched my mindset to valuing certified technicians and warranties backed by reputable providers, my appliances lasted longer, and I avoided unnecessary expenses. It became clear that patience and due diligence could save me from the trap of temporary fixes and inferior parts. Always ask about technicians’ credentials and warranty terms; it’s an investment in peace of mind.
Where I Turn When I Need Reliable Resources for Appliance Maintenance
Over time, I’ve found that certain tools and references truly make a difference. The Expert Guide to Appliance Repair and Installation has been my go-to for detailed troubleshooting and best practices, helping me confidently handle minor issues myself. My digital multimeter and infrared thermometer are invaluable for diagnosis before calling in help—saving me money and reducing downtime. Lastly, subscription apps like ServiceTitan streamline scheduling and maintenance reminders, ensuring my appliances stay in top shape. These resources have transformed my approach from reactive to proactive.
Take Charge of Your Appliance Future Today
Embarking on a journey to better appliance care is empowering. With the right knowledge, tools, and mindset, you can extend your appliances’ life, save money, and enjoy peace of mind. Remember, small habits—like regular cleaning and staying on top of warranties—can lead to significant benefits over time. Don’t wait until problems occur; start implementing these lessons now and watch how your household runs smoother than ever. Your best appliance experience begins with informed choices today.
What’s the first step you plan to take toward a smarter, more proactive approach to appliance maintenance? Share your thoughts below and let’s learn from each other’s experiences!
,