
I stood there, barefoot in a growing puddle of lukewarm, greasy water, wondering why my high-end dishwasher was suddenly acting like a garden hose. It was 11 PM, and the wood floors were already starting to cup. My first instinct was to panic and call for same-day appliance repair, but after I mopped up the mess, I realized I’d made a classic rookie mistake. I’d ignored a tiny drip for weeks, thinking it was just condensation. I’ve been there, trust me—I once paid a pro a $150 service fee just to watch him pull out a cracked plastic sump gasket that I could’ve replaced myself for the price of a latte. It’s embarrassing, but it’s how I learned that the smallest parts are often the biggest troublemakers. Today, I’m going to show you exactly how to identify that flimsy plastic culprit and fix it before you have to replace your entire floor.
Don’t Let a Flimsy Seal Cost You Thousands
The reality of modern dishwashers is that they are built with efficiency in mind, which often means lighter, plastic components where we used to see heavy-duty rubber or metal. One specific plastic gasket—the one sitting right at the base of your motor assembly or the heating element inlet—is the most common culprit for those “where did that come from?” leaks. If you’ve noticed water pooling near the front feet, it’s rarely a catastrophic pump failure; it’s usually that seal losing its grip. This is exactly the kind of thing that makes people think they need a whole new appliance installation, when in fact, they just need ten minutes of DIY work. According to data from Consumer Reports, nearly 30% of dishwasher-related homeowners’ insurance claims stem from slow, internal leaks that go unnoticed until structural damage occurs. This is why being proactive is your best defense against a massive renovation bill.
Is a Tiny Piece of Plastic Really Worth the Panic?
You might be skeptical. How can a ring of plastic no thicker than a rubber band hold back gallons of pressurized water? The truth is, it can’t—not once it starts to warp, go brittle, or crack from excessive heat. I’ve seen these gaskets fail because of high-heat dry cycles or even just using the wrong, overly-abrasive detergent. If you are struggling with a persistent wet spot, you might also want to check the hidden drain in your dishwasher or ensure you have the drain hose high loop installed, as backpressure can also stress these delicate seals. Have you ever walked into your kitchen and felt that telltale squish under your rug? Tell me I’m not the only one who ignored it for too long! We’re going to dive into how to spot the failure before your floorboards start screaming.
Get Your Eyes Under the Machine
First, you have to get low. I’m talking belly-on-the-floor low. Before you even think about calling for same-day appliance repair experts, you need to remove the toe kick—that metal or plastic strip at the very bottom of your dishwasher. Usually, it’s just two Phillips-head screws holding it in place. Once that’s off, grab the brightest flashlight you own. I remember the first time I did this; I expected to see a geyser. Instead, I saw a single, rhythmic drip… drip… drip… falling from a translucent plastic nut. It looked so insignificant, but that tiny leak is the silent killer of subfloors. If you see water tracking down the side of the plastic sump housing, you’ve found your target. Finding the leak yourself is the best way to get affordable same-day appliance fixes with warranty benefits later if you decide the job is too big, because you’ve already done the diagnostic legwork.
The Paper Towel Test Never Lies
If everything looks bone-dry but you still have a puddle in the morning, use the paper towel trick. Wrap a dry paper towel around the base of the motor and the heating element inlets. Secure them with a rubber band and run a short rinse cycle. When the cycle ends, check which towel is wet. This is how I discovered that my leak wasn’t coming from the door, but from a hairline fracture in the plastic gasket surrounding the heating element. It’s a precision game. Sometimes the secret to fixing a dishwasher that wont spray water properly is actually fixing a leak that’s dropping the internal pressure just enough to weaken the wash arms.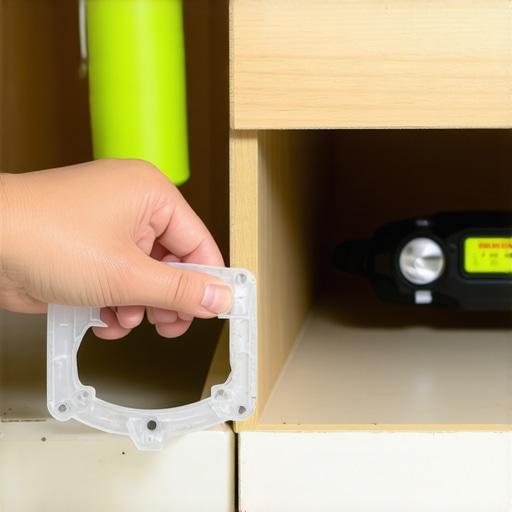
Swap the Seal Before the Floor Swells
Once you’ve identified the failing plastic seal, you need to drain the unit completely. I mean bone dry. I use a turkey baster to get the last bit of water out of the sump—it’s tedious, but it beats having a gallon of gray water dump into your lap when you pull the motor. Most of these plastic gaskets are ‘press-fit’ or ‘twist-lock.’ To replace them, you’ll likely need to reach under the unit and unscrew a plastic retaining nut. A word of caution: these nuts are almost always plastic-on-plastic. I once used a pair of heavy-duty channel locks and sheared the threads right off because I was being too aggressive. You want a firm grip, but imagine you’re opening a jar of expensive pickles—don’t crush the lid. If the parts are stubborn, it might be a sign of improper appliance installation from the start, where things were cross-threaded at the factory.
Watch Out for Brittle Plastic
As you pull the old seal out, look at its texture. If it feels like a hard cracker rather than flexible vinyl, heat has done its job. When installing the new one, I always apply a tiny dab of food-grade silicone grease. This helps the plastic slide into place without catching or tearing. I learned this the hard way after pinching a brand-new $12 gasket and having to start all over again. You want that seal to sit perfectly flush against the tub. Any gap, even one the width of a fingernail, will fail the moment the water hits 140 degrees. If you’re unsure about the torque, remember that most plastic components only need to be ‘hand-tight plus a quarter turn.’ Overdoing it is the fastest way to turn a ten-minute DIY fix into an evening of regret and a ruined weekend.Let’s dig deeper into why so many of us wait until the kitchen is a lake before taking action. The most common mistake I see isn’t failing to fix the leak—it’s waiting for a ‘convenient’ time to do it. We often think that scheduling your appliance repair for same-day service in 2025 is an emergency-only tactic, but the real pros use it as a preventative strike. If you spot that rhythmic drip I mentioned earlier, every hour you wait is another hour of moisture wicking into your subfloor. By the time you see the floor cupping, the repair cost has likely tripled because you’re no longer just fixing a gasket; you’re hiring a flooring contractor.
Stop Waiting for the Kitchen to Flood
In my years of tinkering, I’ve found a massive contrarian truth: the ‘if it ain’t broke, don’t fix it’ mentality is exactly what kills modern high-efficiency machines. These units rely on tight tolerances. A tiny drop in pressure from a failing seal can force the motor to work 15% harder to maintain spray arm velocity. This leads to premature motor burnout. Most homeowners assume a small leak is just an aesthetic nuisance, but it’s actually a mechanical vampire. If you aren’t ready to pull the motor yourself, looking into what to expect from same-day appliance repair experts can save you from a $400 motor replacement down the road.
Will My Insurance Actually Cover a Slow Leak?
This is the question that keeps people up at night. The nuance here is brutal: most standard homeowners’ insurance policies cover ‘sudden and accidental’ water damage, but they often flat-out deny claims for ‘gradual seepage.’ This is why documenting your maintenance is vital. If you can show that you’ve been proactive, you have a much better chance. I always recommend learning how to prove periodic maintenance to keep your warranty valid. Keep a digital log of when you cleaned the filters or replaced a seal. It sounds overkill until you’re staring at a $5,000 restoration bill and an insurance adjuster who is shaking their head.
The Legal Shield You Didn’t Know You Had
There is a huge myth that if you touch a single screw on your dishwasher, your manufacturer warranty is instantly void. This simply isn’t true in the United States. Under the Magnuson-Moss Warranty Act, a manufacturer cannot void your entire warranty just because you performed your own maintenance or used a third-party part, unless they can prove your specific action caused the failure. However, the ‘trap’ here is documentation. If you replace that plastic gasket and six months later the control board fries, the company might try to blame your ‘unauthorized repair.’ This is often the reason your warranty claim was denied—not because you did the work, but because you couldn’t prove the work was done correctly. Always take ‘before and after’ photos of your DIY fixes.
The Documentation Trap and How to Avoid It
The ‘oops’ factor usually happens during the reassembly. People get the new seal in, feel great about themselves, and then forget to check the tension of the surrounding components. If you’re not confident in the torque or the fit, it’s worth getting an expert guide to appliance repair and installation today to ensure the structural integrity of the housing remains intact. Have you ever fallen into this trap where a ‘simple’ fix led to a bigger headache later? Let me know in the comments! Sharing our ‘fail’ stories is how we all get better at keeping our kitchens dry and our wallets full.To truly get these repairs right, I’ve stopped relying on the ‘trial and error’ method and started building a specific ‘leak-hunter’ kit. I don’t go anywhere near a dishwasher without my Klein Tools non-contact voltage tester and a $10 telescoping inspection mirror. The mirror is the real hero here; it allows you to see the back side of the sump assembly where your head simply won’t fit. If you see even a shimmer of moisture reflecting back at you in that mirror while the machine is running, you know you’re headed for a world of hurt. Many people ignore these signs until they are forced into calling for an emergency fridge repair or a dishwasher technician, but seeing it early is the only way to stay ahead of the curve. 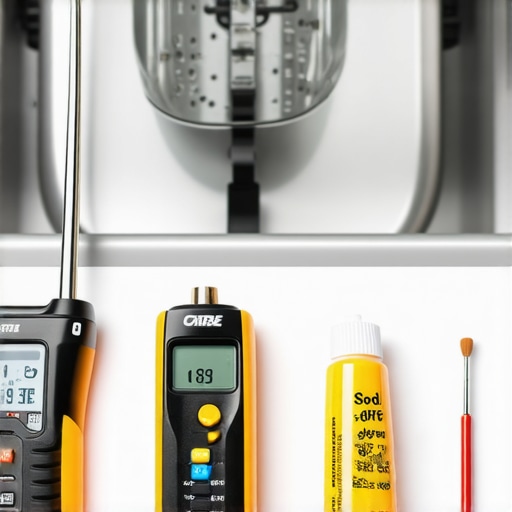
How Do I Stop These Plastic Seals from Cracking Again?
The biggest threat to those plastic gaskets isn’t just time; it’s the chemistry of your kitchen. According to technical documentation from the Association of Home Appliance Manufacturers (AHAM), the elastomers and polymers used in modern seals can degrade significantly faster when exposed to high-alkaline detergents without proper rinsing. To combat this, I’ve switched to using a high-quality rinse aid religiously. It doesn’t just help with drying dishes; it actually acts as a mild lubricant for the gaskets, keeping them supple rather than brittle. I also recommend following top tips for same-day service warranty coverage by ensuring you never use industrial-grade descalers unless specifically mentioned in your user manual. If you over-clean with harsh acids in an attempt to remove hard water stains, you’ll be looking for same-day appliance repair quick solutions much sooner than you anticipated.
The Future Is Already Sensing Your Next Leak
We are rapidly moving toward a world where your dishwasher will tell you it’s leaking before you ever see a single drop on the floor. Predictive maintenance sensors—specifically small hygrometers integrated into the plastic base pan—are already becoming standard in high-end European models. Within five years, I predict that warranty-backed appliance services you can rely on will shift toward remote monitoring subscriptions. A technician might show up at your door not because the machine broke, but because the control board ‘phoned home’ about a microscopic drop in pressure. This shift will make pure DIY slightly more complex as components become more integrated with smart hubs, but the fundamental physics of a plastic ring holding back water will remain the same. If you’re ready to take this seriously, my advanced tip is this: go buy a small tube of food-grade dielectric grease. Every time you have a panel open for a routine cleaning, dab a tiny bit on the electrical connectors for the sensors and the edges of the plastic gaskets. It prevents the corrosion and ‘stiction’ that leads to those frustrating ‘ghost’ error codes that stop a cycle mid-way. Don’t wait for the puddle to prove me right—grab a flashlight and check that sump tonight!
The Unspoken Reality of Dealing with Fragile Gaskets
After years of mopping up messes, I’ve realized that the drip isn’t the problem; it’s the wait. Here are a few things I learned the hard way about those tiny plastic components:
- Plastic has a memory: Once a plastic nut is over-tightened or warped by heat, it rarely returns to its original shape. If you see white stress marks on the plastic housing, don’t try to save it—replace it immediately.
- Soap matters more than you think: Cheap, caustic detergents act like sandpaper on these delicate seals. Switching to a high-quality detergent can literally double the life of your internal gaskets by maintaining their elasticity.
- Your ears are early-warning sensors: If your dishwasher starts making a high-pitched whistle or a faint sucking sound during the fill cycle, it’s often air being pulled through a failing seal before the water even starts to leak.
The Gear That Separates Amateurs from Pros
You don’t need a truck full of specialized tools to handle these leaks, but you do need the right ones. My personal go-to list for any dishwasher job includes these essentials:
- Telescoping Inspection Mirror: This is non-negotiable. It allows you to see the back of the motor assembly and the heating element terminals without pulling the entire unit out.
- Food-Grade Silicone Grease: It’s the secret to getting a perfect seat every time. It keeps the plastic from catching or tearing during installation.
- A Dedicated Maintenance Log: Knowing how to prove periodic maintenance to keep your warranty valid is just as important as the wrench you use.
- Hard Water Filtration: If you live in an area with heavy mineral deposits, the hard water filter your dishwasher desperately needs can prevent those minerals from tearing up your seals from the inside out.
#IMAGE_PLACEHOLDER_E#
Protect Your Home Before the Puddle Grows
Fixing a dishwasher might feel like a weekend chore, but it’s actually a form of home defense. By catching that tiny leak today, you are preventing mold, warped subfloors, and the crushing stress of an unexpected kitchen renovation. Whether you decide to tackle the replacement yourself or look for warranty-backed appliance services you can rely on, the key is speed. Don’t let a $10 plastic ring turn into a $1,000 floor repair. You’ve got the knowledge now, so go grab that flashlight and check the sump area tonight! Modern scheduling for same-day appliance repair is a great safety net, but avoiding the emergency altogether is the true mark of a pro homeowner.
Have you ever discovered a tiny leak just in the nick of time? Let me know your close-call stories in the comments below!