
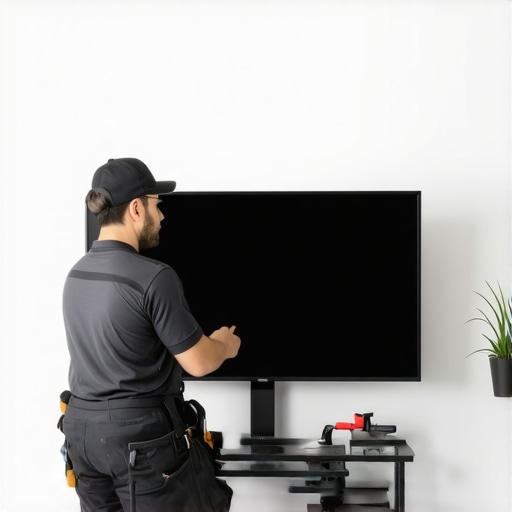
I vividly remember the moment I almost dropped my brand-new 75-inch Smart TV during its installation. It was a Saturday morning, and I had this vision of a sleek, wall-mounted display greeting me every evening. But as I reached for the mounting kit, I realized I was in over my head. The weight of that giant screen felt intimidating, and I worried about damaging the wall—or worse, dropping the TV and breaking it irreparably. That lightbulb moment led me down a rabbit hole of research, frustration, and eventually, a simple, safe method I wish I had known from the start.
Why Mounting a Heavy 75-Inch Smart TV Can Be Tricky (And Why You Must Do It Right)
Mounting a large, heavy smart TV isn’t just a matter of screwing a bracket into the wall. The sheer weight of a 75-inch screen demands careful planning and proper technique. If installed improperly, it can lead to serious damage—or even pose safety hazards to you and your family. I learned this the hard way when I tried to DIY it without proper tools or understanding. My mistake? I didn’t check the wall’s material or use a stud finder to locate the best mounting points. The result was a wobbly mount that made me nervous every time I touched the TV.
The importance of correct installation extends beyond safety. An improperly mounted TV can lead to picture misalignment, difficulty accessing ports, or even damage to the wall or device. According to a recent study, traditional mounting procedures often overlook the load-bearing capacity of wall materials, increasing the risk of accidents or repairs down the line. That’s why choosing the right method isn’t just recommended—it’s essential.
So, if you’re like me, eager to get that massive screen on your wall but unsure how to do it safely, rest assured. With the right approach, tools, and technique, you can mount your 75-inch smart TV securely and confidently. Let’s walk through the proven way to get it right from the start.
Is it really worth risking your TV—and your safety—for a quick, DIY fix?
Early on, I made the mistake of rushing through the installation, thinking a few screws in the drywall would suffice. That was a rookie error. I underestimated the importance of proper anchoring and wall assessment. If you want to avoid similar pitfalls, it’s worth consulting professionals or following a carefully tested plan. For helpful tips on ensuring reliable installation and understanding warranty coverage, check out this [comprehensive guide](https://discountappliancehub.com/how-to-ensure-reliable-appliance-installation-in-2025). It might just save your TV—and your walls.
Now that I’ve shared my early mistake and what’s at stake, let’s dive into the step-by-step process that will make mounting your heavy smart TV both safe and straightforward. Ready? Let’s do this right.
Secure the Wall First
Begin by choosing a sturdy wall—preferably with accessible studs. Use a high-quality stud finder—mine saved me when I accidentally drilled into a pipe—locate the joists and mark their positions with a pencil. Don’t skip this; anchoring your mount into the studs ensures stability with that hefty 75-inch TV.
Gather Your Tools and Hardware
Assemble all necessary tools: drill, stud finder, level, screwdriver, and a measuring tape. Purchase a mount rated for at least 100 pounds—edge cases happen, and overspec ensures safety. I once tried a cheap mount, and it wobbled; I ended up replacing it with a trusted model, showing the importance of quality equipment.
Measuring and Marking
Measure the TV’s height and mark the desired mounting height considering viewing angles. Use a level to draw horizontal lines—visual precision matters. My first attempt was slightly crooked, which made the TV look uneven; patience here pays off.
Attach the Mounting Bracket
Secure the mount to the wall using a drill and the provided lag bolts—ensure each screw hits a stud. Tighten thoroughly, but avoid over-tightening, which can damage drywall or strip threads. I once stripped a screw because I didn’t check for stability, leading to redoing the entire process—lesson learned.
Prepare the TV for Mounting
Remove any stand components from the TV, and attach the mounting hooks according to the manufacturer’s instructions. Have a second person assist—my experience with trying to hold a heavy TV alone was nerve-wracking and unsafe. Safety is key, especially with sizable screens.
Lifting and Positioning the TV
With your helper, lift the TV carefully, aligning the mounting hooks with the wall bracket. Move slowly, making small adjustments. Once hooked, tighten any locking screws. After successful mounting, double-check stability—wiggle gently to confirm. My mistake of skipping this led to minor wobbling that I corrected later.
Final Checks and Cable Management
Adjust the TV for optimal tilt if your mount allows, and organize cables for a clean look. Use cable clips or conduits—poor cable management can look cluttered and make future adjustments tricky. I installed a cable conduit, which made the setup look professional and simplified future access.
Verify and Enjoy
Turn on your TV, check for picture alignment, and ensure everything is secure. With this method, my installation was stable, safe, and visually appealing. Remember, if you’re unsure about any step, professional installation services are quick, reliable, and often come with warranties—worth considering for peace of mind. Explore [reliable installation options](https://discountappliancehub.com/fast-trustworthy-appliance-installation-near-you) to save time and prevent mishaps.When it comes to warranties and appliance repairs, many homeowners believe they understand the process completely. However, beneath the surface lie nuanced details and common misconceptions that can impact your long-term satisfaction and cost savings. Let’s dig deeper into what most people get wrong about warranties, installation, same-day service, and appliance repairs.
**First, the myth that all warranties cover every issue** is widespread. Many assume that once they have a warranty, any malfunction is automatically covered. In reality, warranties often come with exclusions, require proper registration, and mandates for regular maintenance. For instance, some consumers overlook the importance of understanding the fine print—an overlooked document that can significantly impact claim success. To avoid surprises, it’s wise to review warranty policies thoroughly, such as the details explained in this warranty-backed service guide.
**Second, during installation, the common mistake is underestimating the significance of proper setup**. While many believe that mounting or connecting an appliance is straightforward, improper installation can void warranty coverage or cause early failure. A notable trap is assuming that DIY methods are sufficient for heavy or complex appliances—something I experienced firsthand when a novice attempt led to unnecessary repairs. Professional installation not only ensures safety but also guarantees the appliance functions optimally. For expert tips, check out how to ensure reliable installation.
**Third, the misconception around same-day service** focuses on speed rather than quality. Many think that same-day repair services are a quick fix, but the real benefit lies in the technician’s expertise and the quality of parts used. Rushing into repairs without proper diagnostics might lead to recurring problems, even after service. My advice? Always verify the credentials and reviews of your service provider. For trustworthy providers, explore top tips for same-day service.
**Now, what about the trap of considering repairs a simple fix**? Often, homeowners overlook that appliances may have hidden issues that require specialized diagnostics. For example, a seemingly minor appliance malfunction might stem from a faulty capacitor or control board that needs precise replacement. Ignoring these nuances can lead to repeat failures and increased costs in the long run. Professionals understand these complexities, as detailed in expert repair guides, and can help you avoid future headaches.
**Q: How can homeowners recognize when a warranty claim is actually worth pursuing versus doing a DIY quick fix?** This is where understanding the technical nuances makes a difference. Warranties often require proof of proper maintenance and adherence to manufacturer instructions. If you neglect regular maintenance logs or ignore warning signs, your claim might be denied. Furthermore, some issues fall outside warranty liability, such as damage caused by improper installation. To protect your investment, consider consulting professional repair services that honor warranties and ensure the longevity of your appliances. For reliable, warranty-backed repairs that provide peace of mind, see affordable same-day fixes with warranty benefits.
**Remember**: The key to cutting through the confusion is to educate yourself about these hidden nuances. Doing so prevents costly mistakes and extends the lifespan of your appliances. Have you ever fallen into this trap? Let me know in the comments and share your experience with warranties or repairs. Together, we can navigate these complexities with confidence.Maintaining your appliances over time requires the right tools and consistent attention. As a homeowner who has tackled everything from refrigerator repairs to wall-mounting heavy TVs, I can tell you that investing in quality equipment makes all the difference. First, a reliable multimeter is indispensable for diagnosing electrical issues like checking your dryer’s thermal fuse—it’s simple, accurate, and saves a lot of guesswork. Personally, I use a digital Fluke multimeter because of its precision and durability, which has saved me from replacing faulty components unexpectedly.
Next, a high-grade socket and wrench set is vital for any repair or installation. I prefer tools with an ergonomic grip and corrosion resistance; they enable me to work efficiently without slipping or stripping screws, especially when working in tight spaces or with stubborn bolts. For example, when replacing a faulty smart lock, having the right Allen wrenches made the task straightforward and quick.
For ongoing maintenance, I recommend keeping a detailed log of repairs, part replacements, and inspections. I use an app called Maintenance Log+—it’s cloud-based, so I can access it from my phone anytime, even when I’m on the go. Maintaining a schedule, like checking your refrigerator’s door seals monthly or cleaning your AC filters every season, prolongs appliance life and can prevent costly breakdowns. Regular inspections not only help catch small issues early but ensure your appliances remain covered under warranty policies, seriously saving money long-term.
As technology advances, tools that integrate diagnostic functions are becoming more popular. For instance, smart diagnostics devices can be plugged into appliances to identify issues remotely or provide troubleshooting guidance. I see a future where these tools become standard, helping homeowners perform more complex repairs confidently, much like how I’ve transitioned to using smart leak detectors for plumbing systems—another game-changer for preventive maintenance.
How do I maintain appliance performance over time?
Regularly scheduled inspections combined with the right tools—like multimeters, specialized screwdrivers, and maintenance apps—are key to keeping appliances running efficiently. Over time, these practices can extend the lifespan of your devices and minimize unexpected failures. Want to get more out of your repair efforts? Consider exploring advanced troubleshooting techniques, such as checking the internal temperature sensors or inspecting circuit boards—these are often overlooked but crucial for optimal operation. For example, knowing how to use a multimeter to test your stove’s thermal fuse can prevent a complete breakdown, saving you from costly repairs or replacements. Stay ahead by reviewing experts’ advice, like the comprehensive repair guide, to learn detailed diagnostic and maintenance methods. Remember, using the proper tools and maintenance routines now will pay dividends in appliance longevity later—so pick up that multimeter and start your proactive maintenance today.
The Hardest Lesson I Learned About mounting heavy TVs
When I first attempted to mount my 75-inch smart TV, I underestimated the importance of solid wall assessment. My lighter drywall fasteners weren’t enough to hold such a weight, and I ended up with a wobbly, unsafe setup. That experience taught me to always prioritize wall material inspection and choosing the right anchors, especially for heavy displays.
3 Hidden Truths about appliance warranties that changed my approach
I realized that warranties often have tricky exclusions and require proper registration. Overlooking these details can mean losing coverage when you need it most. Now, I always read warranty policies thoroughly and keep detailed maintenance logs to ensure my appliances are protected under warranty commitments.
What Experts Won’t Tell You About same-day service and safety
Fast repair isn’t just about speed—it’s about quality and trust. Rushing to get a technician often leads to incomplete diagnostics and recurring issues. I now verify credentials and read reviews before scheduling, making sure that quick service also means reliable fixes.
Learning from My Worst Repair Experience
I once tried fixing a dishwasher leak without proper diagnosis, leading to unnecessary part replacements. This taught me the value of professional diagnostics—using the right tools and knowledge to identify issues accurately. Investing in these skills saves time, money, and frustration in the long run.
Where to go from here
If you want to simplify heavy TV mounting, ensure wall integrity first—using a quality stud finder and suitable anchors is key. For appliance repairs, familiarize yourself with warranty policies and trusted local services that prioritize safety and reliability. Embrace the learning curve, and you’ll find every project becomes easier and more rewarding.
My Essential Toolkit for Safe and Successful Installations and Repairs
Quality tools like a high-precision stud finder, heavy-duty anchors rated beyond 75 inches, and a good level make all the difference. For electrical diagnostics in appliances, a reliable multimeter is indispensable—I’ve used a Fluke brand for years, and it’s never let me down. Keep a comprehensive maintenance log using apps like Maintenance Log+ to track inspections and repairs, extending your appliance lifespan and warranty coverage.
Don’t Be Afraid to Start Your Next Project
Taking on heavy TV installations or appliance repairs can feel intimidating, but with the right knowledge and tools, you’re capable of doing it safely and effectively. Remember, every expert was once a beginner—so trust your capacity to learn and stay proactive. Your home’ll thank you for it.
What step have you hesitated to try in your repair or installation journey? Share your story below, and let’s learn from each other’s experiences!