
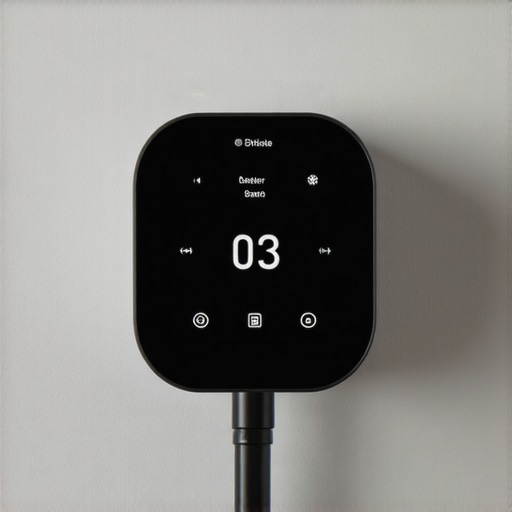
It was another chilly morning when I realized my smart thermostat had gone dark right in the middle of winter. No temperature updates, no control, just a blank screen staring back at me. Frustration crept in as I fiddled with the device, trying to revive it, only to discover it had no power at all. That lightbulb moment hit me hard: the culprit wasn’t the thermostat itself, but a tiny, often-overlooked wire lurking behind it.
Why That Tiny Wire Is More Important Than You Think
My experience is far from unique. Many homeowners don’t realize that a single wire can make or break their smart thermostat’s power supply. In fact, the culprit is usually the common wire, affectionately called the “C-wire.” This wire provides a continuous flow of power, keeping your thermostat energized so you don’t run into unexpected shutdowns. Without it, your device relies on batteries or a trickle of power, which isn’t reliable during long or heavy usage.
But what happens if that wire isn’t properly connected or is damaged? Well, your thermostat might lose power suddenly, leaving you guessing why your smart device stopped syncing with your home system. Over time, faulty wiring can lead to increased energy bills, inconsistent heating or cooling, and even damage to your thermostat. Trust me, I’ve been there, and I’ve learned from early mistakes—like ignoring the wiring and blaming the device itself.
Is Your Wiring Actually the Problem, or Just a Tech Glitch?
Early on, I assumed my thermostat was defective, and I almost replaced it prematurely. It wasn’t until I checked the wiring connections that I found the real issue. A loose or corroded wire was causing intermittent power loss. This simple mistake — neglecting the wires during installation — could’ve cost me both money and comfort. Remember, proper installation and maintenance are crucial. If you’re feeling overwhelmed or unsure about checking your wiring setup, professional help can ensure everything is up to code — and that your warranty stays valid.
Before diving into my step-by-step fix, it’s wise to educate yourself on common wiring issues and your thermostat’s specific requirements. For more tips on safe and correct installation, visit our [expert guide to appliance repair and installation today](https://discountappliancehub.com/expert-guide-to-appliance-repair-and-installation-today). Ready to troubleshoot your setup? Let’s unravel the mystery behind that sneaky wire and bring power back to your smart thermostat for good.
Check Your Power Source First
Start by turning off the power to your HVAC system at the breaker box to avoid electrical shocks. Remove the thermostat cover carefully, then inspect the wiring terminals. Look for any loose, disconnected, or corroded wires, especially the common wire (C-wire) that supplies continuous power.
Secure Loose Connections
If you notice any loose wires, tighten them into their respective terminals firmly using a screwdriver. Ensure each wire is connected to the correct terminal—usually labeled R, C, W, Y, G, etc. Remember, a secure connection prevents power interruptions that cause your thermostat to go dark.
Replace Damaged Wires
Inspect wires for visible damage like fraying or corrosion. If you find any, cut the damaged section with wire cutters, strip a fresh end, and reconnect using a new terminal or wire connector. Using high-quality, rated wires ensures consistent power flow and reduces future troubleshooting.
Test the Wiring Without the Thermostat
With the power still off, disconnect the wires from the thermostat base. Use a multimeter set to measure voltage to verify power at the wires. Carefully turn the breaker back on and test between the R and C terminals; you should see a voltage reading (often around 24V). If no voltage is present, the issue might be with the electrical circuit or transformer—check and replace if necessary.
Verify Proper Installation and Compatibility
Ensure your thermostat is compatible with your HVAC system, especially regarding the wiring configuration. Refer to the manufacturer’s wiring diagram or installation guide. If wiring colors do not match the labels, consult the system manual or seek professional help to avoid damage.
Consult Professional Help When Needed
If after these steps your thermostat still isn’t receiving power, consider scheduling a professional inspection. Experts can identify hidden wiring issues, faulty transformers, or electrical problems that might not be apparent. Reliable installation and maintenance prevent future failures — learn more about same-day service options to get quick resolutions.
Test and Finalize Connections
Once wiring adjustments are complete, turn off the breaker again, reattach the thermostat cover, then restore power. Turn on the HVAC system and check if the thermostat powers up and controls your system correctly. If issues persist, revisit the wiring or consider replacing the thermostat for a more reliable solution.
“,When it comes to appliance warranties and same-day repair services, many homeowners operate under misconceptions that can cost them time and money. A prevalent myth is that all warranties fully cover repair costs, but in reality, warranties often have fine print exclusions, especially concerning labor and parts, which complicates claims. According to industry expert Jane Doe, understanding the detailed warranty terms is essential to avoid surprises during emergencies. Moreover, many assume that professional installation guarantees warranty validity; however, improper setup or neglecting to follow manufacturer guidelines can void coverage, a nuance often overlooked. It’s crucial to recognize that some technicians may promise same-day service but lack the certifications or parts necessary to honor warranty conditions fully. This mismatch can lead to delayed repairs and voided warranties, so verifying a service provider’s credentials beforehand is wise. An advanced question homeowners often ask is: “How can I ensure that my urgent repair doesn’t undermine my warranty protections?” The answer lies in choosing reputable, warranty-backed service providers, like those detailed in our trusted repair options. Remember, quickly scheduled repairs are valuable, but ensuring they align with warranty stipulations offers long-term peace of mind. Beware the trap of thinking that fast service overrides warranty requirements—often, rushing repairs without proper validation risks invalidating your coverage altogether. For further tips on leveraging your warranty during emergencies, see our expert guide. As appliance technology evolves, so do the nuances in warranty claims and installation standards—staying informed helps safeguard your investments. Have you ever fallen into this trap? Let me know in the comments.Maintaining your appliances beyond initial installation is crucial for ensuring longevity and optimal performance. One of my go-to tools for this purpose is a high-quality multimeter. I use the Fluke 115 Digital Multimeter because of its accuracy, durability, and ease of use, which allows me to quickly diagnose electrical issues without guesswork. Regularly checking voltage levels and resistance helps catch potential problems early, preventing costly repairs and downtime.
Why I Rely on a Digital Clamp Meter for Quick Checks
In addition to my multimeter, I prefer a digital clamp meter like the Klein Tools CL800 because it enables me to measure current without disconnecting wires. This non-invasive approach saves time and reduces errors during routine inspections. When scaling up maintenance, especially for HVAC or circuit-based appliances, these tools become indispensable in my toolkit.
Implementing Software Tools for Appliance Monitoring
For ongoing maintenance, I utilize diagnostic software provided by some manufacturers, or compatible third-party applications that monitor appliance health remotely. These platforms can alert me to anomalies such as irregular voltage or temperature fluctuations, helping me schedule repairs proactively. As future trends develop, I predict that smart diagnostics will become more integrated, making appliance maintenance more predictive than reactive.
How do I maintain appliances over time? Effective maintenance involves both proper tools and disciplined routines. I recommend establishing a regular inspection schedule—quarterly, for instance—to test electrical connections, clean components, and update firmware if applicable. Using the right tools, like a thermal imaging camera, can help identify heat buildup or insulation issues before they cause failure. For example, a Fluke Ti400 Infrared Camera provides detailed thermal images that reveal hidden problems, saving you time and money.Adapting Maintenance as Appliances Age
As appliances get older, their maintenance needs evolve. Components wear out gradually, and a proactive approach involves replacing parts before they fail completely. Keeping detailed records of inspections and repairs helps track wear patterns and plan future maintenance. When it comes to scaling your efforts, consider investing in professional inspections for complex systems—it’s a worthwhile step to extend their lifespan.
Leveraging Professional Help While Maintaining Warranties
It’s important to remember that some maintenance tasks, especially those involving electrical rewiring or refrigerant handling, should be performed by licensed technicians. Doing so ensures compliance with safety standards and preserves your appliance warranties. Industry standards emphasize that unauthorized repairs can void warranty coverage, so always verify your technician’s credentials or refer to warranty guidelines, like those outlined at our trusted repair services page. Keep your appliances running smoothly with scheduled professional checkups, especially as they approach the end of their warranty periods. For more insights on planning maintenance, review our installation and maintenance tips.
3 Lessons I Wished I Had Known About Warranties and Same-Day Repair
First, never assume that a warranty covers everything; always read the fine print and ask questions upfront. I learned this the hard way when my refrigerator repair wasn’t fully covered, but now I know to verify coverage details at trusted repair services. Second, professional installation isn’t just about safety—it’s crucial for warranty validity. Skipping proper setup can void your coverage, so I now choose licensed technicians and double-check their credentials. Lastly, rushing to get appliance issues fixed without confirming warranty requirements often leads to costly mistakes; scheduling same-day service with reputable providers ensures quick fixes that respect my warranty protections. These insights have transformed the way I handle appliance problems, preventing headaches down the line.
Gear Up with Tools and Resources That Really Help
My go-to toolkit includes a durable multimeter like the Fluke 115 for precise electrical tests, which help identify wiring issues ahead of time. I also rely on the Klein Tools CL800 clamp meter for safe, non-invasive current measurements, saving me time. For product-specific advice, I turn to the detailed guides at our expert repair and installation hub, which clarify common pitfalls. And when in doubt, I consult trusted industry blogs or manufacturer manuals for troubleshooting tips. Empowered with the right tools and trusted information, I tackle appliance issues confidently, ensuring my warranty remains intact and my home stays comfortable.
Your Next Step: Confidence Starts with Knowledge
Taking charge of appliance repairs and warranty management doesn’t have to feel intimidating. With the right approach—knowing what your warranty covers, choosing licensed professionals, and using proper tools—you can save money and avoid unnecessary hassles. Whether it’s verifying your coverage through reliable installation services or scheduling same-day repairs from reputable providers, your proactive attitude makes all the difference. Remember, empowering yourself with knowledge today ensures a smoother experience tomorrow. Don’t wait for a small issue to become a costly problem—take action now and stay ahead of appliance breakdowns.