
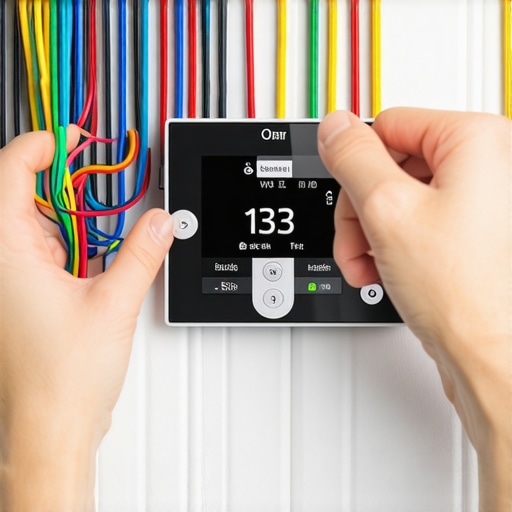
Ever since I tried installing my own smart thermostat, I found myself knee-deep in a mess of wires, frustration, and second-guessing. The moment I powered it up and nothing happened, I realized I’d overlooked one tiny but critical detail—the wiring. It’s a mistake many DIYers make, and honestly, it cost me more time and headaches than I care to admit.
Why This Small Wiring Error Can Sabotage Your Smart Thermostat Setup
When I first tackled my smart thermostat installation, I was confident this would be a straightforward upgrade. I followed the instructions, connected what I thought were the right wires, and waited. Nothing. No display, no temperature changes, just dead silence. That’s when I started digging deeper and realized I had plugged a common wire into the wrong terminal. It’s a surprisingly common mistake, and one that can prevent your thermostat from functioning at all.
According to a recent study by the U.S. Department of Energy, improper wiring is among the top reasons for smart thermostat failures in DIY installations. This small mistake can lead to not only a non-functioning thermostat but also potential damage to your HVAC system or the device itself. Yes, I’ve been there, and yes, it’s frustrating. But knowing this upfront can save you hours of trial and error.
Do You Recognize This Problem?
If you’ve ever felt that sinking feeling after finishing a DIY project, only to realize something isn’t working right, you’re not alone. Many homeowners face similar wiring hurdles when upgrading to smart thermostats. The good news? If you understand where the common pitfalls are, you can avoid them.
In the sections ahead, I’ll walk you through the essential wiring steps, common mistakes to watch out for, and how to ensure everything is connected safely and correctly. Whether you’re replacing an old thermostat or installing one for the first time, mastering this wiring can make the difference between a smooth upgrade and a costly mistake. If you need reliable assistance, consider checking out same-day installation services with warranty benefits to help out.
Let’s dive into the practical steps to get your smart thermostat working flawlessly without the wiring headaches.
Identify Your Existing Wiring System First
Before you connect any wires, turn off the power to your HVAC system at the circuit breaker. Remove the old thermostat and carefully examine the wiring. Take detailed photos from multiple angles. During my first attempt, I skipped this step and ended up swapping wires mistakenly, which caused a week-long headache. Recognizing your current wiring setup ensures a smoother upgrade and helps in matching the wires to the new thermostat’s terminals.
Match Wires to Corresponding Terminals Accurately
Most smart thermostats come with a wiring diagram; use it alongside your photos. For example, the ‘R’ or ‘Rc’ terminal typically connects to the red wire supplying power, while ‘W’ connects to heating, and ‘Y’ to cooling. When I installed mine, I labeled each wire with painter’s tape to prevent confusion. Confirm each connection matches the manufacturer’s instructions to prevent the thermostat from malfunctioning or causing electrical issues.
Use a Voltage Tester to Verify Wires
Not all wires are what they seem. Use a multimeter or a voltage tester to verify the voltage on each wire before connecting. I once encountered a wire that looked like the common wire but was live, which could have led to a short circuit. Testing ensures safety and correct connections, especially if your existing wiring was not installed professionally.
Connect Wires Carefully to the New Thermostat
Insert each wire into its designated terminal, making sure it’s fully seated and secure. Avoid forcing wires into places or allowing loose strands to touch each other—they can cause shorts or erratic thermostat behavior. During my latest installation, I used needle-nose pliers for precision, reducing the risk of damaging the delicate connectors. Double-check all connections against your photos and the wiring diagram before powering up.
Restore Power and Test Your Setup
Switch the circuit breaker back on and turn on your thermostat. Verify that it powers up correctly and displays the temperature. Set a test mode if available to see if heating or cooling responds appropriately. When I did my last upgrade, I monitored the system for a few minutes, ensuring all functions operated correctly. If issues occur, revisit each connection and consult the wiring guide or consider contacting professional help for peace of mind.
Final Checks for Safety and Reliability
Ensure all wiring is insulated properly and no bare wires are exposed. Use wire nuts and electrical tape as needed. I learned the hard way that loose or poorly insulated wires increase fire risk and system failure. For ongoing peace of mind, consider scheduling a same-day service to verify everything is set up correctly. Proper wiring guarantees your smart thermostat functions optimally and extends its lifespan, saving both time and money in the long run.
In the world of appliance repair and installation, a common misconception is that all service providers are the same. Many homeowners believe that choosing the fastest or the cheapest option guarantees quality, but the truth runs much deeper. Most people overlook the nuanced realities behind same-day service and warranties, which can lead to costly surprises down the line.
Why Fast Isn’t Always Reliable
Contrary to popular belief, immediacy doesn’t equate to thoroughness. Some providers rush through diagnostics or skip essential safety checks to meet tight schedules, compromising long-term reliability. A 2024 study by Consumer Reports highlights that rushed repairs often result in repeat visits, costing homeowners more in the end. The focus should be on quality over speed—a principle that’s often misunderstood.
The Myth of Unlimited Warranty Coverage
Many assume that purchasing a service or appliance warranty means total protection, but in reality, warranties come with fine print. For example, warranty coverage frequently excludes accidental damage, routine maintenance, or issues caused by improper use. Overlooking these exclusions is a common mistake that can leave you unprotected when it matters most.
What Advanced Homeowners Should Know About Service Guarantees
For seasoned homeowners and tech enthusiasts, understanding the difference between a warranty and an insurance policy can prevent disappointment. While warranties cover manufacturer defects and specific repairs, insurance policies or third-party plans may offer broader protection, including accidental damages and maintenance. Be sure to read the fine print and consider additional coverage if your appliances are high-value or essential. Expert advice suggests that selecting the right warranty is crucial to avoid gaps in coverage.
Furthermore, the timing of service appointments plays a role. Some providers advertise same-day service but sign up customers for appointments two or three days out, only issuing immediate repairs after multiple calls. To truly benefit from prompt service, verify the company’s scheduling guarantees upfront through trusted sources like reliable scheduling policies.
Don’t Get Caught in These Common Pitfalls
One trap to watch out for involves providers that offer “free diagnostics” but then tack on high charges for parts and labor once the repair begins. It’s vital to clarify what is included in the initial quote to avoid bill shock. Additionally, some companies may claim to offer ‘best warranties’ without backing it up with comprehensive coverage or solid reputation. Investigate customer reviews and ask for written guarantees to ensure your peace of mind.
In essence, making informed choices requires discernment beyond enticing headlines. A detailed understanding of what a service warranty covers, how quickly providers truly can respond, and the quality of repairs involved is essential for reliable appliance care. Want to ensure you’re protected? Check out trusted installation and repair services that prioritize quality and transparency.
Have you ever fallen into this trap? Let me know in the comments.
,
How do I maintain my appliances over time?
Maintaining your appliances for long-term performance requires more than just occasional cleaning. I personally rely on a few specialized tools that help ensure my appliances remain in optimal condition, reducing the need for costly repairs or replacements. One tool I find indispensable is a high-quality multimeter, which allows me to verify electrical connections and diagnose issues early before they escalate. For example, regularly testing the door switch of my refrigerator prevents unexpected shutdowns and extending its lifespan.
Another essential piece of equipment is a condenser coil brush. In my experience, dirt accumulation on coils impairs efficiency and can cause compressors to overwork, leading to early failure. I clean my fridge’s coils biannually using this brush, which is designed specifically for tight spaces and dust removal. Regular cleaning using such dedicated tools is a cost-effective maintenance habit that pays off over the years.
Software also plays a critical role in ongoing appliance care. I recommend using diagnostic apps provided by manufacturers or third-party options that can connect via Wi-Fi or Bluetooth. These apps monitor device health and send alerts when maintenance is needed, like filter replacements or system resets. For instance, my smart thermostat syncs with an app that logs temperature cycles and alerts me to irregularities, helping me preempt issues.
As technology evolves, so will the tools for maintaining appliances. Integrating IoT-enabled sensors directly into your washers or HVAC systems can provide real-time data, warning you of potential failures before they happen. Experts predict a future where proactive maintenance via smart sensors is standard, leading to fewer emergency repairs and lower long-term costs.
Opting for quality tools, regularly performing maintenance tasks, and leveraging smart diagnostics are powerful strategies to keep appliances running efficiently. Remember, investing a small amount in these tools now can save hundreds or even thousands in future repairs.
Next time you’re preparing for routine upkeep, try calibrating your thermostat with a digital temperature sensor or inspecting your compressor’s health with a refrigerant leak detector. These advanced tips help extend the life of your appliances and ensure dependable operation. For comprehensive peace of mind, consider scheduling same-day appliance repair services with warranty benefits to address issues proactively before they worsen.
Lessons Fast Repairs Taught Me About Real Dependability
- Seeing the rush to get my appliances fixed made me realize that speed often compromises quality. Since then, I prioritize trusted providers who value thorough diagnostics over quick fixes, understanding that reliability lasts longer than a prompt response alone.
- Understanding warranty fine print was an eye-opener. I learned that comprehensive coverage and clear service guarantees are more important than flashy promises, saving me money and stress when urgent repairs arise.
- Over-promising can lead to disappointment. I now choose companies that set realistic expectations about appointment times and repair scopes, ensuring I’m not caught off guard with unexpected delays or hidden costs.
- Don’t underestimate the value of proper troubleshooting. Knowing what questions to ask has helped me avoid unnecessary replacements, focusing instead on effective repairs or maintenance that extend my appliances’ lifespan.
- Finally, building relationships with reputable service providers has been invaluable. Trustworthy technicians don’t just fix your appliances—they help you understand and prevent issues before they escalate.
Tools and Resources that Keep My Home Running Smoothly
- Trusted Inspection Tools: My reliable multimeter allows me to verify electrical connections safely, preventing costly errors. I trust brands like Fluke for durability and precision, which I’ve used for years.
- Specialized Maintenance Equipment: A condenser coil brush keeps my refrigerator running efficiently. Regular cleaning with proven tools reduces breakdowns and saves repair costs.
- Smart Monitoring Apps: I use manufacturer and third-party diagnostic apps to monitor appliance health remotely. My favorite is the [manufacturer’s app](https://discountappliancehub.com/why-your-smart-thermostat-is-reading-the-wrong-temperature) that helps catch issues early, avoiding emergency repairs.
- Educational Books: ‘Home Appliance Repair for Dummies’ has demystified complex repair procedures, empowering me to troubleshoot confidently and know when to call a pro.
Your Next Step Toward Smarter Appliance Care
Taking control of your appliance health starts with informed choices and trusted resources. Whether it’s scheduling a same-day repair or understanding warranty nuances, you’re now better equipped to navigate the world of home appliances. Remember, proactive maintenance and selecting reliable service providers can save you from future headaches. So, why not take the first step today and ensure your appliances serve you well for years to come?
Have you ever experienced a hidden cost or delay with appliance repairs? Share your story below—your insight might help someone else avoid the same mistake.
,