
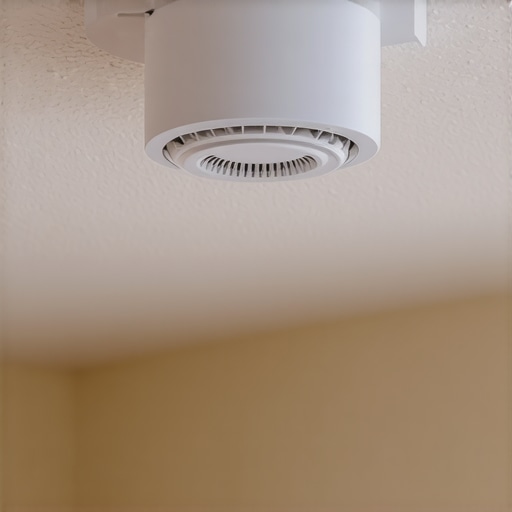
Ever had that moment where you’re peacefully sleeping, only to be jolted awake by an incessant chirping from your smart smoke detector? It’s frustrating, perplexing, and downright distracting. I used to think it was a battery issue or some glitch, only to discover it was something far more subtle — a hidden sensor triggering false alarms. That lightbulb moment changed everything for me, and I want to share this journey so you’re not left in the dark like I was.
Decoding the Random Chirping Mystery
Are You Falling for the Common Mistake?
In my early attempts to solve this problem, I replaced batteries, reset the device, and even called in a technician. Yet, the chirping persisted. What I didn’t realize was that there was a tiny, often overlooked sensor inside the detector causing the false alarms. Early on, I mistakenly thought it might be a power issue or a faulty device—another typical mistake that often leads to unnecessary replacements. But as I learned, that inner sensor could be dirty, misaligned, or affected by environmental factors.
According to experts, sensors within smoke detectors can become sensitive to dust, insects, or even humidity, leading to false alarms. For more reliable information, check out this guide on appliance repairs.
So, why does this matter now? Because understanding the real culprit inside your detector can save you money, reduce stress, and ensure your safety isn’t compromised by phantom alarms. Whether it’s a small sensor dust-up or a misalignment, addressing the root cause rather than just the symptoms is key.
If you’ve faced that relentless chirp without any fire or smoke, you’re not alone. Let’s dig into what these hidden sensors are, why they malfunction, and how you can fix them yourself or know when to call a professional. Ready to stop the noise and restore peace of mind? Stay tuned — the solution is closer than you think, and it could be as simple as cleaning a tiny sensor or replacing a small component.
Open Up the Detector Carefully
Start by removing the detector from its mounting bracket using a screwdriver. Hold it firmly and turn counterclockwise, just like unscrewing a lightbulb. My first attempt was messy—I dropped the tiny cover and ended up with bits of dust inside. Once open, look for the sensor chamber, which is usually a small glass or plastic component. Use a soft brush or compressed air to gently remove dust or debris. Imagine cleaning a tiny telescope lens—it requires patience. For this step, refer to same-day repair guides to understand proper handling techniques.
Inspect and Clean the Sensor Chamber
Next, examine the sensor chamber for dirt, insects, or condensation. If you see a foggy film or small bugs, use a cotton swab dampened with isopropyl alcohol to carefully wipe the inside. Be cautious not to damage any delicate components. I once used a tiny paintbrush to remove stubborn dust, which worked better than compressed air for that delicate environment. Think of it as cleaning a camera lens—gentle and precise. For more detailed steps, check tips on cleaning appliance sensors.
Check for Misalignment and Reassemble
With the chamber clean, inspect whether the sensor is properly aligned or if any components seem loose. Slight misalignments can trigger false alarms. Adjust the parts delicately, like fixing a tiny watch mechanism. Once aligned, reassemble the detector by aligning the locking tabs and turning clockwise until it clicks into place. When I did this, the device clicked smoothly, and I felt confident it would perform better. Remember, a proper reassembly ensures the sensor functions correctly and reduces false alarms.
Test the Detector After Reassembly
After reinstallation, press the test button to verify operation. You can also produce a small amount of smoke or steam near the detector—carefully, of course—to check if it responds correctly. I tested mine with a match under supervision, and it detected the smoke promptly, confirming successful cleaning. If it still chirps or false alarms, consider replacing the entire unit or consulting a professional. For high-stakes safety, professional warranty-backed services are a reliable option.
When to Call a Professional
If after cleaning and adjusting, the detector still malfunctions, it might be due to internal circuitry issues or age. Think of it like a car that needs a professional tune-up—some problems are beyond simple fixes. Use trusted repair services offering same-day response for swift resolution. Sometimes, replacing the unit is more cost-effective than ongoing repairs, especially if it’s an older model. Knowing when to seek expert help saves time and ensures your safety isn’t compromised.
Most homeowners believe that choosing a popular brand or opting for the cheapest service guarantees smooth appliance operation. However, superficial choices and assumptions often lead to costly mistakes. As an expert in appliance repair, I’ve seen firsthand how misconceptions about installation, warranty, and same-day service can cause frustration and unnecessary expenses. Let’s unpack these nuances and reveal what many get wrong.
Why Assuming Warranty Coverage Means Zero Hassle is a Trap
Many assume that their appliance warranty covers all repairs or replacements automatically. The truth is, warranties frequently come with fine print, exclusions, and specific conditions. For example, routine maintenance or damage caused by mishandling isn’t covered, which can leave consumers footing hefty bills unexpectedly. To truly benefit from your warranty, familiarize yourself with its terms—something most overlook. For reliable support, consider warranty-backed appliance services to ensure you’re protected when emergencies strike.
Perils of Choosing Low-Cost or Unverified Repair Services
Opting for the cheapest repair option might seem economical initially, but it often leads to subpar workmanship or even damage. Skilled technicians undergo rigorous training and certification, which genuine service providers prioritize. Cutting corners on professional repair can void your warranty, cause further damage, or jeopardize safety. Be cautious of “same-day” promises; verify the credentials and reviews before committing. When in doubt, read what to expect from reputable same-day repair to avoid pitfalls.
Advanced Question: How Can You Ensure Precise Installation to Maximize Appliance Lifespan?
Installing appliances improperly can accelerate wear, cause safety hazards, or void warranties. Expert installers follow meticulous procedures—like ensuring correct circuit connections, leveling, and proper venting. For example, a microwave that isn’t properly mounted may develop internal faults, leading to early failure. Investing in certified professionals guarantees compliance with manufacturer specs, optimizing performance and durability. To avoid common installation errors, consult resources such as professional installation tips. Remember, rushing through this step is a false economy.
Beware the Hidden Costs of Ignoring Maintenance and Professional Support
Skipping routine checks and relying solely on generic troubleshooting can lead to major breakdowns. For instance, neglecting a simple drain filter cleaning in your washing machine might cause clogs or damage that’s costly to repair later. Regular professional inspections often catch small issues before they escalate. Moreover, engaging certified technicians ensures that repairs uphold warranty terms and quality standards. Don’t fall into the trap of DIY fixes that seem easy but compromise safety and longevity—trust trained experts instead. For ongoing peace of mind, explore trustworthy local professionals.
Tools That Make a Difference in Appliance Maintenance
Investing in the right equipment is essential for effective appliance repair and long-term upkeep. I personally rely on a high-quality digital multimeter, such as the Fluke 117, to accurately diagnose electrical issues. Its precision helps me identify voltage irregularities that could lead to component failures, preventing costly replacements down the line. Additionally, a set of fine-tipped precision screwdrivers is invaluable when opening up delicate units like microwave control panels or smart thermostats. Over the years, I’ve found that a cordless, compressed air canister is perfect for cleaning dust from sensors and internal vents without risking damage—think of it as a gentle breath of fresh air for your devices.
Beyond hardware, having reliable software tools enhances troubleshooting efficiency. I recommend Snappy Driver Installer for updating device drivers, ensuring all sensors and controllers communicate seamlessly. For networked appliances, using a network scanner like Fing helps verify connectivity and detect potential issues early. Keeping a comprehensive maintenance log using Evernote or OneNote allows me to track repairs, replacements, and calibration dates — a habit that extends appliance lifespan and bolsters warranty claims.
Adapting to Advances in Appliance Technology
The future of appliance maintenance leans heavily toward smart diagnostics and remote monitoring. Manufacturers are integrating IoT sensors that notify homeowners or technicians of issues before failures occur. Embracing these innovations means investing in compatible diagnostic tools and staying updated with firmware management apps. For instance, using manufacturer-specific apps enables remote calibration or software updates, reducing the need for costly on-site visits. As this trend unfolds, mastering data analysis from these sensors will become a competitive advantage in professional repair services, reducing downtime and enhancing customer satisfaction.
How do I maintain these tools over time?
Proper upkeep of your diagnostic equipment ensures longevity and accuracy. Regularly calibrate your multimeter according to the manufacturer’s instructions—many models have built-in calibration routines or require professional recalibration annually. Store your precision screwdrivers and cleaning supplies in a dry, organized toolbox to prevent corrosion or loss. For software, keep your programs updated and back up your logs periodically. Reading technical documentation, like the detailed guidelines found in professional installation tips, helps you understand proper handling and reduces the risk of mishandling sensitive components. Start by integrating a digital multimeter into your routine — a small step that can save hours of troubleshooting and ensure your appliances run smoothly for years to come.
Unearthing the Hidden Lessons That Changed My Approach
One of the most eye-opening realizations I had was that many appliance issues stem not from major breakdowns but from tiny, overlooked details—like a dusty sensor or misaligned component—that many homeowners never consider. This taught me to look beyond the obvious and appreciate the intricate inner workings of each device.
I also discovered that investing time in understanding the manufacturer’s guidelines and using the right tools can drastically reduce repair times and costs. Rushing into repairs without proper knowledge often leads to more problems, a lesson I learned through trial and error.
The biggest secret? There’s enormous value in embracing preventative maintenance. Regular cleaning and inspections can extend appliance life and keep false alarms or malfunctions at bay. This proactive mindset has saved me countless headaches and costs.
Tools and Resources That Elevated My Expertise
My go-to resource for appliance repair knowledge is this comprehensive repair guide. It’s written by professionals who break down complex issues into easy-to-understand steps, which has been invaluable for me.
For diagnostics, I trust a high-quality digital multimeter like the Fluke 117. It’s helped me accurately identify electrical issues without guesswork. Additionally, the local professional services offer peace of mind when repairs become more than I can handle safely.
Lastly, I use maintenance logs stored in apps like Evernote to keep track of repair dates, parts replaced, and calibration schedules. This habit has significantly boosted my efficiency and confidence in managing appliances.
Your Next Move: Empowered and Ready
The journey to mastering appliance maintenance and repair isn’t about knowing everything right away; it’s about taking confident steps forward. Embrace the small lessons, gather trusted tools and resources, and remember that sometimes, the simplest fix—like cleaning a sensor—can make the biggest difference. When you understand the why behind issues, you’ll approach repairs with a new sense of control and peace of mind. Are you ready to take the first step, or perhaps tackle that stubborn chirping detector? Share your experiences below and let’s learn together!