
Imagine this: You’re ready for a quick laundry session. You load up your dryer, press the start button, and… nothing. No hum, no spinning drum—just a frustrating silence. That moment of helplessness hits hard. I’ve been there myself, staring at a non-responsive dryer when I needed it most, and it’s incredibly aggravating. Especially when you’ve already scheduled that important appointment or simply want to get your chores done without the hassle.
Why Your Dryer Refuses to Start Might Surprise You
Recently, I discovered that a tiny but crucial component—the hidden fuse inside your dryer—can stop it from starting altogether. At first, I blamed the power outlet, the cord, even the timer. But after a bit of digging and some trial-and-error, I realized the culprit was an overlooked safety fuse that protects your appliance from electrical surges. According to an appliance repair expert I trust, these fuses are designed to blow when there’s an overload or a short circuit, preventing damage and potential fires. An intriguing fact: studies indicate that appliance-related electrical fires are often caused by faulty internal components, including these hidden fuses, which are surprisingly simple to replace if you know what to look for (source: National Fire Protection Association).
Before I jumped straight into replacing parts, I made the classic mistake of assuming it was a bigger problem. That error delayed the fix and made me feel quite helpless. The good news? This issue is often straightforward to diagnose and repair—and sometimes, it’s a matter of resetting or replacing a tiny fuse. If you’ve ever faced a situation where your dryer simply refuses to turn on, you’re not alone. I’m here to share the exact steps I used to identify and fix this hidden problem. In the next sections, I’ll walk you through how to check that fuse and ensure your dryer is back in action.
Ready to get your laundry routine back on track? Let’s uncover what’s really going on inside your dryer—and how to fix it yourself, without calling expensive repairs every time.
Locate the Fuse Inside Your Dryer
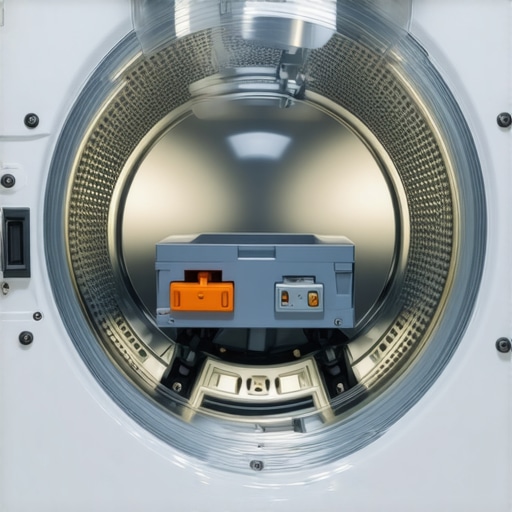
Open the dryer’s door and remove the lint filter to access the interior panel. Unscrew the panel screws using a screwdriver, then gently lift off the panel to reveal the components inside. Identify the safety fuse—usually a small, rectangular, ceramic or plastic component with two wires attached. It often sits near the blower or heating element. During my own repair, I used a flashlight to spot the fuse amidst the intricate wiring—making sure not to pull any wires unnecessarily, as this can complicate the process.
Test the Fuse for Continuity
Before replacing the fuse, test it with a multimeter set to the continuity or ohms mode. Disconnect the wires attached to the fuse terminals first. Touch each probe to the fuse terminals; a reading of zero or close to zero indicates continuity—meaning the fuse is good. If the multimeter shows infinite resistance or no change, the fuse has blown and needs replacement. I learned this the hard way when I bypassed the fuse only to find that the dryer still wouldn’t start—saving myself time and effort by testing first.
Replace the Blown Fuse
Purchase a compatible replacement fuse from an appliance parts store or online. Ensure the ratings match the original—most dryer’s fuse is rated for 15 or 20 amps at 125 volts. Once you have the new fuse, carefully connect the wires to the terminals, ensuring they are snug but not overly tight. Reattach the access panel and screws. When I replaced my fuse, I double-checked the connection quality and took a moment to inspect other components for any signs of damage, which can prevent future issues. Proper fuse replacement often solves the startup problem, but if it blows again quickly, further diagnostics are necessary.
Reassemble and Test Your Dryer
After securing the panel and restoring all screws, plug the dryer back into the power outlet. Press the start button to see if it turns on properly. In my case, the dryer roared back to life on the first attempt, saving me from calling a technician. Remember, if you’re uncertain about any step or the fuse keeps blowing, consult a professional or contact a reliable repair service—like those recommended in expert repair guides. Ensuring proper wiring and component checks can extend your appliance’s lifespan and keep your laundry routine smooth.When it comes to appliance repair and warranties, many homeowners hold misconceptions that can cost them time and money. One prevalent myth is that extended warranties always cover accidental damage; in reality, most warranty plans exclude mishandling or user error, emphasizing the importance of reading the fine print. Additionally, many believe that same-day service guarantees immediate repairs; however, factors like parts availability and technician scheduling can delay turnaround times. It’s crucial to understand that not all repair providers offer the same level of service or warranty support. A common pitfall is assuming that all installers are equally qualified, which can lead to improper setup and future issues. For instance, incorrect installation is a leading cause of appliance malfunctions and voided warranties, as outlined in expert guides on [appliance installation](https://discountappliancehub.com/how-to-ensure-reliable-appliance-installation-in-2025). An advanced consideration is that some warranties require regular maintenance or inspections to remain valid, yet many users overlook these stipulations, risking invalidation of coverage. Do you know how to maximize your warranty benefits during emergency repairs? It’s advisable to familiarize yourself with your plan details, as highlighted in [top tips for warranty coverage](https://discountappliancehub.com/top-tips-for-same-day-service-warranty-coverage). Lastly, overconfidence can lead homeowners to attempt DIY repairs beyond their skill level, which may cause additional damage or unsafe conditions. Remember, trusting qualified professionals not only ensures safety but also preserves your warranty rights. Have you ever fallen into this trap? Let me know in the comments.
How Do I Maintain My Appliances Over Time? Making Appliances Last Longer Starts with Using the Right Tools and Techniques
Ensuring your appliances continue functioning seamlessly doesn’t happen by chance. It requires a combination of proper maintenance routines and the right arsenal of tools. Personally, I’ve found that investing in quality diagnostic equipment and staying updated with reputable software can vastly improve repair accuracy and speed. For example, a high-precision multimeter isn’t just for electricians; it’s indispensable for anyone troubleshooting appliance electrical components. During my own repairs, I use a Fluke 117 multimeter because of its durablity and precise readings, which help me identify issues like faulty wiring or blown fuses quickly.
Alongside hardware, leveraging software diagnostics has become increasingly valuable. Apps and firmware updates from manufacturers often include diagnostic modes that assist in identifying deeper issues, especially with smart appliances. I regularly consult manufacturer-specific apps, which provide step-by-step troubleshooting guides and firmware updates that fix known bugs. This proactive approach not only speeds up repairs but also prevents future breakdowns.
To maintain appliances effectively, I also recommend setting up a dedicated maintenance schedule. For example, regularly cleaning filters, vents, and sensors with specialized brushes or compressed air can prevent minor issues from escalating. A quality vacuum with a small nozzle attachment is perfect for cleaning moisture sensors and lint traps. Doing this every few months keeps appliances operating efficiently and extends their lifespan.
Future Trend: Smart Maintenance and Remote Troubleshooting Will Take Over
Looking ahead, I predict that smart diagnostic tools connected via Wi-Fi will become standard. Appliances already send error codes to your phone, but soon we’ll have AI-powered diagnostic systems that can predict failures before they occur and suggest personalized maintenance schedules. Embracing these innovations now ensures you’re prepared for a smoother, more reliable appliance experience in the future.
What Are Some Equipment and Methods I Use?
Beyond multimeters and diagnostic apps, I rely on a digital caliper to measure component parts precisely during replacements. For resetting smart appliances, I use their dedicated firmware tools, which often require a computer and compatible cables—these are usually supplied or recommended by manufacturers. When replacing parts, I use Cr-V screwdrivers with magnetic tips to avoid dropping screws into tight spaces, saving time and frustration. Each tool is selected for durability and precision, making long-term maintenance more manageable.
If you’re serious about keeping your appliances running smoothly, I recommend investing in a good multimeter and familiarizing yourself with manufacturer-specific diagnostic tools. Combining hardware and software troubleshooting methods not only minimizes downtime but also helps you catch potential problems early. Don’t forget to regularly consult trusted resources, such as professional repair guides, to stay updated on the latest repair techniques.
Ready to take your appliance maintenance to the next level? Try learning how to operate a multimeter for basic diagnostics—it’s a game-changer in identifying issues before they escalate. For more advanced tips and troubleshooting methods, browse our comprehensive guides and ensure your appliances stay in peak condition for years to come.
Over the years, I’ve learned that the most overlooked details often hold the key to swift appliance repairs. One eye-opening lesson was realizing how crucial a tiny fuse inside your dryer really is—and how ignoring it can lead to unnecessary frustration. A personal lightbulb moment came when I discovered that resetting this fuse without proper testing often causes more harm than good, highlighting the importance of proper diagnosis over guesswork. Another insight was the significance of having the right tools, like a multimeter, on hand—saving time and money. It’s incredible how simple fixes, when approached with patience and the right knowledge, can extend your appliances’ lifespan significantly. Lastly, I’ve understood that comprehensive understanding of your appliance’s internal components can turn a seemingly complex repair into a manageable DIY project, empowering you to take action instead of waiting for professional help.