
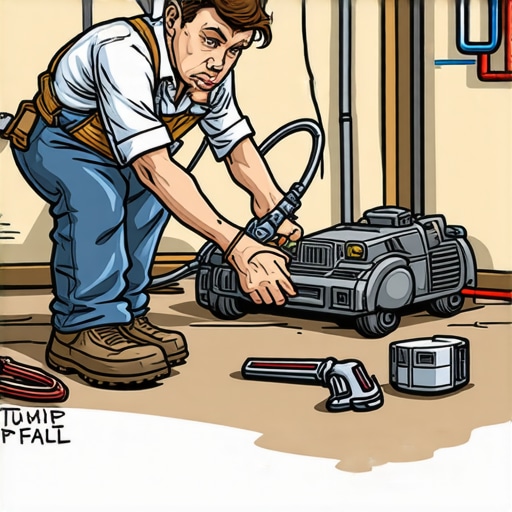
It was a chilly spring evening when I first experienced that sinking feeling—literally. I walked into my basement after a heavy rainstorm expecting soggy floors, and there it was: water slowly creeping across the concrete, an unmistakable sign that my sump pump had thrown in the towel. Panic set in. I knew this wasn’t just a minor hiccup; it was a potential disaster threatening my belongings and the foundation of my home.
That night, I realized I had overlooked one crucial thing—what to do immediately when I find my sump pump isn’t working. If you’ve ever faced this, you’ll know the frantic rush to find solutions and the overwhelming advice online. But I learned the hard way that the first move can make or break how much damage occurs and, more importantly, how quickly you can get everything back on track.
Today, I want to share with you a simple, practical approach rooted in personal experience and some expert tips. We’ll cover exactly what your first step should be when your sump pump fails to activate, so you’re not left scrambling during the next storm or unexpected failure. You don’t have to feel helpless or overwhelmed—I’ll guide you through the crucial initial actions that can save your home from water damage, mold, or costly repairs.
Why Acting Quickly When Your Sump Pump Fails Matters
Sump pumps are the unsung heroes in flood-prone basements. They work tirelessly, usually without much notice, until one day they don’t. The reason acting fast is essential? Because water can cause extensive damage in just a matter of hours. Mold growth, structural issues, and ruined possessions are all risks you face if you delay.
Early intervention can also help you identify whether it’s a straightforward fix or if professional help is needed immediately. The longer you wait, the greater the chance that minor issues escalate into major disasters. That’s why knowing the right first move is critical—whether it’s flipping a switch, checking a fuse, or calling in an expert.
Have you run into this problem before? If so, you’ll know the feeling of helplessness that can settle in when your home’s safety is suddenly compromised. But take heart: with a few proactive steps and the right knowledge, you can control the situation instead of panicking.
Before we dive into the exact steps to take, I want to share a quick mistake I made early on that almost cost me dearly. I assumed my sump pump was simply dead and tried replacing it without checking the simple, often overlooked causes—like a tripped circuit breaker or a clogged intake. Turns out, troubleshooting basics are sometimes the fastest fix, and skipping them can delay your response and worsen the damage.
To minimize those risks, it’s a good idea to familiarize yourself with simple troubleshooting tips and know when to call a professional. For a reliable, quick response, consider trusted local services that offer [same-day appliance repair](https://discountappliancehub.com/scheduling-your-appliance-repair-for-same-day-service-in-2025) and [warranty-backed repairs](https://discountappliancehub.com/warranty-backed-appliance-services-you-can-rely-on). Taking the right initial steps ensures you’re not just rushing but acting wisely to protect your home.
Check the Power Source Immediately
Right after noticing your sump pump isn’t functioning, inspect the power supply. Unplug the unit and plug it back in to reset the circuit. Sometimes, a simple power surge can trip a breaker or cause a fuse to blow. If the pump is plugged into an outlet controlled by a wall switch, ensure the switch is in the ‘on’ position. Consider testing the outlet with another device. Think of it like a car engine; sometimes, the problem isn’t the engine but a dead battery or loose connection.
Examine the Circuit Breaker
Locate your home’s electrical panel and look for a tripped breaker corresponding to the sump pump circuit. Resetting a tripped breaker is akin to rebooting a frozen computer — a straightforward fix that often restores functionality. If the breaker trips again shortly after resetting, it indicates an overload or short circuit, and professional assistance is advisable. This quick check can prevent worsening damage and water flooding especially during heavy rain.
Inspect the Float Switch
The float switch signals the pump to turn on when water reaches a certain level. If the float is stuck or tangled, the pump won’t activate. Gently move the float to see if the pump starts working. If it remains stuck, clean debris, or consider replacing it. It’s like a float attached to a doorbell—if it gets stuck in the down position, the doorbell refuses to ring. Clearing or repairing it can bring back your pump’s response.
Clear Out Clogged Inlets and Discharge Lines
A common cause of pump failure is clogged intake screens or discharge pipes. Use a flashlight to peer into the inlet drain and remove any debris or obstructions. If the discharge line is blocked, water won’t be expelled properly, causing the pump to shut down or burn out. This step is comparable to clearing a blocked artery—keeping the flow smooth prevents future explosions or failures.
Perform a Test Run
Pour a bucket of water into the sump pit to simulate rising water levels. Watch for the pump turning on and draining correctly. If it doesn’t, assess whether the pump is responding and sounding normal or making unusual noises. This proactive test can catch issues early, saving you from surprise flooding.
Maintain Proper Maintenance Habits
Routine inspections and cleaning are your best defense. Schedule annual professional inspections for your sump pump system, similar to regular vehicle servicing. Check for corrosion, worn components, and battery backup functionality. Proper upkeep ensures reliability, much like a well-oiled machine that runs smoothly under pressure.
If All Else Fails, Call in a Warranted Expert
If troubleshooting doesn’t resolve the issue, don’t delay contacting a professional. Look for services offering warranty-backed repairs and same-day service to minimize water damage. Think of professional repair as a specialized surgeon—your home’s safety depends on their expertise. Prompt, reliable help can prevent minor issues from escalating into costly disasters, especially during storms or heavy rainfall.Many homeowners assume that choosing an appliance service simply involves finding the lowest price or the fastest fix. However, experts understand that common misconceptions about installation, warranty claims, and same-day repairs can lead to costly mistakes. One widespread myth is that all warranties automatically cover any repair, but in reality, manufacturer warranties often come with fine print, exclusions, and requirements for professional installation to remain valid. Skipping professional setup can void your warranty, leaving you unprotected when issues arise. For instance, a poor installation might cause damage that isn’t covered later, so always verify that your service guarantees adherence to manufacturers’ guidelines; you can reference our guide to reliable installation for more insights.
Another trap many fall into involves underestimating the importance of proper documentation when filing warranty claims or repair requests. Documenting exactly what happened, when, and how can make or break your claim. Experts recommend keeping photos and detailed notes; this practice can streamline the process and increase your chances of coverage. Remember, the devil is in the details, and many warranties are denied because of vague or incomplete information.
What many homeowners don’t realize is that same-day service isn’t always a guarantee of quality or coverage. Some providers prioritize quick fixes over thorough diagnostics, risking recurring issues or improper repairs. Always check whether the service includes warranty-backed repairs and transparent timelines. Our same-day repair guide emphasizes the importance of choosing technicians who not only respond fast but also deliver reliable, documented solutions.
A common misconception is trusting third-party parts subtly marketed as equivalent to original equipment. While these might save some money upfront, they can jeopardize your appliance’s performance and warranty status. Experts advise only using genuine parts or those approved by the manufacturer, which can often be verified through clear certification processes. This approach helps ensure longevity and warranty compliance.
Finally, navigating the complexities of appliance service requires a nuanced understanding of policies, provider reputation, and technical specifics. Don’t fall for the trap of assuming all services are equal—doing your homework on credentials, reviews, and warranty support is crucial. For a comprehensive roadmap, visit our expert guide to appliance repair and installation today. This knowledge helps you make informed decisions, saving money and stress in the long run.
Have you ever fallen into this trap? Let me know in the comments. Remember, the right knowledge empowers you to avoid costly mistakes and protect your home efficiently.
Invest in Precision Tools for Long-Term Reliability
In my repair toolkit, a high-quality multimeter is indispensable. I personally rely on the Fluke 117 because of its durability and accuracy in diagnosing electrical issues in appliances. This tool helps me quickly identify voltage irregularities or disrupted circuits, reducing guesswork and ensuring precise repairs. Additionally, a digital clamp meter allows for safe current measurement without disconnecting wires, which speeds up troubleshooting. Having these reliable devices means I can confidently diagnose problems on the spot, minimizing downtime for my clients.
How do I maintain my tools over time?
Regular calibration and proper storage are crucial. I keep my multimeter calibrated annually using manufacturer-supplied calibration kits, ensuring consistent accuracy. Store tools in padded cases to prevent damage and keep them clean from dust and moisture. Additionally, I wipe down equipment after each use, inspecting for wear or damaged leads. Consistent maintenance of my tools extends their lifespan and guarantees dependable results, keeping my service trustworthy and efficient.
Master Diagnostic Software for Faster Results
Beyond physical tools, software solutions like appliance-specific diagnostic apps have revolutionized repair efficiency. I use a diagnostic database linked to my tablet, which provides step-by-step troubleshooting for various brands and models. This software allows me to input symptoms and get targeted repair procedures, reducing trial-and-error and saving me time. As technology advances, these programs are becoming more intelligent—learning from ongoing repairs to offer increasingly accurate solutions, aligning with upcoming trends in appliance service industry.
Embrace Preventive Maintenance to Extend Appliance Life
Proactively scheduling inspections and routine cleanings prevents major failures. For example, checking and replacing filters in HVAC systems or clearing debris from dryer vents decreases the risk of breakdowns. I recommend setting calendar reminders and maintaining detailed service logs. This approach not only reduces emergency repair calls but also preserves warranty validity, especially if you utilize targeted warranty-backed services. As manufacturers introduce smart diagnostics, adopting these preventive measures now ensures your tools and techniques stay ahead of the curve, promoting long-term appliance health.
Scaling Up for Extensive Service Demands
If you’re considering expanding your appliance repair operation, investing in higher-capacity diagnostic equipment and automated diagnostic tools is key. These enable you to handle multiple clients efficiently, maintaining quality without sacrificing speed. Additionally, embracing cloud-based appointment scheduling and inventory management can streamline workflows. I believe the future of appliance repair lies in integrating AI-driven diagnostics with IoT-connected appliances, which will allow for predictive maintenance and even remote troubleshooting—saving repair time and enhancing customer satisfaction.
Beyond the Manuals: My Deep Dive into Installation and Warranty Realities
One of the hardest lessons I learned was that even the most straightforward-looking warranty can hide unexpected pitfalls. I once assumed that a simple professional installation would automatically keep my warranty valid, but I overlooked the fine print about using certified technicians. This oversight nearly voided a crucial warranty, highlighting the importance of reading every detail and trusting providers who prioritize official certifications. Understanding these nuances has empowered me to make smarter choices and ensure my appliances are protected under warranty for the long haul.
Why Quick Fixes Can Be Deceiving and Costly
In my early days, I believed that any issue with an appliance warranted an immediate call for a technician. However, I discovered that some problems are simple to fix with a bit of troubleshooting—saving time and money. Rushing into repairs without proper diagnosis can lead to unnecessary expenses, especially when using parts that aren’t manufacturer-approved. My tip? Always perform basic checks and consult reliable resources to determine if professional help is truly necessary, like the ones featured in our same-day repair guide.
Secrets Hidden in the Fine Print of Service Offers
I once fell for an alluring promise of lightning-fast service but realized the hidden conditions—such as limited coverage on parts or additional fees—that can turn a seemingly perfect deal into a headache. To avoid this, I now scrutinize the terms carefully and prefer providers who offer transparent, warranty-backed repairs. These providers ensure that my appliance gets the right parts and skilled technicians, backed by guarantees that protect my investment, as explained in our warranty-backed service overview.
Investing in the Right Tools for Peace of Mind
One of my most valuable revelations was realizing that having quality diagnostic tools like a reliable multimeter or a diagnostic app can distinguish between a quick fix and a costly mistake. Using these tools, I can identify electrical issues or faulty parts immediately, often preventing unnecessary service calls. I trust brands like Fluke because of their durability and accuracy, which, combined with the right knowledge, has transformed my repair approach. For those serious about appliance longevity, investing in the proper equipment makes all the difference, too supported by our comprehensive repair guide.