
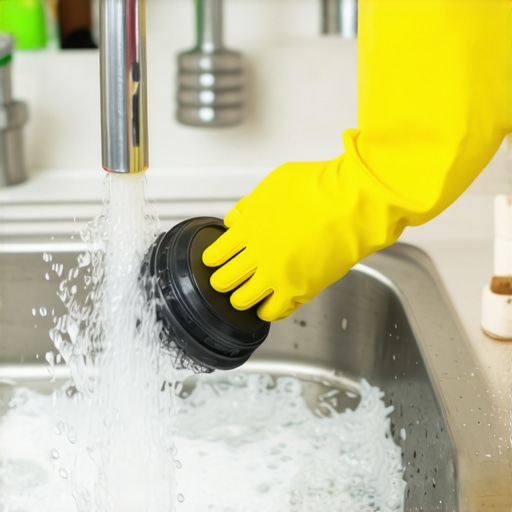
Ever found yourself staring at a sink full of gunk, wondering how a simple push of a button can turn into a disaster? That frustrating moment when your garbage disposal stops working just when you’re about to serve dinner is something I know all too well. One evening, I was racing against the clock, and suddenly, I heard that dreaded hum, then silence. The sink was backed up, and I was stuck. It hit me—there had to be a better way to fix this quickly, without waiting for a technician.
The Fast Track to Fixing Your Garbage Disposal
Dealing with a clogged or jammed garbage disposal isn’t just inconvenient; it can also lead to unpleasant odors, plumbing issues, or even water damage if not handled promptly. The good news? With a few simple steps, I’ve learned how to clear these problems myself, saving time and money.
Is a DIY Fix Really Worth It Or Just a Waste of Time?
Many folks, including myself early on, worry about causing more damage when trying to fix a clogged disposal. My biggest mistake was using harsh chemical drain cleaners first—they seemed like a quick fix but ended up corroding the blades and making the problem worse. Over time, I realized that understanding the right manual methods is far more effective and safer. For trusted advice, I often consult resources like [expert guides on appliance repairs](https://discountappliancehub.com/expert-guide-to-appliance-repair-and-installation-today).
Have you ever tried fixing your disposal only to make the clog worse? If so, you’re not alone. But the truth is, most blockages can be resolved quickly with just a few reliable techniques, provided you approach the problem the right way. Now, let’s walk through the steps that helped me fix my disposal swiftly and confidently—without the need for a costly service call.
Before diving into solutions, remember: safety first. Always unplug the unit before poking around, and avoid using excessive force that could damage the blades or pipes. Ready to restore your sink and get back to normal? Let’s get started with the most effective methods I’ve discovered over my years of DIY troubleshooting.
Unplug and Prepare for Safety
Before doing any work, always unplug your garbage disposal to prevent accidental activation. This simple but vital step saved me from a jarring situation when I accidentally pressed the switch mid-repair, causing a minor shock. Take a moment to disconnect the unit from the power source at the outlet or shut off the circuit breaker if it’s hardwired.
Access the Disposal for Inspection
Remove the splash guard or the drain cover by twisting it counter-clockwise. Use a flashlight to look inside; I once pried mine off, only to find a tangled wad of food and utensils blocking the blades. Clear out any visible debris using tongs or pliers. Avoid putting your hands directly into the disposal—I’ve learned this the hard way when I slipped and scraped my finger on the blades.
Manually Rotate the Blade Assembly
Most jammed disposals can be freed by turning the blades manually. Locate the hex socket at the bottom of the unit—my unit had one under a removable cap. Use an Allen wrench or a special disposal wrench to turn it back and forth. I once spent fifteen minutes wrestling with a stubborn jam, but gentle turning eventually freed the blades, restoring normal operation.
Use a Service Interlock or Reset Button
Press the reset button on the bottom or side of the unit—my model had a red button that popped out when tripped. After freeing the jam, this reset often needs to be pressed to restart the motor. In my case, the reset button clicked back into place, and the disposal hummed back to life instantly.
Test the Disposal for Proper Function
Reconnect the power and run cold water while turning the disposal back on. Observe carefully: if it hums and then stops or runs smoothly, you’ve cleared the jam. I always do a quick test with small scraps to ensure it’s functioning properly, preventing future backups or odors. If issues persist, consulting a professional might be necessary. For reliable repair options, check out [affordable same-day appliance fixes with warranty benefits](https://discountappliancehub.com/affordable-same-day-appliance-fixes-with-warranty-benefits).Many homeowners assume that scheduling a ‘same-day’ appliance repair guarantees instant fixes with minimal fuss. However, the truth is far more nuanced. While quick service seems ideal, several common misconceptions can lead to unmet expectations and even additional costs. For example, many believe that warranties will cover all repairs automatically, but in reality, warranty policies often exclude routine maintenance and some repair types, especially if the repair is deemed due to user error or improper installation. This misunderstanding can leave you facing hefty bills even with a warranty in place. As highlighted in expert guides on appliance repairs, understanding the fine print of your warranty can save you from surprises during emergencies.
Another rising myth concerns installation—many think hiring the lowest bidder guarantees a bargain, but subpar installation can cause long-term issues like leaks, inefficiency, or appliance failure, which aren’t covered under warranty. Investing in certified professionals, such as those described in reliable installation guides, ensures your appliances operate safely and are eligible for warranty claims if needed.
Excessive reliance on the perceived immediacy of same-day services can also be problematic. Some service providers might label their arrival as ‘same-day,’ but actual repair completion can be delayed due to parts availability or diagnostic complexities. This leads to disappointed customers who expect instant fixes but only receive a technician’s assessment. Knowing what to expect from reputable repair services, such as those outlined in detailed industry standards, can prevent frustration.
Have you ever fallen into this trap? Let me know in the comments.
Now, for the advanced homeowner or seasoned DIY enthusiast, it’s crucial to recognize that the real challenge isn’t just about quick fixes or warranties—it’s about understanding the underlying reasons behind appliance failures. Sometimes, what appears to be a simple component replacement is symptomatic of deeper issues like improper wiring, outdated models, or poor initial installation. For instance, installing a new dishwasher without considering drainage issues can lead to recurrent failures that invalidate warranty claims. To avoid these pitfalls, it’s wise to consult comprehensive resources like our expert guide to appliance repair and installation.
Furthermore, advanced troubleshooting requires knowledge of specific signs—such as inconsistent heating or unusual noises—that indicate potential warranty exclusions or the need for specialized repair techniques. Being aware of these nuances allows you to decide whether to attempt a repair yourself or seek professional help. As studies confirm, investing time in understanding your appliances can extend their lifespan and maximize warranty benefits, ultimately saving you money and hassle in the long run. Why settle for superficial fixes when knowledge empowers you?
In summary, avoiding common myths about same-day service, warranties, and installation isn’t just about saving money—it’s about securing your home’s functionality and peace of mind. Next time you face an appliance issue, remember: the details matter, and knowledge is your best tool. For more insights, check out our related articles and ensure your repairs are both reliable and warranty-compliant.
Essential Tools for Reliable Appliance Maintenance
When it comes to maintaining your appliances, having the right tools can make all the difference. I personally swear by a high-quality Digital Multimeter for diagnosing electrical issues. Its precision allows me to quickly determine if a component like a relay or control board is functioning correctly, saving hours of trial and error. Additionally, a compact Inspection Camera helps me peek into tight spaces and hidden corners, especially with built-in refrigerators or under dishwashers, without disassembling everything. For cleaning and small repairs, a versatile Set of Screwdrivers and Needle-Nose Pliers are indispensable, enabling me to access clips and screws easily while minimizing damage.
Software and Diagnostic Resources That Save Time
Beyond physical tools, I rely on specialized diagnostic apps provided by manufacturers or third-party developers. These apps sync with certain appliances, offering real-time error codes and troubleshooting guides. For example, some smart dishwashers have companion apps that display fault logs, helping me identify issues faster. Keeping a digital log of repairs and error patterns allows me to track recurring problems, which is invaluable when considering warranty claims or professional intervention. Moreover, online platforms like the expert guides on appliance repair provide detailed, step-by-step instructions that complement my physical toolkit.
Long-Term Strategies to Ensure Ongoing Performance
Regular preventive maintenance is key. I schedule quarterly inspections of seals, filters, and vents, which often prevents costly breakdowns. Employing smart sensors can alert me to declining efficiency or abnormal operation—think of it as having a health monitor for your appliances. For instance, monitoring a refrigerator’s compressor cycle time via apps helps catch overheating early. Additionally, staying updated with firmware updates from manufacturers ensures your appliances benefit from bug fixes and performance improvements, extending their lifespan. Incorporating these practices today prepares your appliances to serve reliably for years to come.
Looking Ahead: The Future of Appliance Maintenance
As technology advances, I foresee the integration of AI-driven diagnostics and IoT connectivity becoming standard. Smart systems will proactively notify homeowners of potential issues before they escalate, even scheduling repairs automatically. This shift towards predictive maintenance will reduce downtime and repair costs significantly. For example, a smart washing machine might detect bearing wear and suggest a service appointment weeks before a catastrophic failure occurs. To stay ahead, I recommend exploring resources like the latest installation and maintenance trends for 2025. Experimenting with these innovations now can streamline your maintenance routine and keep your home appliances humming efficiently, saving you money and stress in the long run. Don’t hesitate—try calibrating your smart thermostat with our recommended tools today and experience seamless control over your home’s climate.
Over the years, tackling appliance issues like my garbage disposal has taught me invaluable lessons that no generic guide can provide. One of the most important insights is realizing that quick fixes often hide deeper problems. Rushing to replace the unit without understanding the root cause can lead to repeated failures and higher costs. Remember, investing in proper diagnostic steps, like manually turning blades or inspecting electrical components, saves both money and frustration long-term.
Another key lesson is the significance of safety and patience. Hasty attempts to fix a jam while the unit is still plugged in can be dangerous. Always unplug the appliance before maintenance, and use the right tools rather than makeshift solutions. This careful approach prevents injury and internal damage, which could void warranty coverage or lead to costly repairs.
Lastly, I learned that maintaining a proactive attitude towards appliance care outweighs waiting for them to break down. Regular cleaning, prompt attention to odd noises, and understanding your warranty policy empower you to avoid emergencies altogether. So, next time you face a minor appliance hiccup, remember these insider tips—they’re the difference between temporary patchwork and lasting solutions.