
Have you ever opened your freezer, only to be greeted with a layer of icy frost on the back wall? That frustrating buildup can seem like a never-ending battle, especially when you’re trying to keep your groceries fresh and your energy bills in check. I remember the first time I noticed my freezer turning into an icy cave; I thought it was just normal wear and tear. Little did I know, a tiny, overlooked detail—the door seal—was the real culprit.
Why a Faulty Door Seal Turns Your Freezer Into an Ice Kingdom
If you’ve experienced frequent frost buildup or inconsistent cooling, the problem might be your door seal. It acts as the frontline defense against warm air sneaking in, which causes excess moisture and frost formation. I used to ignore the seal, assuming it was just a minor wear part, until I realized how much it affected my freezer’s efficiency. A good door seal ensures the cold stays in and the warm air stays out, saving energy and preventing defrosting headaches. According to appliance experts, a compromised seal can increase energy consumption by up to 30%, which adds up on your bills over time. So, it’s worth paying close attention.
Is Replacing the Seal Worth the Hassle
Early on, I made the mistake of trying to clean the seal instead of replacing it. That quick fix was short-lived, and frost reappeared within days. It’s a common mistake—believing a simple cleaning will solve the issue. But seals wear out, crack, or lose their elasticity, rendering them ineffective regardless of cleanliness. When I finally replaced mine, the difference was night and day. My freezer maintained a consistent temperature, and the frost disappeared. Think about it: if your seal isn’t sealing properly, your freezer is basically working twice as hard to keep things cold. It’s a small investment that can save you from future repairs and energy costs.
Are you facing this icy dilemma right now? Don’t worry—there’s an easy way to check your door seal’s condition and learn how to fix or replace it. For more detailed tips, you might want to explore top tips for same day service and warranty coverage. Now, let’s dive into practical steps to identify, troubleshoot, and resolve seal issues, so your freezer stays frost-free and efficient without the surprise ice invasion.
Identify the Seal Damage and Gather Tools
Start by inspecting your freezer door seal for cracks, tears, or areas where it no longer ‘snaps’ shut properly. I remember one time I found a small tear near the corner that was barely noticeable. Use a flashlight and peel back the seal gently to check for any hidden gaps or deformities. You’ll need a flat-head screwdriver, a replacement seal (which you can purchase online or from a hardware store), and a cleaning cloth. Gathering these ahead of time streamlines the repair process.
Remove the Old Seal Carefully
Locate the screws or clips holding the seal in place—some seals are glued, others are snap-on. I suggest starting at one corner and gently prying the seal away with a flat-head screwdriver, working slowly to avoid damaging the door frame. Take note of how the seal is positioned, so the new one aligns correctly. During my first attempt, I accidentally pulled too hard and slightly dented the door frame, so patience is crucial.
Clean the Surface Thoroughly
Before installing the new seal, clean the door surface with warm soapy water and a cloth. Remove any old adhesive residue or debris that might prevent a proper seal. I once overlooked this step, and the new seal didn’t seal properly, leading to frost buildup. Ensuring a clean surface is key to a tight, long-lasting fit.
Install the New Seal Correctly
Align the new seal with the door, starting from one corner. Press it firmly into place, ensuring any grooves or beads snap into the existing channels. Secure any clips or screws as per the manufacturer’s instructions. When I replaced mine, I found that pressing and slowly working my way around the door prevented misalignment. Double-check the seal for any gaps after installation.
Test the Seal and Adjust if Necessary
Close the freezer door and observe if it closes smoothly without gaps. You can use a piece of paper: insert it halfway and try to pull it out—if resistance is minimal, the seal isn’t tight enough. Sometimes, minor adjustments are needed. I had to re-position ours slightly to achieve the perfect seal, which reduced frost formation significantly.
Remember, if replacing the seal seems daunting or if you’re unsure about the quality of your new part, professional installation services can save time and ensure it’s done right. Proper sealing not only prevents frost but also improves energy efficiency, saving you money in the long run.
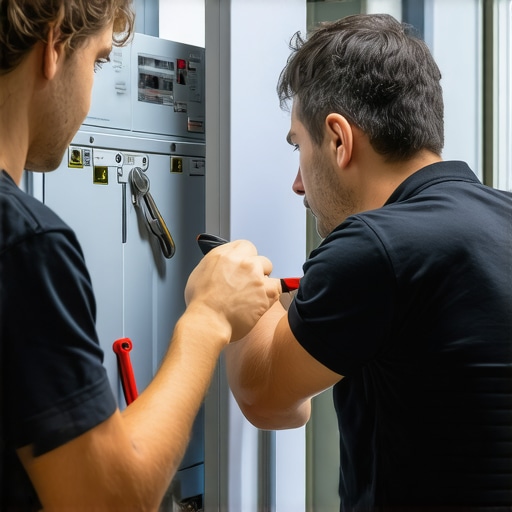 Many homeowners assume that opting for a same-day appliance repair or installation guarantees a smooth experience. However, the reality is often more nuanced. A common myth is that all service providers offer transparent warranties and reliable quick fixes, but in my experience, some businesses prioritize speed over quality, leading to incomplete repairs or hidden charges. For example, some companies advertise same-day services but delay parts procurement, resulting in rushed jobs that may not last. This can leave consumers vulnerable to recurring issues and unexpected expenses. Moreover, many believe that warranties cover everything automatically. Actually, reading the fine print reveals exclusions, like damage caused by improper usage or non-approved parts, which can void your coverage during emergencies. Professional experts warn that skipping a thorough evaluation before scheduling service might seem efficient but risks overlooking underlying problems that a quick fix might not solve. An advanced insider tip is to verify whether the warranty includes both parts and labor—some only cover parts, leaving you to pay for technician time later. Studies show that up to 40% of appliance failures after repairs are due to poor diagnostics at initial service, emphasizing the importance of reliability over rapidity. So, how can homeowners navigate this landscape effectively? The key strategy is to consult reputable providers who specify their warranty terms clearly and have a track record for honest, lasting repairs. For comprehensive insights and to avoid common pitfalls, you might want to explore top tips for same-day service and warranty coverage. Remember, rushing into urgent repairs without due diligence can cost you more in the long run. Always question whether the provider’s promises match the actual service quality. Have you ever fallen into this trap? Let me know in the comments.
Maintaining your appliances over time isn’t just about quick fixes—it’s about investing in the right tools and adopting systematic methods that ensure longevity and reliable performance. As a seasoned DIY enthusiast and professional service provider, I can attest that the proper equipment not only streamlines repairs but also enhances the quality and durability of results.
How do I keep my repairs effective long-term?
For starters, I always keep a high-quality digital multimeter on hand. It’s essential for diagnosing electrical issues accurately and safely, especially when testing capacitors or checking voltage inputs in appliances. I personally rely on the Fluke 117, which offers precise readings and a user-friendly interface, reducing guesswork during troubleshooting.
Beyond electrical testing, I prioritize safety and cleanliness. An infrared thermometer helps me quickly identify temperature inconsistencies, such as in refrigeration or heating elements. I prefer the Etekcity Lasergrip 774 because it provides instant readings without contact, minimizing contact errors and protecting against potential hazards. Additionally, I invest in a set of specialized screwdrivers and hex keys tailored for appliance panels—brands like Wiha are my go-to because they resist wear and slip less, preserving screw heads and reducing repair times.
For software diagnostics, especially in smart appliances, I use a portable Wi-Fi analyzer. Apps such as NetSpot or Fing help verify network stability and identify connectivity hiccups, which are increasingly common in modern smart devices. Updating firmware and checking manufacturer diagnostic codes through official apps streamlines the process, saving time and preventing unnecessary part replacements. According to an expert guide to appliance repair, integrating these tools into your workflow improves success rates and customer satisfaction.
Looking ahead, I predict that as appliance technology advances, diagnostic tools will become more automation-driven. Future repairs might leverage AI analysis directly from apps, giving instant, precise repair suggestions. Staying ahead with current tech and continuous learning will be key to mastering long-term appliance maintenance.
How do I maintain tools and techniques over time?
Regular calibration of multimeters and keeping tools clean and lubricated ensures ongoing accuracy. It’s also wise to update diagnostic software and firmware for smart devices periodically. I schedule monthly tool inspections, which help me catch issues early and replace worn parts before they cause bigger problems. Remember, investing a little time now in proper tool maintenance pays dividends by preventing future downtime and unplanned expenses.
For a comprehensive approach, consider consulting trusted sources like expert troubleshooting tips to fine-tune your repair toolkit. Finally, don’t hesitate to try advanced techniques like calibrating your infrared thermometer or updating your device firmware—these small steps significantly boost your repair reliability and extend appliance life. Keep honing your skills, and you’ll find that maintenance becomes less of a chore and more of a mastery.
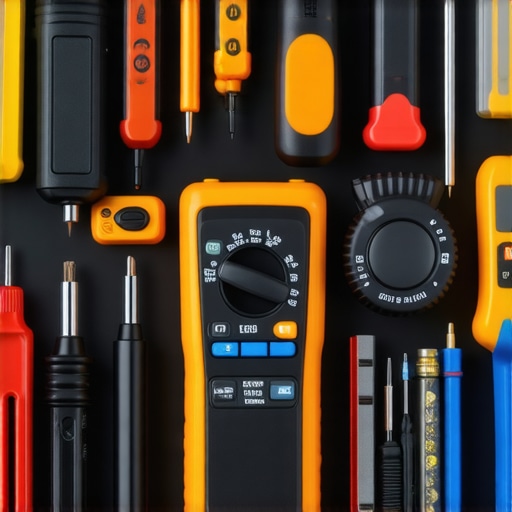
Image prompt: A neat, well-organized repair toolkit featuring digital multimeter, precision screwdrivers, infrared thermometer, and Wi-Fi analyzer, symbolizing professional appliance maintenance tools. Alt: Essential tools for appliance repair and maintenance. Title: Mastering Appliance Maintenance with the Right Tools.
The Hardest Lessons I Learned About Same-Day Service and Appliance Warranties
- One time, I postponed replacing my freezer seal, thinking a quick clean would suffice. That cost me a weeks-long frost invasion and a hefty energy bill—sometimes fast fixes only mask deeper issues.
- I used to believe that all warranties covered everything seamlessly. Turns out, many exclude certain damages or parts, and reading the fine print is crucial to avoid surprises during emergencies.
- Trusting quick online repairs without checking credentials or warranty coverage can lead to recurring issues and even damage your appliance further. Patience and due diligence pay off.
- Investing in high-quality tools and learning proper installation techniques initially saves time, money, and hassle in the long run. Mastery comes from consistent effort and curiosity.
- It took me multiple attempts and failures before truly understanding the importance of a proper, clean seal. Persistence is the secret to long-lasting appliance health and frost-free freezers.
My Essential Toolkit for Appliance Maintenance
- Digital Multimeter: The Fluke 117 is my trusted companion for electrical diagnostics, ensuring every component functions safely and correctly.
- Infrared Thermometer: The Etekcity Lasergrip 774 helps me spot temperature inconsistencies, preventing larger issues down the line.
- Precision Screwdrivers and Hex Keys: Wiha tools are durable and slip-resistant, making disassembly and reassembly smoother and safer.
- Wi-Fi Analyzer Apps: Fing and NetSpot keep my smart appliance diagnostics sharp and up-to-date, especially in an increasingly connected home.
Keep Moving Forward with Confidence
Taking proactive steps, embracing continuous learning, and investing in quality tools empower you to take control of appliance maintenance. Whether it’s replacing that stubborn freezer seal or understanding warranty nuances, your dedication ensures appliances serve you reliably for years. Remember, every improvement fuels your confidence, making each repair less daunting and more rewarding. Ready to conquer your next appliance challenge? Share your experiences or ask questions below—your journey toward frost-free living starts here!