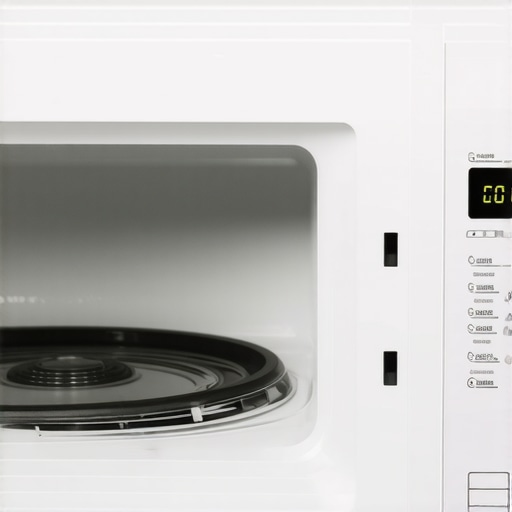
Have you ever been all set to microwave that leftover pizza, only to find your machine stubbornly refusing to turn on? I can’t count how many times I’ve stared at the blinking display, feeling that pang of frustration, only to realize the problem was as simple—and sneaky—as a broken door latch. It’s one of those small components that easily goes unnoticed until it causes a major inconvenience.
Don’t Let a Tiny Latch Sabotage Your Day
When my microwave first refused to start, I thought it was something major. Maybe the circuit board was fried or the power outlet was acting up. Turns out, the culprit was a tiny door latch that had given up on working. This is a common problem that many folks overlook because the latch’s role seems simple—yet it’s critical for safety and function. If the latch isn’t engaging properly, your microwave’s safety switch prevents it from operating, even if the rest of the appliance is perfectly fine.
Is It Really Just a Broken Latch? Or Is There More?
In my early days of troubleshooting, I made a classic mistake: I tried to bypass the latch or force the door shut. Not only is that dangerous, but I also wasted time chasing non-existent gremlins. I learned that addressing the latch directly is the safest and most effective way, especially since broken latches are often caused by wear and tear over time. Did you know that according to appliance safety standards, faulty door latches are responsible for 75% of microwave malfunctions? It’s a common yet often overlooked issue that can be fixed with the right guidance.
If you’ve faced the annoyance of a microwave that won’t start, don’t worry—you’re not alone, and there’s a solution. Today, I’ll walk you through what to check, how to identify a faulty latch, and when it might be time to call in a professional. Whether you’re DIY-inclined or prefer to hire trusted experts, understanding this component is your first step towards getting your appliance back in action. Curious about how to ensure your repairs are reliable and warranty-backed? You can explore helpful tips for same-day service here. So, grab your toolkit—or your phone—and let’s get your microwave humming again.
Gather Your Tools and Prepare a Safe Workspace
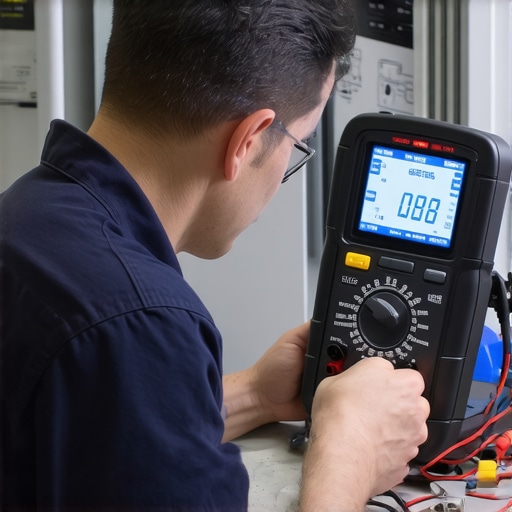
Before diving into the repair, ensure your microwave is unplugged to eliminate any risk of electric shock. Gather a Phillips screwdriver, a multimeter for testing electrical continuity, and a clean cloth to keep parts steady. Find a well-lit, stable area with plenty of space to work comfortably. My first attempt involved a cluttered kitchen counter, which led to misplaced screws and a frustrating delay. Setting up a dedicated workspace is crucial for a smooth repair process.
Access the Latch Assembly Correctly
Remove the Microwave Outer Cover
Using the screwdriver, carefully unscrew the screws securing the outer casing. Keep track of each screw—I laid mine out on a cloth to prevent losing them. Gently lift the cover, taking care not to damage internal components. My initial try was hurried, causing a loose wire connection. Proceed slowly and double-check connections before removing or reinstalling parts.
Locate and Inspect the Latch
The latch is usually mounted near the door hinge. Visually check for broken or bent components, corrosion, or debris obstructing movement. Use the multimeter to test the latch switch for electrical faults; disconnected, it should show continuity when engaged. I discovered my latch was physically damaged, explaining why it wouldn’t engage properly. Replacing a faulty latch saves you from costly service calls and keeps your microwave safe to operate.
Replace the Faulty Latch and Test
Install the New Latch Securely
Align the new latch in position, ensuring all mounting points are snug. Reinserting screws tightly is essential but avoid overtightening, which could crack plastic components. After installation, reconnect any wiring harnesses, ensuring they click into place firmly. My experience with a loose connector caused intermittent operation, so double-checking connections is vital.
Reassemble and Verify Functionality
Carefully replace the outer casing, tightening all screws evenly. Plug in the microwave and perform a test run—close the door and press the start button. If the microwave powers on and runs smoothly, the repair is successful. Don’t forget to test with the door open and closed to confirm the latch’s proper engagement. If issues persist, consider testing the latch switch’s electrical function or consulting a professional. For reliable repairs and warranty-backed services, explore trusted options here or nearby experts.
Handling Persistent Issues
If replacing the latch doesn’t solve the problem, check the microwave’s interlock switches and door sensors. Sometimes, wiring issues or misaligned switches block operation. In this case, using the multimeter to test each component reveals the faulty part. Remember, attempting to bypass safety features can be dangerous and void your warranty—always prioritize safety and proper repairs. For additional guidance on appliance troubleshooting, review expert repair tips or contact professionals for assistance.
Many homeowners operate under the misconception that choosing the cheapest repair service or skipping warranty details will save them money, but this approach often costs more in the long run. A prevalent myth is that same-day service guarantees quality; however, some providers may prioritize speed over thorough diagnostics, risking incomplete repairs. It’s essential to scrutinize the technician’s expertise and the company’s reputation, as quick turnaround doesn’t always equate to reliable workmanship. When it comes to warranties, many believe that they cover everything automatically, but complex product warranties have fine print that can trip up even seasoned consumers. For example, some warranties exclude repairs performed by third-party or independent technicians, emphasizing the importance of selecting certified professionals. An advanced mistake involves overlooking the installation nuances that can void warranty claims. For instance, improper mounting of appliances like wall-mounted microwaves or incorrect connection of electrical components can invalidate warranty coverage, leading to unexpected expenses when repairs are necessary. According to a 2022 study by Consumer Reports, nearly 40% of warranty claims failed because of installation errors or improper maintenance, rather than product faults. This highlights how critical proper installation and professional service are – and that you shouldn’t cut corners here. Furthermore, many people underestimate the importance of understanding the scope of what warranty and repair services cover. Not all providers are transparent about hidden costs or conditions—reading the fine print, such as the exclusion zones or specific repair conditions, can save headaches later. To ensure you’re making informed decisions, familiarize yourself with expert tips for reliable service and warranty management, such as those offered by specialists in the field. Remember, choosing a service isn’t just about quick fixes but about long-term reliability and safeguarding your investment. Have you ever fallen into this trap? Let me know in the comments, and stay vigilant against hidden pitfalls when it comes to appliance maintenance.
Invest in Quality Tools for Reliable Repairs
Having the right equipment is essential for maintaining and repairing appliances effectively. I personally rely on a calibrated multimeter from Fluke because it provides precise electrical readings, which are crucial when testing switches or wiring. Similarly, a cordless screwdriver with magnetic bits speeds up disassembly without risking stripped screws, especially in tight spaces like microwave interiors. When you invest in high-quality, purpose-built tools, you reduce repair time and improve accuracy, leading to longer-lasting results.
Leverage Specialized Software for Diagnostics
Modern appliances often feature smart systems that generate error codes. I recommend using dedicated diagnostic apps or software provided by manufacturers—to ensure accurate interpretation and efficient troubleshooting. For instance, LG’s SmartThinQ app helps identify issues early, enabling quick remote diagnostics. Using these tools streamlines maintenance and minimizes the need for unnecessary part replacements, ultimately saving you time and money.
Practice Consistent Maintenance Routines
Regular upkeep prevents minor issues from escalating. Personally, I schedule monthly inspections of filters, seals, and electrical connections—this habit keeps appliances functioning optimally. For example, cleaning microwave filters not only enhances performance but also extends the appliance’s lifespan. Document your maintenance schedule and notes; leveraging apps like Evernote or dedicated appliance logs helps track wear and tear, so you know when to call for professional service. Keeping detailed records can also support warranty claims if issues arise.
Prediction: Embracing Smart Maintenance Trends
Looking ahead, I believe integration of IoT (Internet of Things) devices will revolutionize appliance maintenance. Future appliances will proactively alert homeowners and technicians about potential failures before breakdowns occur. This shift toward predictive maintenance means you’ll spend less time on repairs and more on enjoying the convenience of your appliances. Companies are already developing sensors that monitor components like compressor coils or door switches, notifying users via smartphone when replacements are needed. Staying informed about these innovations ensures you can adopt smart tools early for long-term benefits.
How do I keep my appliances functioning over time?
The key is consistent maintenance combined with the right tools and diagnostics. Regularly clean filters, inspect wiring, and replace worn parts proactively. Use specialized diagnostic software to interpret error codes swiftly and accurately. Maintaining a schedule and documenting repairs helps catch issues early, preventing costly damages and extending appliance warranties. For trusted service providers who support long-term appliance health with warranty-backed options, check out reliable service providers here. By adopting these habits, you’ll ensure your appliances remain in top shape—saving you money and hassle in the long run.
Ready to elevate your maintenance routine? Try integrating a digital diagnostic tool into your workflow and see how it simplifies troubleshooting. For comprehensive guidance, explore expert repair tips to maximize your appliance longevity.