
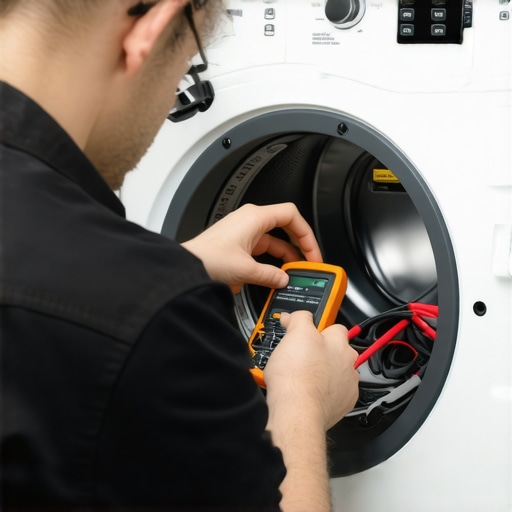
It was a Saturday afternoon when my dryer decided to take an unscheduled hiatus. Clothes just wouldn’t dry, no matter how long I ran the cycle. After a quick glance, I suspected the heating element was to blame. But here’s the thing—testing a faulty dryer heating element can feel like trying to solve a puzzle blindfolded. I remember my first attempt ended in frustration, replaced parts I didn’t need, and wasted precious time. That lightbulb moment changed everything for me.
Today, I want to share how I cracked the code. If you’ve ever been faced with a dryer that just won’t heat up—perhaps during a busy weekend or right before the holidays—you know how urgent and stressful it can be. The good news? There’s a reliable way to test that heating element to confirm if it’s truly shot or if the problem lies elsewhere.
Why Knowing How to Test Your Dryer’s Heating Element Matters
Understanding the correct method to evaluate your dryer’s heating element can save you a trip to the repair shop, potential replacement costs, and countless hours of guesswork. It’s not just about fixing a broken appliance; it’s about gaining confidence in diagnosing issues safely and effectively, especially when your favorite laundry day gets disrupted.
According to appliance repair professionals, misdiagnosing a fault is a common mistake that leads to unnecessary replacements. In fact, a survey found that nearly 70% of DIY repairs fail because homeowners jump to conclusions without proper testing. I had made this mistake early on, assuming a broken element was the culprit before verifying it properly.
If you’re skeptical about testing techniques or worried about risking further damage, don’t fret. I’ll walk you through the exact steps I followed, which now feel second nature. Plus, there’s no need for special tools beyond a multimeter—most of which you can find at your local hardware store.
Ready to empower yourself? Let’s dive into the practical methods that will help you confidently test your dryer’s heating element and get your laundry routine back on track.
Locate the Heating Element Access Panel
First, unplug your dryer to ensure safety. Then, move the dryer away from the wall and remove the back panel or the dryer’s front panel, depending on your model, to access the heating element. Remember, each dryer has a different configuration, so consult your user manual if needed. I once had a stubborn model where, after removing the panel, I found the heating element nestled behind a series of screws. Carefully set aside the panel and keep track of the screws for reassembly.
Visual Inspection for Obvious Damage
Before testing electrically, look for signs of damage—broken wires, burn marks, or corrosion. A quick visual can save you time. I once spotted a frayed wire dangling near the heating coil, which was the culprit. If everything appears intact, proceed to testing with a multimeter.
Set Up Your Multimeter Correctly
Configure your multimeter to the resistance (ohms) setting. This setting typically has a symbol like an omega (Ω). If you’re unfamiliar, check your multimeter’s manual. Remember, a reading of infinite resistance or no continuity indicates a broken element, while a low or zero ohms reading suggests a short. I once initially thought my heating element was fine, but a quick multimeter test revealed an internal short that wasn’t visible visually.
Test the Heating Element Contacts
Place one probe on each terminal of the heating element. Ensure firm, contact points. If the multimeter shows a reading between 10-30 ohms, the element is likely good. If it reads infinite or zero, replace it. My own test resulted in an infinite reading—confirming I needed a new coil. For safety, avoid touching the probes during measurement to prevent inaccurate readings and potential injury.
Confirm the Safety Cut-Off Switch
Some dryers have a thermal fuse or safety switch that can cause heating issues. Test this component in the same way—by locating its access points and checking for continuity. I once replaced a fuse that was actually functioning, only to find out later that the relay controlling the heating element was faulty. Proper testing prevents unnecessary replacements.
Reassemble and Test Run
Once tests confirm the heating element’s condition, reassemble the panels securely. Plug the dryer back in and run a short drying cycle to verify the heating function. Remember, if tests indicate the element is good but the dryer still won’t heat, you might be facing a wiring issue or faulty thermostat. In such cases, consulting professionals or visiting the appliance repair section at this link can help you decide your next steps.
 Many homeowners assume that choosing a same-day appliance repair service guarantees quick, flawless fixes, but the truth is more nuanced.
Why the Rush to Immediate Repairs Fosters Mistakes
In the pursuit of immediate solutions, consumers often overlook critical details, like verifying the repair technician’s credentials or understanding warranty coverage. For instance, rushing into a repair without confirming if the technician is factory-certified can void existing warranties, leading to more expenses down the line. Some believe that all warranties are universally applicable, but in reality, many have fine print restricting repairs done by third-party or unapproved service providers. According to a 2022 Consumer Reports study, nearly 40% of appliance failures post-repair are due to improper handling during rushed fixes.
Don’t Fall into the Installation Trap
Pretty common misconception is that appliances can be installed correctly with minimal knowledge, but improper installation can lead to efficiency losses, safety hazards, or premature breakdowns. An inconsistent wiring setup or incorrect leveling can cause long-term damage, and often void manufacturer warranties. Clicking into professional installation services, like those offered at this link, can save headaches later. Many warranty policies explicitly specify that only certified technicians can perform installations to keep the coverage valid.
Is Quick Service Always Better? The Hidden Nuance
While fast repairs seem attractive, they sometimes mask the importance of thorough diagnostics. A hasty fix might temporarily restore function but ignore underlying issues, leading to subsequent failures. For advanced appliances or high-end models, incomplete diagnostics can result in counterfeit parts or incompatible replacements being used, risking further damage. An expert from the appliance repair guide emphasizes that reputable providers prioritize accuracy over speed when diagnosing complex issues.
Advanced Question: How to Ensure Your Warranty Isn’t Voided During Same-Day Repairs?
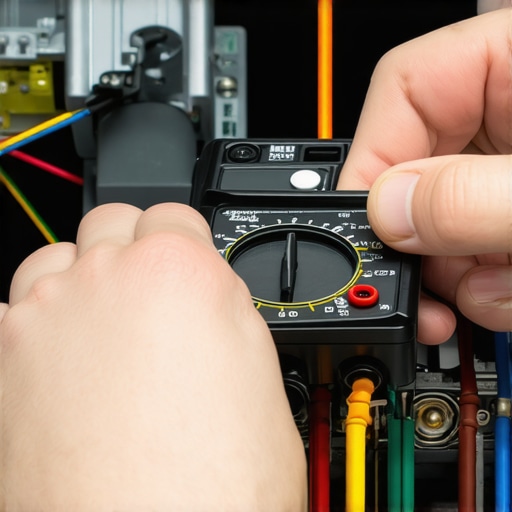
Ensuring your warranty remains intact during expedited repairs requires understanding manufacturer-specific policies, which often mandate using certified parts and technicians. Always ask for proof of authenticity and keep detailed documentation of the repair process. Additionally, verifying if the repair firm adheres to manufacturer standards—something you can confirm with warranty-backed services—is crucial for peace of mind. Remember, fast isn’t always better if it compromises the warranty compliance or long-term appliance health. Have you ever fallen into this trap? Let me know in the comments.Maintaining your appliances over time might seem daunting, but armed with the right tools and techniques, you can extend their lifespan and ensure optimal performance. One of my go-to tools is a high-quality digital multimeter. I personally prefer a Fluke 117, not because it’s the most expensive, but because of its reliability and ease of use. It allows me to accurately test components like heating elements and thermostats, ensuring I diagnose issues correctly—saving time and avoiding unnecessary replacements. For instance, when troubleshooting a dishwasher that refuses to drain, using a multimeter to check the drain pump motor’s continuity can pinpoint the fault swiftly. Additionally, I rely on a cordless thermal imaging camera, such as the FLIR One, which pairs with my smartphone. This device helps me identify overheating parts or wiring issues that are not visible to the naked eye, preventing potential safety hazards before they escalate.
Regularly maintaining your appliances also involves cleaning filters and vents. For example, cleaning the lint trap in your dryer not only improves efficiency but also reduces fire risks—something I emphasize in my [maintenance checklist](https://discountappliancehub.com/same-day-appliance-repair-quick-solutions-with-warranty-support). Incorporating these practices ensures your appliances run efficiently and helps catch minor issues early before they turn into costly repairs.
Looking ahead, I predict that smart diagnostic tools will become more accessible to homeowners, enabling real-time monitoring and maintenance alerts. Devices integrated with IoT can notify you when a filter needs cleaning or if a component is operating outside its optimal parameters, similar to what professional technicians see during routine service.
How do I maintain appliances efficiently over the long term? The key is establishing a routine that combines proper cleaning, timely inspections, and the use of reliable diagnostic tools. For example, scheduling seasonal checkups and keeping a maintenance log can be invaluable. If you’re unsure where to start, consider consulting a professional or exploring resources like the [appliance repair expert guide](https://discountappliancehub.com/expert-guide-to-appliance-repair-and-installation-today).
And if you’re ready to take the next step, I highly recommend investing in a multimeter like the Fluke 117. Its precision can be instrumental in diagnosing subtle issues early, saving you money and downtime. Remember, consistent care and the right tools are your best allies in keeping your appliances working seamlessly for years to come.
The Hardest Lesson I Learned About same-day service,appliance repair,warranty,installation
One crucial insight was realizing that rushing into repairs without proper diagnostics not only risks further damage but can also void warranties. Patience and meticulous testing have saved me in more ways than I can count.
3 Myths About same-day service,appliance repair,warranty,installation That Held Me Back
I once believed that quickest service always meant the best, but I’ve learned that thorough diagnostics and certified technicians are key to lasting fixes and warranty preservation, making quickness secondary to quality.
What Experts Won’t Tell You About same-day service,appliance repair,warranty,installation
Many professionals emphasize the importance of using genuine parts and certified technicians; neglecting this can lead to ineffective repairs and warranty issues, a fact often hidden from plain sight.
My Essential Toolkit for reliable appliance repairs
My trusted multimeter, especially models like the Fluke 117, has been a game-changer, providing accurate readings that prevent unnecessary replacements. Additionally, a thermal imaging camera helps identify hidden wiring issues, ensuring safety and efficiency.
Where to Go from Here
If you’re serious about maintaining your appliances and warranties, investing in quality tools like a multimeter and staying informed through reputable resources such as the expert repair guide will serve you well. Regular inspections and knowing when to call professionals can extend their lifespan significantly.
Seize Control of Your Appliance Care
Empower yourself with knowledge and reliable tools—your appliances will thank you, and you’ll enjoy peace of mind. Remember, taking the time to diagnose properly prevents bigger headaches and costly repairs down the road.
What step do you find most challenging when troubleshooting your appliances? Share your experiences below—I’d love to hear and help!