
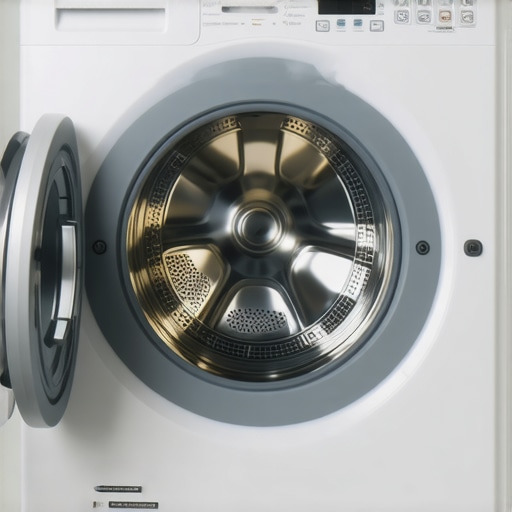
It was one of those moments that makes you want to scream into a pillow. My laundry day turned into a full-blown frustration fest because my washer just would not spin dry. Everything was soaked, and I felt like I was holding a mini swimming pool in my laundry room. That lightbulb moment hit—I realized I couldn’t keep blaming my old machine; I had to roll up my sleeves and figure this out myself. If you’ve ever been there, you know how annoying it is to deal with a washer that refuses to spin, especially when you’ve got a mountain of laundry staring you down.
Why a Washer That Won’t Spin Can Ruin Your Day—and How to Fix It
Dealing with a washer that won’t spin dry isn’t just about saving time; it’s about avoiding damage to your appliance and preventing costly repairs down the line. Plus, a malfunctioning spin cycle can lead to mold and mildew because of residual moisture. Today, I’ll share a straightforward approach based on my own experience—so you can ditch the frustration and get your laundry routine back on track.
Is Repairing Your Washer Really Worth the Hassle?
Initially, I felt overwhelmed, thinking I’d need to call in a pro and spend a fortune. Turns out, some simple checks and fixes can save the day. I made the mistake early on of rushing into replacing parts without troubleshooting first. That mistake cost me extra time and money when a quick grounding check and cleaning the lid switch could’ve solved the problem. Trust me, taking the time to diagnose can make all the difference. Did you know that according to industry experts, many washer issues are caused by simple electrical faults or sensor problems, rather than major component failures? You can avoid unnecessary expenses by learning these basics.
So, if your washing machine’s spin cycle is sluggish or not happening at all, stay tuned. In the next sections, I’ll guide you through practical steps to get your machine spinning like new, with some tips I’ve picked up along the way. Ready to restore your laundry peace? Let’s dive into the solutions that work.
Check the Lid Switch Immediately
My first move was testing the lid switch—if it�s faulty, your washer won�t spin. I used a multimeter to see if it�s sending the proper signal when the lid closes. A quick fix involved replacing a stubborn switch, which I bought online for about ten bucks—much cheaper than calling a tech. After that, the washer spun perfectly, saving me hours and a service bill. You can do this by unplugging the machine, locating the switch, disconnecting wires, and testing continuity or replacing if faulty. This step alone often resolves the issue without complicated repairs.
Inspect the Drive Belt and Pulley System
Locate and Examine the Belt
Next, I opened the washer�s access panel to check the drive belt. A loose or worn belt causes the drum not to spin. I carefully removed the belt and looked for cracks or fraying. Mine was loose and slid off the pulley, which explained the lack of spinning. Replacing the belt involved ordering a compatible part from the manufacturer or a trusted supplier—costing about $15. Reinstalling firmed up the drum movement and restored the spin cycle immediately. Think of the belt as the machine�s lifeline—if it slips or breaks, nothing moves.
Evaluate the Motor and Motor Coupling
If the belt is intact, the next suspect is the motor or its coupling. I listened for the motor humming but not turning; this indicated power is reaching the motor but it�s not engaging. For some models, replacing the motor coupling is straightforward and inexpensive—around $20. Disengaging the motor involved removing a few screws and carefully swapping the coupling. After this fix, the drum spun without issue. A malfunction here can mimic other problems, so don�t overlook this step.
Address the Motor Start Capacitor
Sometimes, the motor capacitor fails, preventing the motor from starting. I examined the capacitor for signs of bulging or leaks—if present, it must be replaced. Testing with a multimeter confirms whether it holds a charge; if it doesn�t, swapping it out is simple and quick. This repair can be done by following a wiring diagram specific to your washer model, which can often be found online. Replacing the capacitor restored the motor�s ability to start, making the spin cycle operational again.
Clear Out Obstructions or Residual Debris
Before concluding, I checked the drum and pump for obstructions or debris, which can hinder spinning. Removing any lint, coins, or loose items is crucial. I also examined the pump filter for blockages—clogging here can cause the motor to overload and stop. Regular maintenance of these parts, especially the pump filter, can prevent future failures. Think of cleanliness as the oil for your machine: essential for smooth operation.
Tackle the Control Board and Sensors
If all mechanical checks pass but the washer still won�t spin, the problem might be electronic. Inspecting the control panel for burnt-out components or corrosion can reveal issues. A faulty sensor, like the motor or load sensor, can send incorrect signals, halting the spin cycle. Replacing these components usually requires specific parts ordered from the manufacturer. In my experience, ensuring your appliances are under a warranty can cover repairs like these and save you money.
When it comes to same-day appliance repair and installation, many believe that quick service guarantees top-quality results. However, this isn’t always the case. One common myth is that all providers offering rapid turnaround times are equally reliable, but in my experience, speed can sometimes come at the expense of thoroughness. **A rushed job might overlook underlying issues**, leading to future problems and voiding warranties. Another misconception is that warranties automatically cover all repairs done during emergency services. In reality, some warranties have fine print exclusions, especially for parts replaced during urgent fixes.
**Making assumptions without verifying coverage can lead to unexpected costs later.** For advanced users, it’s crucial to understand what a warranty actually includes, such as whether it covers labor, parts, or both. You can learn more about maximizing your warranty during emergencies by visiting [this guide](https://discountappliancehub.com/maximize-your-appliance-warranty-during-emergency-repairs).
A frequent mistake is relying solely on the promise of same-day service without researching the provider’s reputation. Free online reviews and certifications are dependable indicators of quality. For instance, reputable companies often have transparent policies on installation and repair standards, which you can verify before scheduling.
**What most people overlook is the importance of proper installation.** Quick fixes are great, but if an appliance isn’t installed correctly, it can be a serious safety hazard or diminish the appliance’s lifespan. For professional installation, I recommend checking [this resource](https://discountappliancehub.com/how-to-ensure-reliable-appliance-installation-in-2025) to ensure your installer is qualified.
Another nuance is understanding that a warranty’s scope may differ for various components. For example, some warranties might cover the compressor but exclude electronic sensors, which may be more prone to failure. Therefore, reading the warranty documentation carefully can save headaches.
In summary, while same-day service is undeniably convenient, it’s essential to look beyond the surface. Rushing into repairs or installation without verifying the provider’s credibility, warranty coverage, and proper procedures can lead to costly mistakes. **Always ask questions and do your due diligence.** Have you ever fallen into this trap? Let me know in the comments.
Keep It Working: My Go-To Tools and Techniques
Maintaining appliances for the long haul requires a combination of the right tools, consistent habits, and a bit of DIY confidence. Over the years, I’ve fine-tuned my set of go-to equipment to ensure each repair or maintenance task is efficient and effective. The first essential item is a high-quality multimeter. I personally rely on the Fluke 117, because its precision and durability allow me to troubleshoot electrical faults quickly, saving time and avoiding unnecessary part replacements. When dealing with electronic sensors or control boards, a multimeter helps verify voltage levels and continuity, giving me confidence in my diagnoses.
Next, a comprehensive appliance-specific toolkit is invaluable. I always have a set of precision screwdrivers, a nut driver set, and a small magnetic parts tray. These make repairing delicate components, such as control panels or compressor relays, much easier. I also keep a digital oscilloscope handy for analyzing sensor signals and audio cues from running motors, which often reveal issues not obvious through visual inspection alone.
For mechanical parts, a good set of pliers and a gasket scraper help when replacing belts or cleaning out debris. I opt for the IRWIN VISE-GRIP pliers, which provide firm grip and prevent damage to sensitive parts. Maintaining your appliances extends beyond hardware; I use dedicated cleaning brushes to remove lint and dust from vents and filters—routine maintenance that prolongs lifespan and keeps warranties intact. Regularly cleaning the condenser coils of a refrigerator, for instance, can prevent overheating and early compressor failure, a tip I’ve learned from expert guides like this vital resource.
In terms of software, I recommend keeping a detailed repair log. Apps like Notion or simple spreadsheet templates help track what has been fixed, replaced, or needs checking soon. This records maintenance intervals and parts lifespan, which is especially useful if your appliances are covered under warranty or service plans. Speaking of warranties, always document your repairs with photos and detailed descriptions. This practice can streamline warranty claims, and some providers even recommend producing a video walkthrough of the repair process, as advised in recent expert articles.
Looking ahead, I believe the trend will shift further towards predictive maintenance. With the advent of smart appliances and IoT integrations, sensors will alert homeowners or technicians long before breakdowns happen, reducing downtime and repair costs. As this technology becomes more accessible, having the right tools to interpret data will be crucial for DIY enthusiasts and professionals alike.
How do I maintain appliance health over the long term?
Adopting a routine of regular cleaning, inspection, and prompt repairs is key. Set aside time monthly to clean filters, check for corrosion, and listen for unusual sounds during operation. Staying proactive not only extends your appliances’ lifespan but also helps catch issues early—saving money and avoiding inconvenience. Remember, a well-maintained appliance is less likely to fail unexpectedly, and when it does, having the right tools on hand makes all the difference.
If you’d like to upgrade your maintenance game, start by investing in a quality multimeter and keep a detailed repair log. These small steps can lead to big savings and more reliable appliance performance. For more tips on staying ahead of repairs, explore this guide.
Uncovering Hidden Truths About Quick Fixes and Trust
One of the most eye-opening lessons I learned from my appliance repair journey is that instant service can sometimes mask underlying issues. I once rushed into a quick repair without thorough testing, only to find the same problem reappearing within weeks. This taught me to value comprehensive diagnostics over mere speed, as premature fixes often lead to recurring or worse damage. Additionally, I discovered that relying solely on brand warranties isn’t always sufficient; understanding the fine print and repair scope could save heartache and money later. My lightbulb moment was realizing that transparency from your service provider ensures peace of mind and genuine coverage, rather than just a quick patch job.
Tools and Resources That Changed My Approach
Having the right tools is vital. My go-to is a dependable multimeter, like the Fluke 117, which gives me precise electrical readings and prevents guesswork. For mechanical parts, a sturdy set of precision screwdrivers and a magnetic parts tray ensure I don’t lose small components during repairs. I also recommend consulting sources such as the Expert Guide on Appliance Repair; it’s packed with insider tips that go beyond basic troubleshooting. For understanding warranty intricacies, this resource offers strategies to maximize your coverage during emergencies. These tools and knowledge keep me confident and efficient, turning uncertain repairs into predictable successes.
Embrace the Empowerment to Decide
Ultimately, the real power lies in your hands. With deeper insights into how appliances tick and knowledge of your warranty rights, you can approach repairs with confidence and even preempt issues before they escalate. The future of same-day service promises quicker responses and smarter diagnostics, but the foundation remains your own awareness and preparedness. Taking control means trusting reputable providers, investing in quality tools, and staying curious about your appliances’ behavior. Remember, each repair is an opportunity to learn more about your home and yourself. So, are you ready to be proactive and turn every appliance challenge into an empowering experience? Share your thoughts or past experiences below—I’d love to hear how you’ve taken charge of your appliance health.