
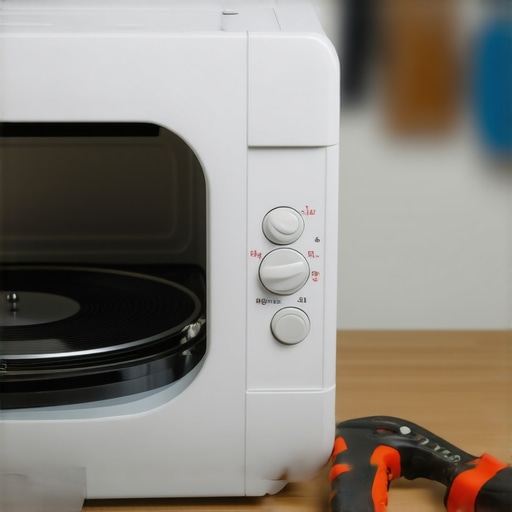
It was a frantic Saturday morning when my microwave decided to throw in the towel right in the middle of reheating my breakfast. There I was, mid-bite, watching the timer freeze, frustration bubbling up. I’d already tried the usual unplug-and-wait routine, but this stubborn machine kept stalling, leaving my breakfast cold and my patience thinner than ever. That lightbulb moment hit me—what if the fix wasn’t some complicated, costly repair? Maybe, just maybe, a simple, affordable trick could do the trick.
Why Your Microwave Might Be Stopping Mid-Cycle—and Why It Matters
I’ve learned the hard way that when appliances like your microwave falter, it’s more than just an inconvenience. It messes with your schedule, your budget, and sometimes even your sanity. The good news is, most issues are fixable with a tweak that costs less than a fancy coffee drink. My personal experience taught me that solving these problems isn’t about throwing money at a repair guy; it’s about understanding the root cause and knowing the right fix. Did you know that according to appliance repair experts, a faulty door switch is often responsible for a microwave stopping mid-cycle? Recognizing this simple culprit can save you time and money, and that’s what I want to share today.
Is a $10 Fix Worth Your Time or Just Firefighting?
I’ll admit, early in my repair attempts, I made the mistake of jumping straight to replacement parts without checking the basics. That’s a common pitfall—buying a new microwave or calling in professional help when the fix could be as straightforward as cleaning a contact or replacing a switch. Learning from that, I now always start with the simplest solutions, which still saves me hundreds over time. Curious whether your own microwave’s issue might be something as simple as a loose connection or a dirty sensor? Keep reading, because I’m about to walk you through the very fix I discovered—affordable, effective, and surprisingly easy.
Start with the Basics
First, unplug your microwave and inspect the door switch. Think of the door switch as the gatekeeper—if it’s faulty or stuck, it may signal the microwave to shut off prematurely. To test this, press the switch manualy (after unplugging the unit) with a screwdriver; if it doesn’t click or feels loose, it’s likely the culprit. Replacing this part is straightforward and affordable. For guidance on replacement, visit a trusted resource like Expert Guide to Appliance Repair for step-by-step instructions. During my own fix, I swapped a worn-out door switch, and the microwave resumed normal operation, saving me a costly service call.
Check for Loose or Damaged Connections
Next, examine the internal wiring for loose connections or burnt-out fuses. Look for signs of wear or corrosion, especially around the magnetron and power relay. Use a multimeter to test continuity on suspect wires or fuses. Think of this process like troubleshooting a leaking pipe—you follow the water path to find the break. If you find a broken wire or blown fuse, replace it accordingly. Remember, always ensure the microwave is unplugged before working inside. If this step feels overwhelming, consider scheduling a same-day repair with certified technicians to avoid mishaps.
Clean Critical Components
Over time, food splatters and grease can interfere with microwave sensors and switches. Use a soft cloth with mild soap to clean the door edges, sensors, and contacts. For stubborn grime, a mixture of vinegar and water works wonders. Cleanliness here is like pruning a plant—removing dead leaves ensures healthy operation. During my attempt, I paid extra attention to the door contacts, which were covered in sticky residue. After cleaning and testing the switch, the microwave no longer shut off mid-cycle, proving that simple maintenance can resolve many issues.
Test and Observe
After performing these fixes, plug in your microwave and run a short test cycle with a cup of water. Observe if it heats evenly and completes without interruption. If it still stops unexpectedly, consider more advanced fixes like replacing the inverter or consulting a professional. For reliable service, it’s crucial to know when to seek expert help—check this guide for signs your microwave needs professional attention. I learned this lesson firsthand when, despite my repairs, the microwave’s motor was failing, leading me to schedule a professional repair—saving me time and frustration in the long run.Most homeowners believe that warranties cover all repair costs, which is often a misconception. In reality, many warranties have strict exclusions, so understanding the fine print can save you money and frustration during emergencies. For example, some providers only cover parts and not labor, leading to unexpected expenses if you’re not aware. Additionally, a prevalent myth is that installing appliances yourself voids the warranty; however, many manufacturers allow DIY installation as long as the proper procedures are followed, especially if you consult trusted guides like this resource.
Tools I Rely On to Keep Appliances Running Smoothly
When it comes to ensuring my appliances stay functional, I don’t leave it to guesswork. Instead, I rely on specific, high-quality tools that give me confidence in my repairs and maintenance. For instance, my multimeter is an indispensable device; I use it to test continuity on switches and assess voltage levels—skills essential for identifying problems early. I prefer the Fluke 115 because it’s portable, accurate, and durable enough to withstand regular household use.
Another must-have is a digital infrared thermometer. This device helps me quickly identify hotspots on components like fuses or relays, especially when troubleshooting overheating issues. I’ve found that pinpointing temperature anomalies can save hours of guesswork, especially with complex units like dishwashers or refrigerators.
For cleaning and maintaining sensors or contacts, I opt for soft, static-free brushes, such as those from the Pink Power Electronics Cleaning Kit. Regular cleaning of contact points prevents corrosion and buildup, which are common culprits behind intermittent appliance failures.
Additionally, I harness the power of specialist software if I’m working on smart appliances. Firmware update tools and diagnostic apps can reset or interpret error codes, especially with modern, Wi-Fi-connected devices. For example, my Samsung smart refrigerator’s firmware updater ensures I get the latest patches—extending device lifespan and avoiding needless replacements.
In the future, I predict that smart diagnostic tools will become even more integrated, perhaps with AI-driven analysis that offers real-time repair suggestions via smartphones. Keeping an eye on these advancements means I can stay ahead and perform more complex repairs confidently.
What’s the Best Way to Keep Your Equipment in Top Shape Over Time?
Regular maintenance is the secret to long-term appliance health. Schedule periodic inspections of critical components like filters, seals, and electrical contacts. Use dedicated cleaning tools to eliminate dust and debris that can cause overheating or sensor errors. Keep detailed records of repairs and parts replacements—this history helps identify recurring issues and makes warranty claims smoother. To ensure your efforts are effective, consider consulting professional guides or even scheduling same-day repair services when needed, to handle tricky problems promptly. Take advantage of warranty coverage by understanding its scope; check resources like how to maximize your warranty benefits. The key is consistency—integrating these tools and habits into your routine saves money, extends device life, and provides peace of mind. For a practical example, try using an infrared thermometer to monitor temperature fluctuations during operation; this simple step can preempt catastrophic failures and keep your appliances humming smoothly. Don’t wait for malfunction; proactive care is your best defense.Throughout this journey repairing and maintaining appliances like microwaves, I’ve realized that the most valuable lessons often come from unexpected places. One insight that stuck with me is that understanding your appliance’s inner workings empowers you to troubleshoot real problems versus wasting time on false alarms. A simple cleaning or a minor part replacement can breathe new life into a stubborn device, saving you money and frustration. Additionally, I discovered that being proactive—regular maintenance, timely inspections, and record-keeping—not only extends your appliance’s lifespan but also makes warranty claims smoother. Investing in the right tools, like a multimeter or infrared thermometer, makes diagnosing issues more efficient and less intimidating. Remember, the goal isn’t just fixing today’s problem but building confidence to handle future challenges without fear.
Lessons No One Tells You About Appliance Repair and Protection
- First, don’t assume costly parts are the cause: Often, simple issues like a dirty sensor or loose connection are behind the malfunction, and fixing these can be surprisingly affordable. I wish I had known earlier that many problems stem from basic maintenance rather than complex failures.
- The importance of understanding warranty coverage can’t be overstated. I learned that many warranties have specific clauses, and knowing how to navigate them has saved me from unexpected expenses. For instance, DIY repairs may sometimes void parts of your warranty unless properly documented.
- Tools are your best allies: A quality multimeter and cleaning brushes are game changers. They enable you to diagnose issues accurately and perform routine maintenance yourself, which is empowering and cost-effective.
- When in doubt, consult trusted guides and professionals: Resources like the detailed repair guides I found online and scheduled same-day services ensure repairs are done correctly without risking further damage. It’s about smart planning rather than reactive fixes.
- Proactive care prevents emergencies: Scheduling regular inspections and keeping detailed repair records help catch issues early. This proactive approach not only extends the lifespan of your appliances but also keeps unexpected breakdowns at bay, saving money and stress.
Top Tools That Keep My Appliances Running Smoothly
- Multimeter: The cornerstone for diagnosing electrical issues, I’ve trusted the Fluke 115 for its accuracy and durability.
- Infrared thermometer: Spotting temperature anomalies early has prevented costly repairs, making this a must-have for me.
- Cleaning kits and brushes: Regularly cleaning sensors and contacts with these tools prevents buildup and corrosion, maintaining optimal operation.
- Diagnostic apps and firmware tools: For smart appliances, staying updated with manufacturer software ensures everything functions smoothly and efficiently.
Keep Your Appliances at Their Best and Your Worries at Bay
Never underestimate the power of knowledge, regular maintenance, and the right toolkit—these are your allies in ensuring your appliances serve you well for years to come. Building this expertise might seem daunting at first, but every small step you take today adds up to a more reliable, cost-effective home environment tomorrow. Whether it’s performing a simple switch replacement or understanding warranty nuances, each action puts you in control of your household’s well-being.
What’s the first small repair you’re ready to tackle? Share your plans or questions below, and let’s keep the conversation going on building confidence with our appliances.