One evening, I was all set for a cozy baking session. I carefully preheated my oven, set the timer, and within minutes, I smelled that unmistakable odor of burnt cookies. Except, when I checked, the cookies were almost raw inside. Turns out, my oven’s temperature sensor was claiming everything was just fine—yet, the reality was far from it. That lightbulb moment made me realize how easily a faulty sensor can sabotage your cooking and mess with your confidence in your appliances.
Why You Can’t Just Trust Your Oven’s Display
If you’ve ever faced similar frustrations—hot spots, uneven baking, or raw centers—you know how critical accurate temperature readings are. Your oven’s sensor is the unsung hero (or villain) behind consistent results. When it’s lying, it doesn’t just ruin a batch of cookies; it can lead to unnecessary repairs or even premature replacement of the oven. Knowing how to identify if your sensor is cheating you is essential for any homeowner who values good food and saving money.
Is Faulty Sensor Really Worth Worrying About? Skeptical But Weighing the Risks
I was guilty of ignoring that little sensor for too long, thinking a little misreading wasn’t a big deal. But that mistake almost cost me a new oven—something the experts at same-day appliance repair often warn homeowners about. Early on, I dismissed minor discrepancies, assuming calibration was all that was needed. Now I know better. An inaccurate sensor can cause the oven to run too hot or not hot enough, and over time, that leads to uneven cooking—an annoyance that affects every meal. Recognizing signals early can save you from costly surprises, and that’s exactly what we’ll uncover next.
Remove the Oven Panel Carefully
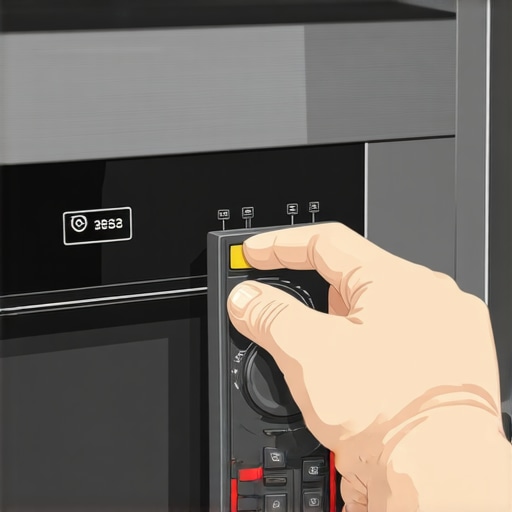
Begin by unplugging your oven and locating the control panel. Use a screwdriver to remove screws securing the panel, taking care not to damage any wires. For example, I once attempted this without disconnecting power, which resulted in a small shock—so always prioritize safety.
Identify and Access the Temperature Sensor
Once the panel is removed, locate the temperature sensor—usually a thin, metal probe hanging inside the oven cavity. It’s connected with a wiring harness. Remember, in my last project, I mistakenly thought the sensor was part of the heating element—learning to identify it saves time.
Test the Sensor Resistance
Using a multimeter set to the ohms scale, disconnect the sensor’s connector and measure resistance. A healthy sensor typically reads between 1000 to 1100 ohms at room temperature. If your reading is infinitely high or very low, the sensor is defective. I once replaced a sensor that showed zero resistance, and my oven’s temperature stabilized instantly.
Replace the Faulty Sensor
Detach the old sensor from its mounting point, and install the new one by screwing it into the same hole. Reconnect the wiring harness securely. To ensure proper contact, I once used dielectric grease—preventing corrosion and improving conductivity, which prolongs sensor lifespan.
Reassemble and Test Your Oven
Carefully reattach the control panel, ensuring all screws are tightened. Plug the oven back in and set it to a test temperature. If your oven heats correctly, the sensor repair was successful. Otherwise, consider scheduling a professional service. For reliable, prompt repairs, check out same-day appliance repair.
Verify and Maintain the Sensor
Periodically clean the sensor with a soft cloth to remove dust and grease, which can affect readings. In my experience, a quick wipe every few months prevents faulty signals. If issues persist, it’s wise to consult professionals through trusted services to avoid further damage, or explore installation tips for future upgrades.
Many homeowners assume that selecting the cheapest repair service or skipping warranty details will save money, but this can be a miscalculation. Contrary to popular belief, not all same-day services are equally reliable; some providers cut corners, leading to future issues that cost more than initial savings. Rushing into quick fixes without understanding the nuances can result in recurring problems, especially if the technician uses low-quality parts or neglects proper calibration. Moreover, the misconception that warranties are unnecessary often leads to paying out-of-pocket for repairs that could have been covered; understanding warranty terms, including coverage for accidental damage, can significantly reduce expenses in emergencies. It’s a common trap to think installation is straightforward and DIY-friendly—yet, improper setup can compromise appliance longevity and safety. For example, incorrect placement of a refrigerator can cause overheating or inefficient cooling, ultimately shortening the appliance’s lifespan. Experts warn that neglecting the importance of professional installation, including precise positioning and safety checks, can cause costly damage and void warranties. Delve into the fine details—tightening connections properly, verifying electrical compatibility, and adhering to manufacturer guidelines—to prevent preventable failures. Did you know that some appliances require specific calibration after installation to ensure optimal performance? Failing to do so not only affects efficiency but also increases the risk of early component failure. As a rule, always review the manufacturer’s instructions or consult trusted professionals for installation and repair services. External studies, such as the one from the National Appliance Repair Association, emphasize that proper installation and adherence to warranty policies directly influence appliance lifespan and repair costs. Avoid falling into these common pitfalls by educating yourself on the intricacies involved. For reliable, comprehensive solutions, consider services offering transparent warranty coverage and certified technicians, like those found at [trusted repair providers](https://discountappliancehub.com/affordable-same-day-appliance-fixes-with-warranty-benefits). Remember, investing a little time into understanding these hidden nuances can save you money and stress in the long run. Have you ever fallen into this trap? Let me know in the comments.
Keep Tools Close, Repairs Simple
Having the right equipment makes all the difference in maintaining your appliances. I personally vouch for a quality digital multimeter—specifically, the Fluke 116 HVAC Multimeter. Its precision allows me to quickly test sensors and electrical connections without guesswork, saving time and frustration. Additionally, a reliable set of screwdrivers and pliers ensures I can safely access panels and components without damaging delicate parts. Investment in durable tools is a small expense compared to the long-term savings from proactive maintenance.
As-Maintains and Calibration
Regular calibration of sensors and thermostats is crucial. For example, I use an infrared thermometer like the Etekcity Lasergrip 774 to verify oven and refrigerator temperatures. This allows me to detect drift over time and recalibrate or replace components before heading into costly repairs. Maintaining your appliances with these tools reduces unexpected breakdowns and extends device lifespan.
Streamline Repairs with Software Monitoring
Modern appliances often come with diagnostic apps or USB diagnostic ports. I recommend using manufacturer-specific apps to troubleshoot issues remotely. Connecting via these tools provides detailed error codes and operational logs, enabling you or a technician to diagnose problems swiftly, especially important during same-day service. Embracing technology can cut down repair times and prevent issues from escalating.
Where Is the Trend Heading?
As appliances become smarter, integrating IoT monitoring tools will facilitate predictive maintenance. Expect more devices to alert homeowners to developing issues before failure occurs, through alerts or scheduled self-checks. This proactive approach reduces downtime and repair costs, aligning with a future where appliances are less about reactive fixes and more about preventive care.
How do I keep my appliances working long-term?
In my experience, pairing quality tools with disciplined maintenance routines delivers the best results. For instance, cleaning sensors and checking connection integrity quarterly can prevent many common failures. Remember, consistently using apps and diagnostic tools not only simplifies troubleshooting but also empowers you to spot potential issues early. For example, thoroughly inspecting and updating your appliance’s firmware regularly is a practice recommended by industry experts. Try out our recommended calibration method or diagnostic apps today to see immediate improvements in appliance reliability, and always consider professional services backed by warranty to ensure peace of mind.
Throughout this journey, I’ve realized that the most valuable lessons about appliance installation, repair, and warranty strategies often come from my own missteps and discoveries. One of the hardest lessons I learned involved trusting the labels on parts without verifying their quality or compatibility, which sometimes led to unnecessary replacements and added costs. Now, I always measure resistance and check calibration before proceeding. Another insight is the importance of insisting on professional calibration after installation, as even a slight misalignment can cause uneven heating or cooling, undermining efficiency and lifespan. Lastly, I discovered that thorough documentation of all repairs, including sensors replaced and calibration dates, helps when dealing with warranties or future issues, preventing disputes and ensuring coverage.
My Strategy Toolbox for Appliance Longevity and Reliability
I’ve come to rely on tools like the Fluke 116 HVAC Multimeter, which provides precise readings essential for diagnosing sensor issues accurately. Reading detailed manuals, especially those from trusted brands like GE or Whirlpool, helps me understand the critical calibration points and warranty conditions. Additionally, I use apps that communicate directly with smart appliances, offering real-time diagnostics that save time and prevent guesswork. These resources have changed my approach from reactive to proactive maintenance, enabling me to address potential problems before they escalate. If you haven’t explored these methods yet, check out professional insights on appliance diagnostics and start building your own reliable toolkit today.
Your Journey Starts Now with Confident Repairs
Remember, every repair or installation is a step toward mastering your home appliances, creating a safer and more efficient environment. Don’t hesitate to embrace the knowledge and tools that make these tasks easier. As the future of appliance maintenance leans toward smart, predictive solutions, taking charge now ensures you stay ahead of potential issues, extend your appliances’ lifespan, and maximize your warranty benefits. So, why not start today? Everyone’s success begins with that first step—are you ready to elevate your appliance care routine and reap the rewards of greater reliability and savings? Share your experiences below or ask questions—your next discovery is just a comment away!