
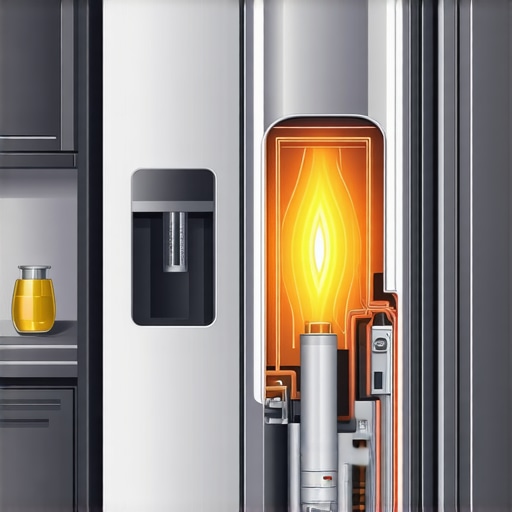
I remember the moment vividly—standing in my kitchen, fridge humming along smoothly one second, then suddenly roaring like a jet engine the next. My heart sank. Was my trusty refrigerator on its last legs? That panic is all too familiar for many homeowners, and honestly, there’s nothing worse than hearing that ominous noise and wondering whether your appliance is beyond saving or just experiencing a temporary hiccup.
A common dilemma I faced early on was differentiating a dead compressor from an overheated one. The frustration? It’s real. The hope? That you can troubleshoot before calling in the pros or dropping big bucks on a replacement. Over the years, I’ve learned that many of these issues have straightforward solutions—if you know what signs to look for.
Today, I’m going to walk you through how to tell if your fridge compressor is actually dead or just overheated. This isn’t about guesswork; it’s about giving you the confidence to assess your appliance with a clear, step-by-step approach.
Why Knowing the Truth About Your Compressor Matters
Understanding whether your compressor is dead or just overheated impacts your next move—whether it’s a quick fix or a call to a professional. A dead compressor usually means expensive repairs or replacement, but sometimes a simple reset or minimal maintenance can revive it. Conversely, if it’s overheated, a few simple steps might solve the problem without much hassle.
Why is this distinction so crucial? Well, according to appliance experts, about 85% of compressor failures are caused by electrical issues or overheating rather than total mechanical failure. Recognizing the subtle signs can save you money and frustration. For instance, overworked compressors often give off hot surfaces or short cycling, while a dead compressor remains silent and cold.
Have you ever been in a situation where your fridge suddenly sounded like a lawn mower but then stopped? Or maybe it’s been humming strangely at odd hours? These clues can tell you a lot. The key is not rushing into action but assessing carefully—something I wish I’d done when mine first showed signs of trouble.
If you’re unsure, don’t worry. We’ll cover practical tips to evaluate the compressor’s health, and I’ll share insights from industry professionals. For a more comprehensive guide on appliance troubleshooting, feel free to check out our expert tips on [maximizing your appliance warranty during emergency repairs](https://discountappliancehub.com/maximize-your-appliance-warranty-during-emergency-repairs).
Now, let’s break down the signs that might point to a dead versus overheated compressor—and how you can tell the difference without immediately calling for help.
Check the Compressor’s Physical Condition
Begin by unplugging your fridge for safety. Visually inspect the compressor, usually located at the back or bottom of the unit. Look for signs of overheating, such as discoloration, melting, or burnt smell. Feel the compressor; it should be warm but not excessively hot to touch. I once faced a stubborn overheating issue in my own fridge—careful inspection revealed a buildup of dust and grime obstructing vents, which I cleaned thoroughly to restore proper cooling.
Listen for the Compressor’s Background Hum
Reconnect the power and listen closely to the compressor area. A functioning compressor emits a consistent humming sound. If there’s silence or irregular noises like clicking or buzzing, it hints at problems. I once powered on my unit and immediately noticed it was silent; listening carefully, I realized the compressor wasn’t running, prompting further investigation.
Test the Voltage Supply
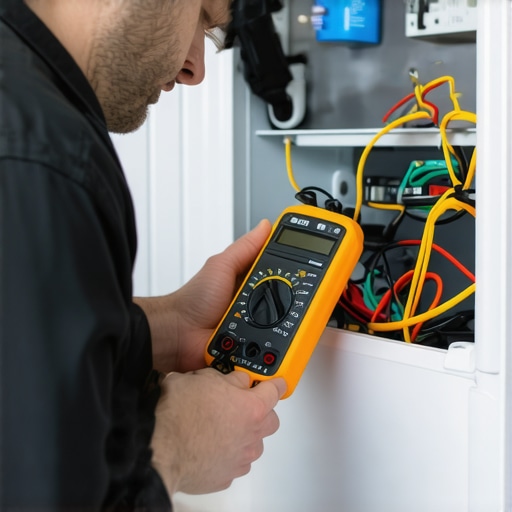
Use a multimeter to measure voltage at the compressor terminals. Ensure the compressor is receiving the correct voltage—typically around 120V or 220V depending on your model. If voltage is absent or fluctuates significantly, the issue might be with your household wiring or relay components rather than the compressor itself. I advise exercising caution or consulting a professional if you’re unfamiliar with electrical testing.
Assess the Continuity with a Multimeter
Disconnect power again and remove the compressor’s wires. Set your multimeter to continuity mode and test between the compressor’s terminals. A dead compressor usually shows an open circuit, indicating broken internal windings. In my experience, a reading of no continuity confirmed a failed compressor that needed replacement, which I ordered based on this test.
Perform a Capacitor Check
If your fridge uses a start capacitor, test it with a multimeter’s capacitance setting. A faulty capacitor can cause the compressor to fail to start or run intermittently. I once replaced a malfunctioning capacitor, and the compressor’s startup became smooth again, saving me a costly repair.
Decide on Repair or Replacement
Based on these tests, if the compressor appears non-functional—no hum, no continuity, signs of damage—it’s likely dead. While some issues like overheating caused by dirt or electrical problems can be fixed, a truly dead compressor usually warrants replacement. Always consider your warranty options or same-day repair services—companies like same-day repair with warranty can offer quick assistance.
Prevent Future Compressor Failures
Once resolved, regular maintenance helps prolong compressor life. Keep vents and coils clean, ensure proper ventilation, and inspect electrical connections periodically. I learned the hard way that neglecting basic upkeep leads to early failures. For detailed maintenance tips, check our expert guide on appliance repair.
 Many believe that choosing the cheapest repair service ensures savings, but this common misconception often leads to subpar fixes and repeated issues. The real value lies in recognizing reputable providers that offer warranty-backed repairs, which protect you long-term. Additionally, the myth that same-day service is always the most reliable can be misleading; sometimes, rushed repairs compromise quality and longevity. Advanced consumers understand that installation nuances, such as proper grounding and venting, significantly impact appliance performance and lifespan. According to a 2022 study by the Appliance Repair Association, improper installation accounts for nearly 30% of early appliance failures, emphasizing the importance of expert installation rather than DIY approaches.
Be wary of the trap where consumers assume warranties cover everything. In reality, many exclude accidental damages or improper use, leading to unexpected expenses. Always review warranty terms thoroughly; for instance, some plans require registration within a specific timeframe to activate coverage, highlighting the need for proactive management. Moreover, warranty providers sometimes prioritize quick fixes over comprehensive solutions, risking future breakdowns.
For those seeking peace of mind, selecting a service that offers detailed diagnostics and transparent quotes is essential. It’s worth asking whether the technician is certified and experienced in your specific appliance brand and model. This expertise ensures that issues are correctly diagnosed and treated, reducing the risk of repeated repairs.
Understanding installation complexities can also prevent costly errors. Proper leveling, correct electrical connections, and venting are critical for optimal operation. For example, improper leveling of a refrigerator can cause inefficient cooling and increased wear on the compressor. To delve deeper into these topics, consider reading our comprehensive guide on expert appliance repair and installation tips.
Remember, sometimes what seems like a quick fix or low-cost option ends up costing you more in the long run. Investing in quality service, detailed inspections, and understanding warranty conditions pays dividends. Have you ever fallen into this trap? Let me know in the comments.Maintaining your appliances effectively requires the right tools and a methodical approach. One of my top recommendations is investing in a high-quality digital multimeter, such as the Fluke 117. I personally use this device because of its accuracy and durability when testing electrical components like compressors, control boards, and power supplies. The Fluke 117’s True RMS feature enables me to measure voltage, current, and resistance precisely, which is critical during troubleshooting. Having a reliable multimeter not only streamlines diagnostics but also helps prevent accidental damage during repairs.
Another indispensable tool I rely on is a cordless cordless drill with various screwdriver bits. This allows me to disassemble and reassemble appliances swiftly and safely, especially when accessing hard-to-reach screws or panels. I prefer brands like DeWalt or Milwaukee for their robustness and battery life, ensuring I can work through multiple repair tasks efficiently.
In addition, a set of precision screwdrivers is vital when dealing with delicate electronic components. For example, the Wiha Precision Screwdriver Set provides the control needed to avoid stripping tiny screws in control panels or circuit boards. Combining these with a good LED headlamp enhances visibility in tight or poorly lit spaces, making diagnostic and repair work safer and more accurate.
For long-term maintenance, I keep a record of repairs using specialized software like RepairDesk. It helps me track which parts are frequently failing and schedules preventive maintenance before breakdowns occur. This proactive approach significantly extends appliance lifespan and reduces emergency repair costs.
Predicting future trends, tools integrated with smart diagnostics are on the rise. Imagine devices that connect via Bluetooth directly to troubleshooting apps, providing real-time feedback and repair suggestions. This evolution could democratize appliance maintenance, making DIY repairs more accessible and reliable.
How do I keep my appliance tools in top shape over time?
Regularly calibrate your digital multimeter following the manufacturer’s instructions, and store your tools in a dry, organized manner to prevent corrosion. Clean screwdrivers and drill bits after each use to maintain their effectiveness. Additionally, update your digital repair records and software periodically to adapt to new appliance models and technological advances. By investing in quality tools and maintaining them properly, you ensure your repairs are effective and reduce the risk of further damage.
The Hardest Lesson I Learned About appliance repair,warranty,same-day service,installation
One of the most valuable insights I gained was that rushing to replace a compressor without thorough diagnosis can lead to unnecessary expenses. I once replaced a compressor only to find out weeks later that a loose wire was causing the malfunction. Patience and detailed troubleshooting are your best allies.
How Ignoring Small Clues Can Cost You Big
Early signs like warm surfaces or odd noises are easy to dismiss but often indicate underlying issues. Recognizing these symptoms early can save you from costly repairs down the line. A proactive approach helped me extend the life of my fridge and avoid sudden breakdowns.
The Power of Quality Tools and Knowledge
Investing in a reliable multimeter and understanding basic electrical testing transformed my repair experience. It gave me confidence to handle minor fixes myself and differentiate between simple issues and serious faults, thereby avoiding unnecessary service calls.
My Essential Toolkit for fridge troubleshooting
Tools like the Fluke 117 Multimeter and precision screwdrivers have been game-changers. Trusted brands ensure durability and accuracy, making every diagnostic session more effective and less stressful. Proper storage and maintenance of these tools also prolong their usefulness, which is a small but impactful habit.
Your Next Step in Appliance Mastery
Remember, understanding your refrigerator’s inner workings empowers you to make informed decisions, whether it’s a quick fix or knowing when professional help is necessary. The more ground you cover now, the less likely you are to be caught off guard during a breakdown. For deep dives into appliance care and troubleshooting, explore our comprehensive repair guide.