One quiet evening, I went to dry my clothes—expecting the comforting hum of my dryer, but all I got was silence. No heat, no spinning, just an empty drum and that sinking feeling of appliance failure. We’ve all been there, staring at an appliance that suddenly refuses to cooperate, frustration mounting as you wonder what went wrong. That lightbulb moment hit me hard—could a simple part be causing all this chaos? And more importantly, could I fix it myself?
Why Your Dryer Might Be Dead in the Water
When your dryer stops producing heat, it’s easy to assume the worst—perhaps the heating element gave out or the motor finally bit the dust. But in many cases, the culprit is a tiny component called the thermal fuse. This little safety device is designed to blow if your dryer overheats, preventing fires and other hazards. The problem? Once it’s blown, the dryer won’t heat until it’s replaced.
Early in my troubleshooting journey, I made the mistake of assuming I had a burnt-out heating element without checking the fuse. That led to unnecessary parts buying and more frustration. Turns out, the fuse is a common failure point—I’ve seen it blow due to clogged venting, overuse, or even minor power surges. Interestingly, the U.S. Consumer Product Safety Commission reports that overheating is one of the top causes of dryer fires, underscoring the importance of this tiny fuse’s role in safety.
If you’ve faced a similar dilemma—your dryer turns on but refuses to heat, or it runs but with no warmth—you might be dealing with a blown thermal fuse. Don’t worry; it’s often a straightforward fix, and understanding how to diagnose it can save you time and money. Today, I’ll walk you through how to tell if your thermal fuse is blown and what steps you can take to get your dryer back in action.
Will Replacing the Fuse Actually Solve My Dryer Problem?
One common mistake I made early on was replacing the fuse without fixing the underlying cause of overheating. It’s crucial to identify what caused the fuse to blow in the first place—clogged venting, a faulty thermostat, or a failing heating element. Skipping that step can lead to repeated failures and potential safety hazards. For a deeper dive into the common causes of appliance failures, check out this guide on dryer issues.
Now that you understand the importance of the thermal fuse and the dangers of ignoring the root cause, let’s explore how you can determine whether it’s blown and learn the best way to replace it if needed. Ready to become your own repair hero? Let’s get started.
,
Start with Safety and Prepare Your Tools
Before diving into the repair, unplug your dryer from the power source to avoid electrical hazards. Gather your tools: a multimeter for testing continuity, a screwdriver to open the panel, and possibly pliers. I once overlooked safety and received a mild shock, reminding me why precautions are vital. Wearing gloves and working in a dry environment can prevent accidents.
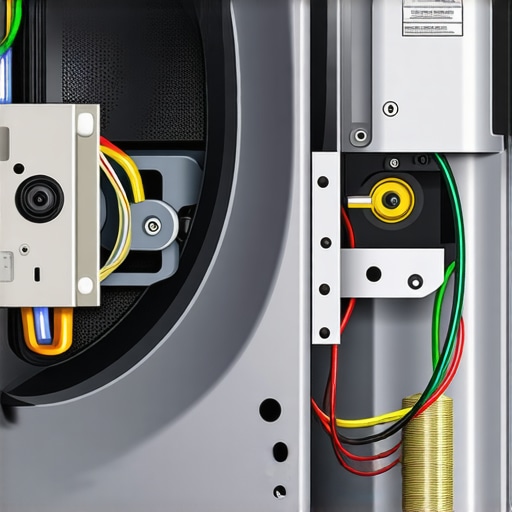
Locate the Thermal Fuse
Most dryers have the fuse mounted on the blower housing or the heating element. Consult your dryer’s manual or look for a diagram online specific to your model. For instance, when I replaced mine, I found it behind the rear panel, accessible after removing a few screws. This step is critical; a wrong location prolongs the fix and risks damage.
Test the Fuse for Continuity
Using the multimeter set to the continuity setting, connect the probes to each terminal of the fuse. A good fuse should show continuity, meaning a complete circuit. If there’s no beep or reading, the fuse has blown. I once tested a fuse twice to confirm—breaking the circuit and then reconnecting—it saved me from unnecessary replacements. Remember, a blown fuse indicates an underlying issue, so do not simply replace it without investigation.
Identify the Cause of Overheating
Since the fuse blew, something caused the dryer to overheat. Check for clogged venting, lint buildup, or a malfunctioning thermostat. I cleared out my vent pipe, which was packed with lint—a common culprit. Neglecting this step risks blowing the fuse again, leading to repeated repairs or even safety hazards. For a comprehensive clean, consider following this guide on vent maintenance.
Replace the Fuse Correctly
Install a new fuse, ensuring it matches the specifications of your model. Secure it firmly but dont over-tighten. I once used a fuse with incorrect amperage, which caused problems later. After installation, double-check all connections and reassemble the panel.
Test the Dryer
Plug the dryer back in and run a cycle to verify proper heating. Keep an eye on it during the first few minutes. If the dryer heats as expected, the replacement was successful. If not, re-test the fuse, or revisit the cause of overheating. As a safety tip, make sure to read your warranty document, as unnecessary DIY repairs might void coverage—see this guide on warranty documentation.
Document Your Fix and Plan Preventative Measures
Take notes or photos of your repair steps. Regularly clean your venting system and replace filters to prevent future blows. I now schedule semi-annual vent cleaning, which significantly reduces overheating incidents. Proper maintenance extends the life of your appliance and keeps it running efficiently.
Many homeowners assume that appliance repairs are straightforward and that warranties cover all issues, but in my experience, there are often hidden nuances that can trip up even seasoned DIYers. For instance, a common misconception is that repairs performed by unverified technicians will automatically void your warranty. However, the reality is more complex; many warranties require that repairs be carried out by certified professionals or using genuine parts, but some policies are more lenient, as detailed in this guide on warranty documentation.
Another mistake many make is neglecting to understand the fine print of installation requirements. Incorrect installation can lead to recurring issues and may even void your coverage, especially if the manufacturer stipulates specific setup procedures. A prime example involves dishwasher installations; improper drainage or electrical connections can cause malfunctions that aren’t covered under warranty, emphasizing the importance of adhering to provided instructions.
Advanced users often overlook the importance of precise troubleshooting, mistakenly assuming that all problems stem from major component failures. In truth, minor issues like misaligned sensors or clogged filters can mimic more serious faults. It’s beneficial to verify these small details before initiating costly repairs, and resources like this article on AC blower issues can guide you through some of these diagnostics.
Beware the trap of relying solely on same-day service promises. While convenient, these services sometimes overlook deeper problems or perform superficial fixes. An experienced technician will diagnose thoroughly, considering potential hidden faults that could cause future breakdowns. This practice aligns with recommendations from industry experts, such as those cited in this article on microwave issues, emphasizing the need for comprehensive troubleshooting.
Finally, be cautious about DIY repairs without proper knowledge or tools. While fixing a broken fridge water filter yourself can be easy, attempting complex repairs like replacing a control board without expertise can cause more harm than good, leading to costly rework or voided warranties. For example, the importance of correct calibration is highlighted in this guide on thermostat calibration.
In summary, understanding these hidden nuances and avoiding common pitfalls can save you time, money, and frustration. Carefully read your warranty terms, follow installation guidelines meticulously, and don’t hesitate to seek professional help when in doubt. Have you ever fallen into this trap? Let me know in the comments.
Tools I Recommend for Reliable Appliance Care
Maintaining appliances effectively requires the right tools to diagnose and keep systems running smoothly. I personally swear by a high-quality multimeter, such as the Fluke 115, because it provides precise readings essential for identifying issues like blown fuses or faulty thermostats. For cleaning and preventive maintenance, a cordless vacuum with a narrow nozzle helps me remove lint from vents and filters without hassle. Additionally, a digital infrared thermometer allows me to monitor surface and component temperatures, helping to catch overheating early. Investing in these tools has saved me time and money, and they are invaluable for DIY repairs and routine upkeep.
Implementing Preventive Maintenance Routines
Preventative care is the cornerstone of appliances that last. Regularly cleaning vents, filters, and drain traps ensures optimal performance and reduces the risk of failures. For example, inspecting and cleaning the secret drain valve in your dishwasher can prevent leaks and costly repairs—more details are available in this guide. Scheduling seasonal checks, like examining door seals, inspecting power cords, and testing safety devices such as thermal fuses, can extend appliance life significantly. Modern smart tools, including Wi-Fi-enabled sensors, are beginning to automate these inspections, promising a future where appliances alert you to issues before they escalate.
How do I keep my appliances working smoothly over time?
Consistent maintenance hinges on understanding each appliance’s specific needs and adopting systematic routines. Keeping detailed logs of repairs and replacement dates, as well as following manufacturer guidelines, helps identify patterns before problems become serious. For essential systems like refrigerators and washers, verifying that their warranties remain valid often involves maintaining documentation of service records—more on this is discussed in this resource. Additionally, I recommend setting reminders for filter changes and vent cleaning, which are crucial for avoiding common issues such as inefficiency or breakdowns. To streamline long-term upkeep, consider creating a maintenance schedule tailored to your appliances’ usage patterns.
Stay Ahead with Proper Maintenance Techniques
One advanced tip I suggest is using an infrared thermometer to check your appliance’s critical components periodically. For instance, measuring the temperature of your refrigerator’s coils or your dryer’s heating element can reveal early signs of failure. As highlighted in industry manuals, inconsistencies in temperature readings often indicate underlying problems, like failing thermostats or clogged vents. Incorporate this simple check into your routine to catch issues early. If you notice abnormal temperatures, act promptly—perhaps by cleaning vents or scheduling professional repairs—preventing costly damage down the line. Practicing these proactive steps ensures your appliances perform efficiently for years to come.
What I Wish I Knew When I Started Fixing Appliances
One of the most eye-opening lessons was realizing that DIY appliance repair isn’t just about swapping parts; it’s about understanding the story behind what caused the failure in the first place. For example, replacing a blown thermal fuse without cleaning out the lint-clogged vent pipe is like putting a bandage on a deeper wound—you might stop the symptom, but the problem will come back. Additionally, I learned that warranties can be tricky terrain, often requiring precise documentation and adherence to manufacturer guidelines to stay valid. Knowing these hidden nuances early on saved me from wasting money and voiding my coverage unintentionally.
Another lightbulb moment was discovering how much dangerous overheating can be prevented by simple maintenance routines, such as regularly cleaning filters and vents. It isn’t just about keeping appliances running smoothly; it’s about safety. Lastly, I found that trusting industry-standard tools and resources, like accurate multimeters and trusted repair guides, is essential for confident troubleshooting. These insights transformed my approach from guesswork to methodical problem-solving.
Tools That Make a Real Difference
If you’re serious about appliance fixes, certain tools become your best allies. A high-quality multimeter, like the Fluke 115, has been invaluable for testing fuses and thermostats reliably. A slim, cordless vacuum helps keep vents and filters spotless, preventing overheating issues that could blow your thermal fuse again. I also recommend a digital infrared thermometer, which allows you to monitor temperature irregularities proactively, catching problems before they escalate. These tools are investments that pay off by making repairs safer, faster, and more accurate.
For educational resources, I turn to industry-recognized websites and repair manuals that offer detailed diagrams and troubleshooting steps. These sources have guided me through complex issues like diagnosing control board faults or understanding intricacies in modern appliances. Building a toolkit with these essentials empowers you to handle most common repairs confidently and keeps your appliances performing at their best.
Embrace Your Repair Journey and Take Charge
Remember, mastering appliance repair and understanding warranties is a rewarding journey that enhances your independence and safety at home. The more you learn, the less vulnerable you become to costly repairs or unsafe failures. So, start small—diagnose that non-heating dryer with patience, explore trusted resources, and keep safety at the forefront. Your home appliances rely on your care as much as you rely on their service—taking proactive steps ensures they serve you reliably for years to come.