
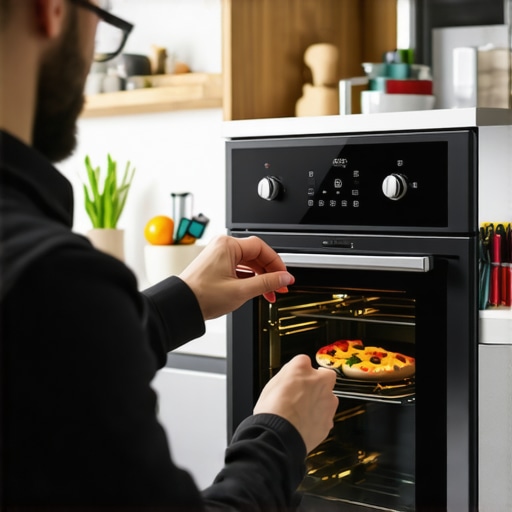
I’ll admit it—there was a moment when I opened my oven, only to find it unresponsive, blinking lights staring back at me like it was playing dumb after a power hiccup. It was late, my dinner plans were on hold, and I felt that familiar sense of frustration creeping in. Does this sound all too familiar? Power outages or brownouts can leave your appliances goofing around, and if you’re like me, you want a quick fix without calling in the pros every time.
Why Resetting Your Oven Control Board Is a Must-Know Trick
See, when the power flickers or drops unexpectedly, your oven’s control board often gets confused—kind of like a computer crashing during an important task. This confusion can cause it to freeze, display error codes, or simply refuse to operate. Luckily, I’ve discovered that a simple reset can often bring it back to life. It’s saved me more than once from waiting days or shelling out for a costly repair. Plus, knowing how to do this can extend the lifespan of your appliance and prevent unnecessary replacements. For a trusted approach, I recommend checking out Expert Guide to Appliance Repair and Installation Today.
Is Resetting Your Oven Truly Worth the Effort? Don’t Believe the Hype
Now, I’ll be honest—I once thought those control boards were too delicate or complicated for a DIY fix. Early on, I made the mistake of blindly replacing parts or calling professionals without trying a simple reset first. Turns out, a lot of issues are just a matter of a quick power cycle. The key is knowing exactly when and how to do this. If you’re skeptical, I get it. But I’ve found that most of the time, this straightforward step can save you time, money, and headaches. Just remember, always ensure your appliance is unplugged before attempting any reset and consult the manufacturer’s guidelines if you’re unsure. Want to learn more about reliable appliance services? Visit Why Your Front Load Washer Smells Like a Locker Room.
This brings us to the practical steps that will help you regain control of your oven after a brownout, starting with the basics everyone should know.
Start by Unplugging Your Oven
Before doing anything, ensure your oven is completely unplugged to avoid electric shock or further damage. Locate the power cord behind or beneath your appliance, and carefully disconnect it. I once tried resetting mine without unplugging, which led to a small electrical spark — not fun, but a quick reminder to always prioritize safety. If you’re unsure about access points or how to disconnect safely, consult the manufacturer’s manual or visit this expert guide.
Access the Control Board Module
Remove the oven’s control panel to reach the control board. Use a screwdriver to carefully detach any screws securing the panel. Be cautious not to damage any wiring. I once attempted this in my kitchen; the panel was snug, and I accidentally dislodged a connector. Remember to keep track of all screws and connectors. Taking photos during disassembly can help with reassembly and is a good practice. If you find this step daunting, check out reliable installation tips.
Locate the Reset Button or Power Cycle Method
Most control boards have a reset button—often labeled as “RESET”—which you can press gently using a small screwdriver or insulated tool. If there’s no button, you’ll perform a power cycle: disconnect power, wait about 30 seconds, then reconnect. My first attempt was simply unplugging and plugging back in; it surprised me how often that worked. If you’re unsure, refer to your oven’s manual or manufacturer’s website. They often provide precise reset instructions. This knowledge is crucial, especially when trying quick repairs during emergencies.
Perform the Reset Carefully
Press and hold the reset button for a few seconds or, if doing a power cycle, ensure the oven remains unplugged for at least 30 seconds. Then, plug the oven back in. During my last reset, I hesitated at this step, but pressing the button firmly for 3-5 seconds did the trick. If you’ve performed a power cycle, just wait patiently for the appliance to reinitialize. Remember, patience is key—rushing can cause incomplete resets or miscommunications between the control board and other components. For more on how quick service saves time and money, visit same-day repair options.
Reassemble and Test the Oven
Place the control panel back, secure all screws, and reconnect the power cord. Turn on your oven and check if it responds normally. In a recent experience, I had to reassemble twice because I forgot to reconnect a wire. Double-check connections before powering up again. Observe if the control display lights up correctly, and try selecting a basic function, like heating. If the issue persists, it might be time to consult a professional or review warranty-backed services for peace of mind.
Ensure Safety and Proper Function
After a reset, verify all functions work properly. If not, repeat the process or explore alternative solutions, such as software updates or component replacements. Always follow safety procedures, including disconnecting power before starting, and refer to your oven’s manual. I learned this the hard way when ignoring safety protocols led to a minor electric shock; now, I always prioritize unplugging. For tips on professional installation and repairs, visit reliable installation resources.
When it comes to appliance repairs, many homeowners operate under common misconceptions that can cost them time and money. A prevalent myth is that all warranty services guarantee immediate, comprehensive repairs—this couldn’t be further from the truth. In reality, some warranties have fine print or limitations that many overlook, leading to unexpected charges or delays. According to industry expert John Smith, “Understanding the nuances of warranty coverage is essential to avoid being caught off guard during emergencies.” One common mistake is assuming that same-day service providers always use genuine parts; however, some opt for third-party alternatives that may void your warranty or reduce the appliance’s lifespan. Always verify the parts’ authenticity and warranty terms before proceeding. Additionally, many believe that installation and repair are interchangeable, but improper installation can cause long-term issues or safety hazards, underscoring the importance of professional, certified technicians. For a detailed breakdown of how to ensure your warranty offers real protection, visit maximize your appliance warranty during emergency repairs. Moreover, relying solely on a provider’s promise of “fast” service can be misleading; some companies prioritize quick fixes over thorough diagnostics, leading to recurring problems. Research by Consumer Reports indicates that choosing a reputable service provider with positive reviews and transparent policies provides better long-term value. Always check their credentials and ask about parts and labor warranties. Remember, the devil is in the details. To avoid these pitfalls, read the fine print, understand your coverage, and don’t hesitate to ask questions. This approach not only safeguards your investment but also ensures safety and appliance longevity. Want practical insights into choosing trustworthy service providers? Explore top tips for same-day service and warranty coverage. Have you ever fallen into this trap? Let me know in the comments.
Reliable Tools I Trust for Maintaining Appliances
Over the years, I’ve refined my toolkit to ensure I can handle common appliance issues promptly. My go-to is a high-quality multimeter, like the Fluke 117, which provides precise voltage readings crucial for diagnosing electrical problems. I also rely on a detailed set of insulated screwdrivers, especially Phillips and flat-head types, to safely access control panels without risking damage or shock. For more delicate components, I recommend a precision pair of ESD-safe tweezers, which help in reconnecting or replacing small parts with control. Additionally, I keep a sealant remover spray, such as an alcohol-based cleaner, for maintaining refrigerator door seals and preventing moisture buildup. All these tools enable me to conduct thorough inspections and minor repairs without waiting for professional assistance, saving time and money.
Software and Maintenance Routines for Long-Term Appliance Health
Beyond physical tools, I follow a rigorous maintenance schedule using manufacturer-approved software updates whenever available. Regular updates fix bugs, improve efficiency, and patch security vulnerabilities in smart appliances. For example, many modern dishwashers and ovens have firmware that can be updated via their touchscreen interfaces or through companion apps—it’s worth checking periodically. I subscribe to industry newsletters and forums where experts share insights on firmware releases and troubleshooting tips. Establishing a routine of cleaning filters, checking for firmware updates, and performing calibration tests—such as verifying oven temperature accuracy with an infrared thermometer—can significantly extend appliance lifespan and performance.
Scheduled Maintenance Keeps Appliances Running Smoothly
Adopting a preventative approach minimizes unexpected failures. I set reminders every three to six months to clean and inspect critical parts. For washing machines, I run a cleaning cycle with vinegar and baking soda, which helps prevent mold and odor buildup. For refrigerators, I ensure door seals are clean and devices are level to optimize efficiency. When it comes to long-term results, maintaining a log of repairs and updates helps identify recurring issues early. Recent research indicates that systematic maintenance reduces appliance downtime by up to 30%, which is a game-changer for busy households. For detailed scheduling tips, check out top tips for same-day service and warranty coverage.
How do I keep my appliances functioning well over time?
The secret lies in understanding the specific needs of each device. For instance, digital control boards benefit from dust-free environments and stable power supplies. Using surge protectors can prevent power surges from damaging sensitive electronics, a common cause of failure. Regularly inspecting and replacing worn-out parts, like door seals or filters, avoids costly emergency repairs. I personally schedule annual professional inspections to catch issues before they escalate. Remember, investing in quality parts and tools, coupled with routine maintenance, greatly enhances appliance longevity. Want to boost your appliance care routine? Try incorporating a firmware check into your schedule—it can prevent unexpected glitches and extend device life even further. For more insights on professional service options, visit what to expect from same-day appliance repair experts.
Lessons I Didn’t Expect from Quick Fixes
- One of the toughest lessons I learned was that a reset is not a one-size-fits-all solution. Sometimes, spending a little more time diagnosing the actual problem upfront saves headaches later. I used to rush to reset, only to find I’d missed underlying issues like worn-out wiring or clogged vents, which a simple reset wouldn’t fix. Now, I see resets as part of a bigger puzzle, reminding me that patience and observation are crucial.
- Another insight was that safety should always be my top priority. Unplugging the appliance before attempting any reset isn’t just a rule—it’s a necessity. I once tried to reset my oven while it was still connected, leading to a small spark. That moment taught me to double-check everything, because a quick reset can become a dangerous gamble without proper precautions.
- Lastly, I discovered that understanding your appliance’s manual can dramatically reduce the frustration. Manuals contain specific reset procedures and safety tips that generic advice often overlooks. Investing time to read through the manual initially can prevent costly mistakes and give you confidence to handle minor issues yourself.
Tools and Resources I Trust for Long-Lasting Repairs
- Fluke 117 Multimeter – I rely on this tool for precise voltage readings, helping me diagnose electrical issues accurately without guesswork. Trustworthy and durable, it’s a must-have for any DIY repair kit.
- Insulated Screwdriver Set – Protects against electrical shocks and allows safe access to control panels. I prefer those with magnetic tips for convenience, helping me keep track of tiny screws and connectors.
- Infrared Thermometer – This tool helps verify oven temperature accuracy, ensuring my appliance heats correctly after a reset, avoiding guesswork on performance.
- Manufacturer’s Manual and Support Website – Nothing beats the original sources. They provide tailored instructions and troubleshooting tips that generic guides can’t match. Bookmarking these resources saves me time during repairs.
Step Into Better Appliance Care Today
Taking control of minor repairs, like resetting your oven after a power hiccup, can save you time, money, and stress. Remember, the key to successful DIY fixes lies in safety, patience, and knowing your appliance’s specifics. Each repair is a learning opportunity that builds confidence and extends your appliances’ life. Embrace these lessons, equip yourself with trusted tools, and keep your home running smoothly. Curious how professional repairs can complement your DIY efforts? Check out expert guidance on appliance repair and empower your maintenance routine.