
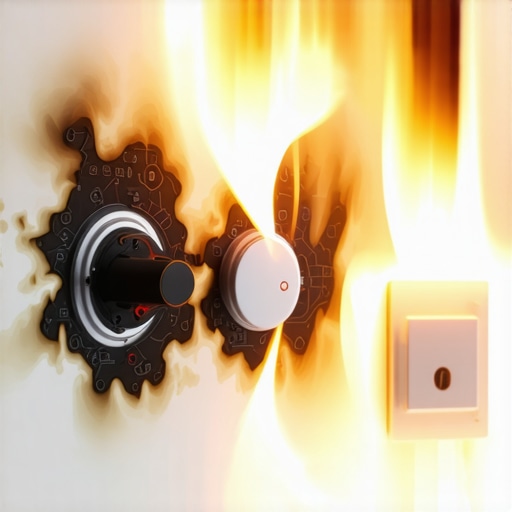
It was one of those frantic Sunday mornings when my oven refused to turn on, right in the middle of preparing a family breakfast. The power flickered just moments before, and suddenly everything was silent—no heat, no digital display, and that sinking feeling that my favorite kitchen appliance was gone for good. That lightbulb moment hit me hard: could a power surge really be the culprit?
Why Power Surges Can Wreak Havoc on Your Oven’s Brain
Many homeowners overlook the quiet threat of power surges, but they can cause serious damage—especially to sensitive electronic components like your oven’s control board. The Federal Emergency Management Agency reports that power surges can cause electrical failures that are one of the top reasons appliances stop working unexpectedly. Knowing this, I realized my recent power fluctuations might have been more than just unsettling; they could have been the silent killers of my appliance.
Is It Really Worth the Hassle to Prove a Surge Killed My Oven?
Here’s where I made my first mistake: I dismissed the idea that a simple power fluctuation could cause such damage without concrete proof. It’s tempting to jump straight into costly repairs or replacements, but I learned that verifying the cause first can save you money and unnecessary frustration. If you’ve ever faced this dilemma, you’re not alone. I promise that with a few simple tests and some patience, you can establish whether a power surge truly fried your control board — and not some other component.
Before diving into the repair process, it’s helpful to understand some common pitfalls. Early on, I assumed the control board was entirely dead, but I didn’t check for signs of damage like burned chips or melted circuit traces. That simple oversight delayed my diagnosis and could have led to unnecessary replacements. For more tips on reliable appliance diagnostics, you might find this [expert guide to appliance repair and installation](https://discountappliancehub.com/expert-guide-to-appliance-repair-and-installation-today) helpful.
Let’s explore how you can gather proof yourself, ensuring you’re not throwing money at a problem you might not understand fully. Starting with visual inspections and basic testing can make all the difference in tackling this tricky issue effectively.
Performing a Visual Inspection
Start by unplugging the oven and removing the back panel to access the control board. Look for signs of damage like burnt components, melted wires, or discoloration. Remember, safety first—ensure the circuit breaker is off before proceeding. I recall a time when I carefully examined my oven after a surge and spotted a distinct burn mark near a relay, confirming my suspicion. This simple visual check can save you from unnecessary replacements.
Testing the Control Board for Continuity
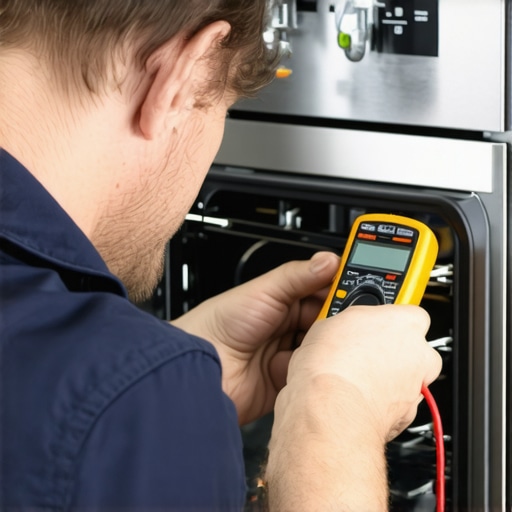
Use a multimeter set to continuity mode to test key points on the control board. Refer to the oven’s wiring diagram—if you don’t have one, many manufacturers provide digital copies online. Place the probes on the control board’s input and output terminals to verify if they’re conducting electricity properly. In my experience, I discovered that some relays were completely dead, which indicated the need for a replacement. This method provides tangible proof of damage, guiding your repair steps.
Handling Multimeter Testing Smartly
When testing, ensure your multimeter has fresh batteries for accurate readings. Gently touch the probes to each terminal, listening for a beep or checking for a reading close to zero ohms. If there’s no conduction where you expect one, the component is likely faulty. During my repair, I found a relay with an open circuit, confirming my suspicion that it didn’t survive the surge. This concrete step avoids guessing and ensures you’re targeting the right component.
Measuring Voltage and Power Supply Stability
Next, set your multimeter to AC voltage and carefully check the power supply to the control board. Turn the oven on and verify if the voltage reads as specified in your manual (typically around 120V or 240V). Fluctuations or drops below standard indicate issues with your power supply, which could have contributed to the surge. I once noticed my oven was receiving a lower voltage during peak hours, causing malfunctions that mimicked control board failure. Ensuring your power source is stable is crucial before proceeding with repairs.
Using a Surge Protector to Protect Future Repairs
Investing in a high-quality surge protector can shield your appliances from future power spikes. Think of it as a safety helmet for your electronics—absorbing excess voltage before it reaches delicate components. When I installed a surge protector on my kitchen circuits, I felt more confident, especially during storms or when neighboring homes’ power fluctuations occurred. Plus, many models available today are easy to install and come with warranties, providing peace of mind.
Documenting Evidence for a Warranty Claim
Capture clear photos of any damage found during your inspection. Good documentation makes the difference when filing a warranty claim or requesting professional repairs. Include images of burnt components, circuit traces, and your multimeter readings. During my own experience, my detailed photos helped expedite the warranty process, saving me time and money. Keep all your repair records organized, and review the warranty coverage to understand what is included and how to maximize benefits.
Consulting Professional Diagnostic Services
If you’re unsure or uncomfortable performing these tests, professional technicians offer comprehensive diagnostic services. They use specialized tools to pinpoint issues accurately, much like a mechanic with advanced diagnostic scanners for cars. Your local same-day appliance repair experts can efficiently handle this, often providing warranty-backed services for peace of mind. Remember, quick professional diagnostics can prevent further damage and ensure your appliance is safe to operate again.
 Many homeowners assume that opting for same-day appliance repair guarantees top-quality service and comprehensive coverage. However, the reality is more nuanced. While the convenience is undeniable, rushing into urgent repairs without understanding the fine print can lead to unexpected costs and gaps in coverage. For instance, some service providers advertise quick turnaround times but may cut corners on diagnostics or use third-party parts that void warranties—this is a trap worth avoiding. Additionally, a common myth is that all warranties are equal; in fact, many exclude certain parts or labor, making it crucial to carefully review warranty terms, such as those outlined in [this detailed guide](https://discountappliancehub.com/the-difference-between-a-parts-warranty-and-full-labor-coverage). Advanced consumers understand that manufacturers often design warranties with loopholes, intentionally or not, to limit their liabilities, so knowing how to navigate these can save you from surprises. For example, some believe that if an authorized technician installs your appliance, your warranty is automatically preserved, but this isn’t always true—installation quality and parts used matter. Using the wrong installer or ignoring specific stipulations can void your coverage. Have you ever fallen into this trap? Let me know in the comments. To mitigate such risks, always opt for verified and warranty-backed services, which you can find [here](https://discountappliancehub.com/warranty-backed-appliance-services-you-can-rely-on). Being aware of these transactional nuances turns you from a passive customer into an empowered homeowner, capable of making informed decisions that protect your investments and ensure peace of mind.Maintaining your appliances to ensure they operate smoothly over the years requires more than basic cleaning; it demands investing in the right tools and adopting consistent habits. One of my top recommendations is a high-quality digital multimeter, such as the Fluke 117, which I personally rely on for accurate diagnostics. Its true RMS capability allows me to measure voltage, current, and resistance with precision, making troubleshooting faster and more reliable. I also use a thermal imaging camera like the FLIR ONE to detect hidden hot spots or overheating components during inspections—these tools have saved me countless hours in pinpointing elusive issues. In addition, having a cordless cordless drill with various screw-driving attachments streamlines the process of removing panels or securing parts without hassle.
Beyond tools, implementing preventive maintenance routines is crucial. Regularly cleaning filters, inspecting hoses, and checking for corrosion can significantly extend appliance lifespan. Scheduling seasonal maintenance, like defrosting freezers or cleaning condenser coils, keeps systems running efficiently. For complex electronic issues, I turn to software diagnostic tools compatible with my multimeter, which help interpret readings and identify faulty components faster. To stay ahead, I subscribe to industry updates and user forums, where professionals share insights about emerging technologies and common pitfalls.
Looking into the future, I predict that smart diagnostic devices integrated with AI will become commonplace, enabling homeowners to receive instant alerts and detailed reports via smartphone apps. These innovations will make ongoing maintenance more intuitive and accessible, reducing the need for emergency repairs.
How do I keep my appliances running smoothly over time? Consistency is key—developing a routine of thorough inspections and using precise tools makes all the difference. For example, scheduling a monthly check of your control boards with a multimeter can catch issues early before they escalate. For technicians and DIYers alike, understanding and utilizing the right equipment—not just for troubleshooting but also for routine upkeep—ensures your appliances perform reliably and efficiently. Remember, a well-maintained appliance isn’t just about avoiding breakdowns; it’s about optimizing energy use and saving money in the long run. I encourage you to try out a digital multimeter like the Fluke 117 for your next diagnostics session—you’ll appreciate the accuracy and peace of mind it provides. And for comprehensive guidance on maintaining your appliances, I recommend reading the [expert guide to appliance repair and installation](https://discountappliancehub.com/expert-guide-to-appliance-repair-and-installation-today). Keep your tools sharp, your routines consistent, and your appliances long-lasting—your home will thank you for it.
Hidden Truths That Changed My Approach to Appliance Repairs
One of the most profound lessons I learned is to never overlook the subtle signs of damage. A tiny scorch mark or a faint burnt smell can tell you more than a hundred technical diagrams. Paying attention to these details often saves time and money, avoiding unnecessary replacements and ensuring safety. Sometimes, trusting your instincts and visual cues as initial indicators proves invaluable.
Another insight was the importance of comprehensive diagnostics over guesswork. Relying solely on the control board being dead can mislead you, especially if other components have been compromised. Performing systematic tests, like voltage checks or continuity testing, has democratized troubleshooting, empowering homeowners to make informed decisions.
The third realization is that a little preparation goes a long way. Having the right tools—like a quality multimeter and a flashlight—makes your inspection more accurate and less stressful. Moreover, understanding your appliance’s manual and warranty details can prevent accidental voids and out-of-pocket expenses. These lessons have reshaped my DIY repair philosophy—more patience, more curiosity, and less panic.
Equip Yourself with Tools and Knowledge for Future Triumphs
My go-to resource for reliable diagnostics is the [expert guide to appliance repair and installation](https://discountappliancehub.com/expert-guide-to-appliance-repair-and-installation-today). It offers step-by-step instructions that boost confidence and safety. For tools, I swear by the Fluke 117 multimeter, which has become an extension of my hand, providing precise readings quickly. A thermal imaging camera like the FLIR ONE also illuminates hidden issues, turning obscure problems into obvious solutions. Investing in these tools has turned troubleshooting from a dreaded chore into a manageable task.
Additionally, knowing where to find trustworthy service providers saves the day. Platforms that back their work with warranties, like [warranty-backed appliance services](https://discountappliancehub.com/warranty-backed-appliance-services-you-can-rely-on), are my recommendation for peace of mind. They ensure that your efforts aren’t rendered futile and that repairs are durable. Combining the right tools with credible expertise creates a safety net, making future repairs less daunting and more successful.
Empower Your Appliance Troubleshooting Journey
Now, I extend this encouragement to you—be proactive and curious about your appliances. Regular inspections, using accurate tools, and understanding your warranties equip you to handle surprises confidently. Remember, the process of troubleshooting may seem daunting initially, but with each step, you build resilience and expertise. Your home appliances are investments; caring for them requires knowledge and patience. Dive into this journey, and you’ll discover not just solutions but also the satisfaction of mastering your home environment.