
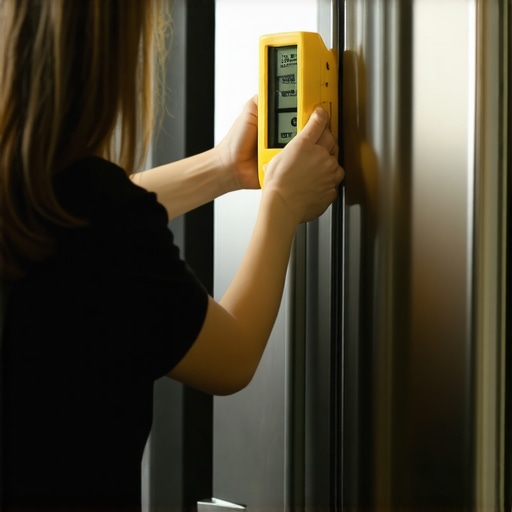
It was a frustrating Saturday morning when I noticed a puddle forming right outside my refrigerator. At first, I thought it was a spill, but after a closer look, I realized water was dripping from beneath the unit. That lightbulb moment made me realize I had overlooked one crucial aspect of appliance care: leveling my fridge properly. Since then, I’ve learned that an unlevel refrigerator isn’t just a minor annoyance; it can lead to persistent leaks, damage to your flooring, and costly repairs.
The Impact of an Unlevel Refrigerator
Starting with my own mistake, I want to stress how important it is to get this right. When a refrigerator isn’t sitting perfectly on your floor, it causes internal components like the defrost drain and door seals to malfunction. Over time, these issues can allow water to escape or cause moisture buildup, leading to leaks that are both frustrating and damaging. It’s not just about preventing messes—proper leveling can extend the lifespan of your appliance, save you money, and keep your kitchen safe from water damage.
Have You Faced This Problem Before?
If you’ve ever discovered water pooling on your kitchen floor or noticed that your fridge door doesn’t seal tight, you might be dealing with a leveling issue. I remember ignoring the level, thinking a simple wobble was harmless. That mistake cost me a lot more in repairs and cleaning. But here’s the good news: fixing this is straightforward once you understand the proper steps.
Research shows that improper refrigerator leveling is one of the most overlooked causes of leaks, yet it’s easily fixed with just a few tools and some basic knowledge. You can find detailed guides online, like those at [Discount Appliance Hub](https://discountappliancehub.com/expert-guide-to-appliance-repair-and-installation-today), that walk you through this process. Today, I’ll share my own experience and break down exactly how you can level your fridge to prevent leaks and keep everything running smoothly.
Let’s get started on how to ensure your refrigerator is perfectly balanced and functioning efficiently—because a little maintenance goes a long way in preventing costly headaches down the line.
Check the Floor and Choose Your Tools
Before lifting a finger, inspect your kitchen floor to ensure it’s flat and stable. Use a carpenter’s level or a digital spirit level—my personal favorite for quick accuracy—to confirm. Gather a wrench, adjustable or specific socket size for your fridge’s leveling legs, and some shims if needed.
Turn Off the Refrigerator and Empty the Water
Unplug the unit to avoid electrical hazards, and remove any items close to or inside the fridge that might get in your way. This minimizes accidents and makes the process smoother.
Adjust the Fridge’s Leveling Legs
Carefully tilt the refrigerator slightly forward or backward using the handles—be cautious to avoid tipping. Locate the leveling legs typically at the front corners of your fridge. Using your wrench, turn the legs clockwise to raise or counterclockwise to lower until the fridge sits firmly on the floor without wobbling. In my own experience, I used an adjustable spanner to make fine adjustments, and I found that small turns go a long way. Once the appliance is steady, check the top surface with your level again—if it’s still off, make minor tweaks until perfectly aligned.
Use Shims for Uneven Flooring
If your floor isn’t perfectly flat, shim underneath the wheels or legs to create a stable base. Place shims—thin pieces of wood, plastic, or metal—in strategic spots, then recheck with your level. Shimming prevented a wobbling fridge at my last repair, and it kept everything running smoothly.
Test and Secure Your Adjustments
After setting the legs, gently push the refrigerator in place. Confirm stability by trying to tilt it slightly; if it moves, readjust the legs. Once stable, plug the unit back in and monitor for leaks or sliding. Remember, proper leveling is crucial to avoid future water leaks and internal damage, saving you money and stress.
Consult a Professional if Needed
If after all adjustments your fridge still leaks or isn’t stable, it might be time to get expert help. You can [schedule your appliance repair for same-day service](https://discountappliancehub.com/scheduling-your-appliance-repair-for-same-day-service-in-2025) to ensure swift resolution. Certified technicians have specialized tools and experience to handle stubborn issues promptly, reducing the risk of costly repairs down the line.
Many homeowners assume that a warranty or same-day service is a magic bullet that covers all appliance issues without fuss. But let’s dig deeper into what most people get wrong about these promises, and why understanding the nuances can save you time, money, and frustration. Contrary to popular belief, warranties often come with microscopic exclusions, especially regarding installation mishaps or DIY repairs. While a warranty may promise coverage, it might not include labor or accidental damages—not the full protection consumers expect. In fact, some service providers highlight their “warranty-backed” offerings but sidestep the fine print that excludes certain problems, and I advise always reading the warranty details carefully or consulting a trusted expert for clarification.
Why Are My Repairs Still Going Wrong Despite Quick Service? The Hidden Complexities
It’s tempting to believe that a same-day repair guarantees a long-term fix. However, quick fixes sometimes address symptoms rather than root causes. For example, a technician might replace a faulty part that’s easy to access, ignoring underlying issues like improper leveling or electrical inconsistencies, leading to recurrent problems. This reminds me of how ignoring proper appliance installation—such as not leveling or incorrect venting—can cause issues that reappear shortly after a repair. Research confirms that proper initial installation reduces repair frequency, but many technicians skip this step due to time constraints or lack of specialized training. You can read more about how to ensure reliable appliance installation in 2025 at [this expert guide](https://discountappliancehub.com/expert-guide-to-appliance-repair-and-installation-today).
What Common Myth About Warranty Claims Misleads Most Customers?
Many believe that a warranty automatically covers all repairs when a failure occurs. The truth is, warranties often only cover specific parts and exclude labor or accidental damages. Moreover, some warranties become void if the appliance was improperly installed or if maintenance protocols weren’t followed. I’ve seen cases where homeowners thought their warranty would cover a leak caused by incorrect leveling, but since installation wasn’t verified by a professional, the claim was denied. To avoid this, it’s crucial to document your appliance’s installation and maintenance process carefully. For actionable tips, visit [maximize your appliance warranty during emergency repairs](https://discountappliancehub.com/maximize-your-appliance-warranty-during-emergency-repairs).
How Can You Spot a Professional Service That Truly Delivers?
Choosing a technician isn’t just about quick turnaround; it’s about expertise, transparency, and long-term solutions. Look for providers who clearly communicate the scope of their warranty coverage, provide a thorough initial diagnosis, and respect your appliance’s specific needs. A common mistake is accepting the first available option without verifying credentials or reading reviews. Remember, a true professional will not only fix the immediate issue but will also advise on preventive measures, like proper leveling and maintenance, to extend your appliance’s lifespan. As I always recommend, using trusted sources for same-day service ensures you’re covered for both repairs and future issues. Find out more about reliable services at [this link](https://discountappliancehub.com/why-your-oven-is-heating-to-the-wrong-temperature).
Essential Tools for Reliable Repairs
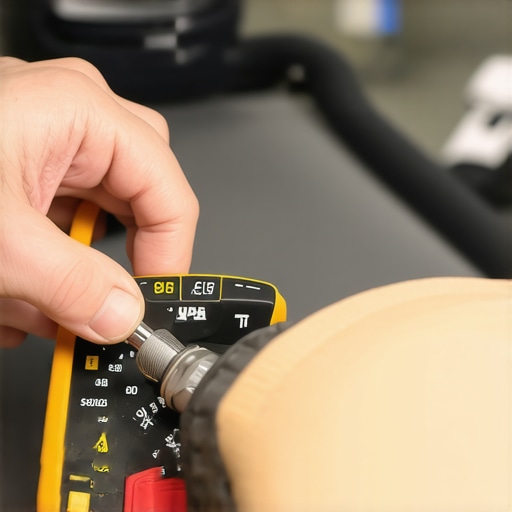
To ensure your appliance continues functioning smoothly, investing in quality tools is a game-changer. I personally rely on a digital multimeter for diagnosing electrical issues, as it provides precise voltage and resistance readings that help identify faulty components quickly. A torque wrench is invaluable when adjusting tightness during repairs, preventing over-tightening that can damage parts. For leveling and stability checks, a bubble level ensures your appliances are perfectly aligned, reducing leaks and internal strain. Moreover, a detailed repair manual or digital resources like this expert guide have saved me countless hours by providing step-by-step instructions tailored to specific models.
Streamlining Your Repair Workflow
Besides physical tools, having reliable software can streamline diagnostics. I use appliance diagnostic apps that interface with smart appliances to run tests and interpret error codes in real-time, making repairs more efficient. These apps, combined with a well-stocked parts inventory, allow me to tackle most issues without unnecessary delays. Over the years, I’ve noticed that maintaining an organized toolbox—categorizing tools and keeping spare parts readily accessible—significantly reduces the time spent on each repair, ensuring I can offer same-day service when needed. For more insights on rapid troubleshooting, check out this resource.
Planning for Long-Term Success
Preventative maintenance is key. I recommend scheduling regular inspections of seals, filters, and electrical connections, which can catch minor issues before they escalate. Using a moisture meter helps monitor for leaks or increased humidity that could signal underlying problems. Additionally, applying anti-corrosion spray on vulnerable metal parts extends appliance life, especially in humid environments. As appliance technology evolves, I predict more integrated diagnostic tools and AI-assisted troubleshooting will become standard, further simplifying maintenance. To stay ahead, routinely updating your knowledge base with trusted sources ensures you’re prepared for upcoming trends.
How do I maintain my appliances over time?
Consistent care involves both proper tools and routine checks. Start by maintaining a clean environment—dust and debris can impair sensors and vents. Use the right tools, like a multimeter and level, for inspections and adjustments. Keep an inventory of replacement parts and keep software firmware updated for smart devices. Following manufacturer guidelines and consulting experts when necessary will save you from costly failures later. If even after a thorough DIY approach your appliance still struggles, consider scheduling your repair with professionals for quick, warranty-backed solutions—details are available at this link.
Remember, integrating advanced diagnostic tools and maintaining good habits can greatly extend the lifespan of your appliances, saving you time and money in the long run. Stay proactive with regular checks and don’t hesitate to utilize expert assistance when needed. For the most reliable, same-day service, always verify your warranty coverage and trust experienced technicians.
Lessons From My Biggest Mistake About Leveling and Leaks
One of the most eye-opening lessons I learned was how a small oversight, like neglecting proper leveling, can lead to persistent water leaks and costly repairs. I once ignored the importance of using a reliable level, thinking a slight wobble was harmless, only to wake up to a flooded kitchen. This taught me that paying close attention to every detail in appliance setup is crucial—sometimes, the tiniest tweak makes all the difference.
Another revelation was understanding that warranties often don’t cover installation errors—making proper setup your own responsibility. I’ve seen too many homeowners rely solely on service promises, unaware that DIY mistakes or skipped steps void warranty protections. Gaining insight into these intricacies helped me prioritize correct installation practices from the start.
Lastly, I discovered that proactive maintenance and checking internal components periodically can preempt major failures. Regularly inspecting seals, filters, and connections isn’t just tedious; it’s an investment in longevity. Embracing this mindset has saved me from emergency repairs and extended my appliances’ lifespan considerably.
Tools and Resources That Elevated My Repair Game
My go-to toolkit includes a high-quality digital level for precise alignment, a dependable torque wrench for adjusting legs without over-tightening, and a reliable multimeter for electrical diagnostics. These tools have empowered me to tackle leveling and minor repairs confidently, reducing dependence on professionals for simple tasks.
I also trust this comprehensive repair guide for step-by-step instructions tailored to various appliances. It’s been a lifesaver when troubleshooting tricky issues or confirming correct setup before calling in help. Additionally, I rely on reputable online reviews and trusted service providers to ensure I get honest, quality assistance for complex repairs.
For software-related diagnostics, I use specialized apps compatible with smart appliances, which help interpret error codes quickly. A well-organized toolbox and an inventory of spare parts have also speeded up my workflow, letting me deliver same-day repairs with confidence.
Embracing Action: Your Path to Smarter Appliance Care
Don’t let minor oversights turn into major headaches—approach appliance maintenance with curiosity and confidence. Regularly check and level your appliances, invest in quality tools, and seek expert advice when necessary. Remember, a little knowledge and preparation go a long way in extending your appliances’ lifespan and saving money. With the right mindset and resources, you can master appliance care and enjoy a safer, more efficient kitchen.
What small step will you take today to improve your appliance maintenance routine? Share your plans below!