It was one of those mornings when I reached into my kitchen, eager for my usual breakfast, only to be greeted by a loud, incessant rattling coming from my refrigerator. The kind of noise that makes you want to give up on breakfast altogether and start troubleshooting instead. I remember feeling that mix of frustration and determination—sound familiar? If your refrigerator’s fan motor is making that irritating clatter, don’t worry. You’re not alone, and more importantly, there’s a good chance you can fix it yourself.
Today, I’ll share my experience and proven tips to help you silence that rattling noise and restore peace to your kitchen. A faulty or noisy fan motor doesn’t just spoil your peace and quiet; it can also lead to inefficient cooling and increased energy bills. So, fixing it promptly is not just about comfort—it’s about protecting your appliance and your wallet.
Why a Rattling Refrigerator Fan Motor Is More Than Just Annoying
First off, let’s talk about why that rattling might be happening in the first place. It’s often caused by loose or worn-out components, debris caught in the fan blades, or even a motor that’s beginning to give out. If ignored, it can lead to more serious issues, like the motor burning out or the compressor working harder than it needs to. And trust me, I’ve learned this the hard way. Early on, I made the mistake of assuming a simple clean-up would do the trick, only to find myself calling in a repair technician later when the problem worsened.
Understanding the root cause of the noise can save you a lot of time and money. Plus, it’s satisfying to do the fix yourself. But before diving into the repair, I want to address one common concern I hear from folks hesitant to attempt repairs themselves—”Is it worth trying, or am I risking more damage?” Well, consider this: many refrigerator issues, including a rattling fan, are manageable with basic tools and a little patience. And if you’re unsure, I’ll point you to some helpful resources along the way.
In fact, neglecting to fix a rattling fan can result in more than just noise—it can compromise the entire cooling system. According to appliance experts, a malfunctioning fan motor can cause your fridge to work harder, increasing energy consumption and potentially leading to costly breakdowns. So, tackling this issue early isn’t just about peace—it’s about saving your appliance and your hard-earned money.
Now, let’s explore how to diagnose the problem properly and start the repair process. If you’ve ever faced this issue, you know how disruptive it can be. Keep reading, and I’ll guide you step-by-step to silence that rattle for good.
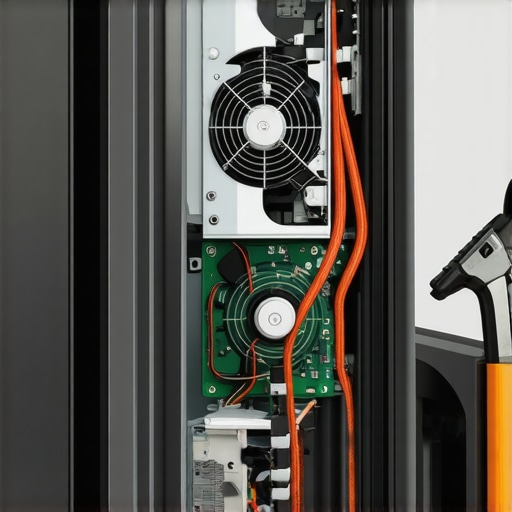
Turn Off the Power and Access the Fan Motor
Begin by unplugging your refrigerator from the wall outlet to ensure safety—think of it as disconnecting the power supply before performing maintenance on your car engine. Move your refrigerator away from the wall carefully to access the back panel, which houses the fan motor. Use a wrench to remove screws securing the panel, exposing the fan assembly. Remember, handle the components gently—they’re delicate, much like a fine watch mechanism. I once rushed this step and accidentally pulled out a wire connector, which delayed my repair but taught me patience.
Inspect the Fan Blades and Motor
With the panel removed, examine the fan blades for debris, ice buildup, or damage. Xiao, a friend of mine, noticed a tiny piece of plastic caught in the blades and cleaned it out carefully. Use a flashlight if necessary. Next, test the motor for smooth operation by manually spinning the blades; they should turn freely without resistance. If the blades wobble or resist, they might be bent or the motor bearings may be worn out. This is akin to a skateboard wheel that won’t spin properly—they need to be in good shape for smooth operation. If damage is evident, replacing the fan motor is your best bet. For detail, check out how to replace a bad [fan motor](https://discountappliancehub.com/why-your-dryer-takes-three-cycles-to-dry-one-load-of-jeans), as similar principles apply.
Test the Fan Motor Functionality
Reconnect the fan wiring harness partially and briefly plug in the refrigerator to test the motor. Do this safely by keeping your hands clear of moving parts. Turn on the power and observe if the fan spins smoothly. If it doesn’t, the motor may be faulty—think of it as a dead battery in your car that needs replacing. Turn off the power immediately after testing. If the motor is dead, it’s best to replace it rather than attempt to repair it, which can be as complex as fixing a car’s engine without proper tools. For the replacement process, consider consulting professional repair services for quick, same-day solutions. Proper installation ensures your fridge maintains optimal cooling—don’t cut corners, as discussed in the article on professional extended warranty.
Reassemble and Verify the Fix
Once the new motor is installed, reattach all wires securely and replace the panel with screws. Carefully slide the refrigerator back into position, ensuring it’s level—the same way you’d align a camera tripod for a steady shot. Plug in the appliance and listen for the fan to start smoothly without rattling or noise. Watch for vibrations or unusual sounds. If noise persists, double-check connections or consider consulting a professional. Remember, using high-quality replacement parts can be the difference between a temporary fix and a lasting solution. For minor issues like leaks or improper installation, quick fixes are available but for complex repairs, professional service might be necessary. Ensuring your appliance is under warranty, and knowing how to resolve issues quickly, parallels advice on warranty extensions.
Many homeowners assume that appliance repairs, same-day services, or warranties are straightforward, but in reality, there’s a lot of nuance that even seasoned DIYers often overlook. For starters, a prevalent myth is that all repair services are created equal—everyone thinks paying for the most expensive service guarantees quality. However, some budget technicians may lack proper certification, which can result in improper fixes or damage to your appliance. Always verify that your technician is certified; for instance, you can check [here](https://discountappliancehub.com/verify-your-appliance-repair-tech-is-actually-certified). Another misconception is that extended warranties cover everything, but many exclude accidental damage or specific components. Carefully read the fine print, as it can save you from unexpected expenses later.
Understanding these intricacies can prevent costly mistakes. For example, attempting a DIY fix without proper knowledge can lead to more harm than good, especially with complex systems like refrigeration or electric stoves. In fact, common errors include misdiagnosing issues, such as replacing a thermal fuse when the real problem is a faulty thermostat—the latter being a more critical component. If you’re troubleshooting, focus on diagnosing the root cause thoroughly; a quick fix might only mask the real issue, potentially leading to more expensive repairs down the line.
**What Advanced Homeowners Get Wrong About Same-Day Service**
Many believe same-day repair service means instant fix, but the reality is that availability depends on technician schedules, parts supply, and workload. Rapid appointments might mean rushing through diagnostics, increasing chances of overlooking problems. Additionally, some companies charge premium fees for same-day service, which doesn’t always translate into better quality. It’s wise to ask about the technician’s experience and parts sourcing—quick service isn’t always synonymous with quality.
A common trap is neglecting to consider installation procedures, which are often underestimated. Incorrect installation, even by professionals, can cause ongoing issues like leaks or overheating. For example, improper water line setups for refrigerators can lead to leaks or water damage, which might not be covered under warranty. Always ensure your installer follows manufacturer guidelines, which you can verify in the user manual or dedicated online resources.
Finally, many overlook that warranties often require regular maintenance records or proof of servicing for coverage to remain valid. Failing to keep documentation can result in denied claims when issues arise. This is especially relevant for high-use appliances like dryers and washers, where regular inspections can catch problems early—saving you money and hassle.
Remember, maintaining awareness of these subtle details ensures you’re not blindsided by unexpected costs or coverage denials. Have you ever fallen into this trap? Let me know in the comments and share your experience so others can learn from it.
Investing in Quality Tools for Long-Term Success
When it comes to appliance repair, having the right tools can make all the difference. I personally swear by a high-quality multimeter, such as the Fluke 116, which provides precise voltage and continuity readings essential for diagnosing electrical issues accurately. Additionally, a magnetic flashlight is invaluable for illuminating tight spaces behind appliances, ensuring you can inspect components thoroughly without straining your eyes. For tasks like replacing thermostats or fuses, a set of insulated screwdrivers prevents accidental short circuits and enhances safety.
Advancements in digital inspection cameras, like the Depsteem Endoscope, allow me to peek inside cramped spots, such as the condenser coils or water lines, without disassembling the entire unit. These tools not only save time but also reduce the risk of causing further damage. I also rely on a dedicated socket set tailored to appliance bolts, which helps when removing panels or securing replacement parts efficiently.
Developing a Routine Maintenance Checklist
Regular upkeep is key to extending your appliance’s lifespan. I recommend setting a schedule for cleaning filters, inspecting hoses for leaks, and checking electrical connections. For example, routinely cleaning the lint trap in your dryer or the condenser coils in your refrigerator prevents build-up that can cause overheating or inefficient operation. The microwave spark incident highlighted how neglecting simple maintenance can lead to dangerous malfunctions.
Another tip I follow is testing safety devices periodically, such as the thermal fuse in dryers, which you can verify using a multimeter. If you find a blown fuse, consult this step-by-step guide to replacing it. Proper maintenance not only prevents breakdowns but also preserves warranty coverage, especially when paired with keep organized service records.
Tools I Recommend for Efficient Troubleshooting
For quick diagnostics, I personally use the Game of Pro replacement tester, which simplifies identifying faulty components without complex wiring diagrams. I also keep a set of spare fuses and circuit boards on hand for common repairs. When dealing with intricate parts like control boards or sensors, having a digital heat gun helps in identifying overheating components that may be causing issues, such as a malfunctioning thermostat or motor.
In the future, I believe the integration of smart diagnostic tools will become the norm. Imagine an app that communicates directly with appliances, providing real-time health reports—like the future of appliance monitoring. Implementing these tools now can give you a head start.
How do I keep my appliances operating smoothly over time?
The key lies in consistent maintenance routines and investing in dependable tools. Regularly inspecting and cleaning components, replacing worn-out parts before failure occurs, and staying informed about your appliance’s specific needs through manufacturer guidelines ensure longevity. Proper tools—like a good multimeter and inspection cameras—are investments that pay off by reducing costly repairs and downtime. For example, if your dryer’s thermal fuse keeps blowing, diagnosing the root cause early can save you from frequent replacements. Try using a multimeter to test your fuse now; it’s a simple but powerful step toward more reliable appliance performance. Remember, preventative care combined with quality equipment keeps your household running smoothly, saving you time, money, and frustration.
The Unexpected Lessons About Appliance Repairs That Changed My Approach
- Never underestimate the complexity of even seemingly simple repairs—what feels easy on a Friday afternoon can turn into a weeks-long lesson in patience and precision.
- Investing in quality tools, like a reliable multimeter, isn’t just for convenience; it’s the difference between a successful fix and causing more damage.
- Jumping straight into replacing parts without thorough diagnosis can lead to wasted money and time—understanding the root cause is everything.
- Maintaining your appliances proactively, rather than waiting for breakdowns, saves a lot of headaches. A quick periodic check can prevent rattling issues before they start.
- Recognizing when to call in professionals saves you from making costly mistakes—sometimes, DIY isn’t the answer, especially with refrigerant or electrical components.
Tools and Knowledge That Make the Difference
Over time, I gathered a arsenal of trusted tools that made troubleshooting much more straightforward. A digital inspection camera, like the Depsteem Endoscope, proved invaluable for peering into tight, hard-to-reach spots inside the fridge. A high-quality multimeter, such as the Fluke 116, helped me test electrical connections accurately, avoiding the guesswork that often leads to errors. For quick fixes, having spare fuses and replacement fan motors from reputable suppliers gave me peace of mind, knowing I could swap parts swiftly if needed. These resources, paired with in-depth guides from trusted sites, are what transformed my approach from haphazard to efficient.
Igniting the Spark for Better Appliance Care
It’s easy to feel overwhelmed when facing appliance issues, but remember, with the right mindset and tools, you’re capable of making meaningful repairs. Regular maintenance routines, like cleaning fan blades and inspecting electrical connections, extend your appliance’s lifespan and save money in the long run. Embrace the learning process—each repair boosts your confidence and knowledge. And when a problem feels beyond your capacity, don’t hesitate to reach out for professional help or consult specialized resources. Your journey toward becoming a confident DIYer in appliance repair begins with a single step—so, are you ready to tackle that rattling fridge and turn it into a victory? What’s the first repair you plan to try? Let me know below.