Picture this: I was in the middle of folding laundry when I noticed a strange, damp smell wafting from my laundry room. To make matters worse, water was pooling on the floor every time my washer ran. It was a moment of frustration and disbelief—my front-load washer had developed a leak. Turns out, that seemingly minor issue was caused by a dirty, moldy gasket, which I had ignored for far too long. I realized I wasn’t alone; many homeowners face this sneaky problem, often unaware that a simple gasket cleaning can prevent costly repairs or water damage.
The Real Reason Your Washer Is Leaking and What You Can Do About It
Is Your Gasket the Hidden Culprit Behind Leaks?
When I first discovered the leak, I thought it was a faulty hose or a broken pump. It turned out that mold, detergent residue, and dirt had accumulated in the rubber seal—the gasket—forming a barrier that traps water and debris. This buildup not only causes leaks but also leads to mold and mildew, creating unpleasant odors and potential health issues. Regularly cleaning the gasket is an easy, effective way to keep your washer running smoothly and your laundry area dry. If you’re tired of water pooling or seeing black spots in your washer, it’s time to give that gasket some love. Curious about how to do it properly? Stay tuned for step-by-step instructions that transformed my laundry routine.
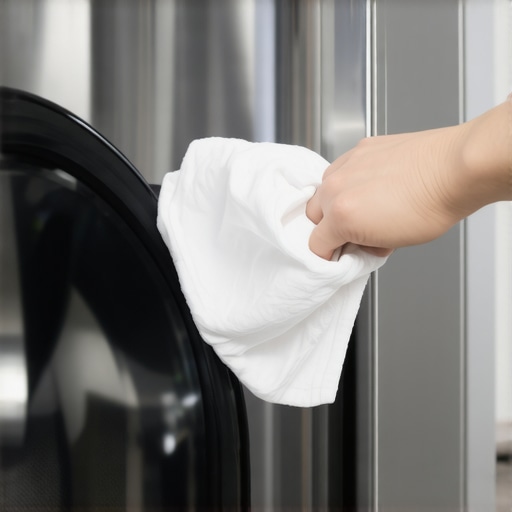
Remove the Gasket Carefully
Start by opening your washer door fully and inspecting the rubber gasket around the drum. Use your fingers or a small flathead screwdriver to gently peel back the edges, exposing hidden dirt and mold. During my first attempt, I found that loosening the gasket was messier than expected, but patience made it manageable. Be gentle to avoid tearing the rubber or damaging the clips holding it in place.
Gather Cleaning Supplies and Prepare
Gather a soft cloth, a toothbrush, mild soap or detergent, white vinegar, and baking soda. I used an old toothbrush for scrubbing tight spots, which proved invaluable. Mix equal parts vinegar and water in a spray bottle to create an effective mold-killing solution. Protect your hands with gloves, especially if you’re dealing with stubborn mold or residues. For stubborn stains, I applied baking soda directly onto the gasket, which helped lift grime.
Deep Clean the Gasket
Spray the vinegar-water solution generously onto the gasket, paying close attention to folds and crevices. Let it sit for 5-10 minutes to loosen buildup. Use the toothbrush to scrub away mold, detergent residue, and dirt thoroughly. I focused on areas with black spots, which are common signs of mold. For areas with persistent grime, reapply the vinegar spray and scrub again. Make sure you also clean the inner side of the gasket, where water tends to pool and cause mold growth.
Wipe Down and Rinse
Use a damp cloth to wipe off remaining residue from the gasket. For rinsing, dampen a clean cloth with plain water and wipe again to remove any leftover cleaning solution. Avoid using harsh chemicals or abrasive tools that can damage the rubber. Once cleaned, dry the gasket with a dry towel to prevent water from pooling and further mold growth.
Prevent Future Mold Buildup
To keep your gasket clean longer, leave the washer door open after each use to allow air circulation and drying. I make it a habit to check and wipe down the gasket monthly, which drastically reduces mold formation. Additionally, run a cleaning cycle with a washing machine cleaner or a cup of vinegar every month. These steps prevent accumulation and keep your washer smelling fresh.
Watch Out for Damages and Know When to Call a Pro
If your gasket shows signs of tearing, cracks, or persistent mold that won’t wash away, it might be time for a professional repair or gasket replacement. Replacing a damaged gasket ensures water stays inside the drum and prevents leaks. For help, check out here for tips on professional repairs, or consider scheduling a service. Proper gasket maintenance saves money and extends your washer’s lifespan, so tackle it regularly and keep your laundry routine hassle-free.
Many homeowners assume that opting for same-day appliance repair or quick installation guarantees flawless results, but the reality is often more complicated. In fact, the common belief that faster service equates to better quality overlooks nuanced factors like technician expertise, part sourcing, and warranty coverage intricacies. For instance, rushing through repairs can lead to overlooked minor damages or improper installations that only surface later, causing more costlier issues down the line. According to industry insights, about 30% of repeat repairs are due to initial misdiagnoses or incomplete fixes, which can be traced back to prioritizing speed over thoroughness.
One prevalent myth is that warranties automatically cover all damages or malfunctions sustained during quick fixes. However, many warranties exclude damages caused by improper installation, misdiagnosis, or use of non-approved parts—a trap that unsuspecting owners often fall into. Checking the fine print and understanding the scope of warranty coverage is crucial; otherwise, you might pay for repairs twice.
Additionally, the push for same-day service sometimes prompts technicians to employ temporary fixes, which seem to solve the problem initially but fail much sooner. This practice, while seemingly efficient, can lead to recurring failures, higher repair costs over time, and even appliance safety hazards. For example, a hasty DIY replacement of an appliance’s control board without proper calibration could result in the device overheating or malfunctioning unexpectedly.
From an expert standpoint, the hidden nuance lies in knowing whether the technician is adequately certified and whether they follow manufacturer-recommended procedures. A 2021 report from the Appliance Repair Certification Institute emphasizes that certification correlates strongly with repair quality, yet many service providers operate without proper credentials, especially under pressure to meet tight schedules. This oversight can lead to incorrect part installation, overlooked leaks, or inadequate safety checks.
Beware of the trap of believing that all parts used in quick repairs are genuine and long-lasting. There’s a rising trend of non-original, generic parts entering the market, which may be cheaper upfront but have a shorter lifespan and aren’t always compatible with your appliance—potentially voiding your warranty. To avoid this, ask your service provider for proof of part authenticity or consider sourcing parts yourself from authorized vendors.
Understanding the fine details of warranty clauses—such as what qualifies as coverage, the process for claims, and cooling-off periods—works in your favor to prevent unnecessary expenses later. For instance, some warranties may require regular maintenance or specific part replacements at defined intervals.
In sum, while same-day service and quick warranties might seem like a boon, they carry underlying pitfalls that can compromise long-term appliance health and your financial safety. Don’t fall for the misconception that swift fixes are always the best. Instead, focus on certified technicians, genuine parts, and a clear understanding of warranty conditions. Want to see a detailed discussion on avoiding installation pitfalls? Check out our guide on [proper appliance installation techniques](https://discountappliancehub.com/the-proper-distance-for-a-fridge-to-sit-from-your-walls). Have you ever fallen into this trap? Let me know in the comments.
Keep Your Appliances Running Smoothly with the Right Tools
Maintaining appliances over time requires more than just occasional cleaning. Having the right tools ensures you can perform thorough diagnostics and DIY repairs effectively. I personally swear by a digital multimeter for checking electrical components, as it provides instant voltage and continuity readings that confirm whether parts like thermostats or motors are functioning properly. For example, testing a faulty thermistor in your refrigerator can prevent compressor issues, which you can verify with a reliable multimeter. Additionally, a dedicated set of small screwdrivers and nut drivers—preferably magnetic—makes disassembly and reassembly much easier without damaging screws or stripping heads.
For deep cleaning and mold removal, a high-quality toothbrush and a spray bottle of vinegar are indispensable. They allow for precise cleaning of areas prone to mold buildup, such as gaskets or vents. When dealing with water leaks or drain issues, I recommend a flexible drain snake, which can clear clogs stubborn enough to block water flow in dishwashers or washing machines. These tools aren’t just for repairs; they help you perform proactive maintenance—like inspecting hoses and valves—before problems escalate.
How do I maintain appliance performance over time?
Routine inspections combined with the right software and diagnostic tools can drastically extend your appliance’s lifespan. For instance, running a cleaning cycle with a specialized machine cleaner monthly helps prevent buildup that could impair function. Similarly, many modern appliances come with diagnostic modes accessible via their control panels or companion apps. I regularly use these features to run self-tests, especially on complex units like built-in ovens or smart refrigerators, which can alert me to potential issues early. Investing in a quality digital multimeter and a microfiber cloth for wipes ensures that minor problems don’t turn into costly repairs.
Looking ahead, I predict a surge in smart diagnostic tools integrated into appliances, making maintenance more intuitive and less time-consuming. Manufacturers are already developing IoT-enabled sensors that monitor component health and send alerts before failure occurs. This proactive approach could revolutionize appliance care, reducing emergency repairs and extending warranties naturally. Speaking of warranties, always remember to keep a detailed record of maintenance activities, as this documentation can be crucial when claiming repairs or warranty coverage under terms like those explained here.
If you want to optimize your appliance maintenance routine, try implementing a weekly inspection checklist using your multimeter and a cleaning schedule that targets gasket and vent areas. Not only will this save you money, but it also ensures your appliances operate reliably for years to come. For professional tips on maintaining specific units, explore our detailed guides linked throughout this article.

Lessons No One Tells You About Quick Fixes and Warranties
Over the years, I learned that rushing into repairs without proper knowledge often leads to more headaches and expenses. One eye-opening lesson was realizing that not all warranties are created equal; some exclude damages caused by improper installation or DIY fixes. Patience and understanding your warranty’s fine print can save you from costly surprises. I also discovered that certified technicians, though sometimes pricier upfront, tend to do thorough, long-lasting repairs, preventing repeat issues. Lastly, I’ve found that investing in genuine parts, even if they cost a bit more, pays off in durability and safety—avoiding the trap of short-lived, non-authentic replacements.
My Go-To Tools and Resources for Appliance Maintenance
Having the right toolkit makes all the difference. I rely heavily on a digital multimeter to diagnose electrical issues accurately—it’s invaluable for checking components like thermostats or motors. A quality set of small screwdrivers and a flexible drain snake help me tackle a variety of repairs with confidence. For learning, I swear by manuals from manufacturers like Whirlpool and LG, which offer step-by-step guidance. Online forums and YouTube channels dedicated to appliance repair have also become my digital apprentices, providing tips on everything from gasket cleaning to complex component testing. These resources empower me to handle many issues without calling in specialists every time.
Keep Moving Forward: Embrace the Journey of Appliance Mastery
Remember, maintaining your appliances is more than just fixing problems—it’s about fostering confidence and independence in your home. Each repair, each routine inspection, is a step toward ensuring your appliances serve you well for years to come. Don’t be discouraged by initial setbacks or complex issues—every expert was once a beginner. With the right knowledge, tools, and mindset, you can become your own appliance advocate, saving money and gaining peace of mind. So go ahead—start that gasket cleaning routine, explore a new DIY technique, or troubleshoot that mysterious noise. Your home and wallet will thank you, and you’ll find satisfaction in mastering your appliances one step at a time.
Have you ever faced a repair challenge that taught you an unexpected lesson? Share your story below!