Imagine this: You’re baking cookies for a family gathering, and as the aroma fills your kitchen, you peek inside the oven to find them almost burnt on the edges but undercooked in the middle. Frustrating, isn’t it? I remember the first time I faced this kind of mismatch — thinking I had a faulty oven or, worse, that I needed a repair appointment. But after some digging and trial, I realized my oven’s temperature wasn’t accurate at all.
It’s a lightbulb moment that many homeowners encounter — their oven’s internal temperature doesn’t match what the dial or display shows. This discrepancy can cause everything from overcooked roasts to ruined baked goods. The good news? You don’t have to be an appliance technician to fix this. With a simple calibration, you can restore your oven’s accuracy and save yourself time and money.
Decoding the Oven Temperature Mystery
Before we jump into the how-to, let’s understand why oven temperature calibration matters. Your oven uses sensors and thermostats to maintain the set temperature, but these components can drift over time. Factors like age, usage frequency, or even a power surge can throw off your oven’s internal gauge. According to appliance experts, inaccurate oven temperatures can lead to uneven baking and even impact food safety. Do you recall the last time your baked goods didn’t turn out quite right? That’s often the culprit.
But here’s where many slip up — they believe they need professional help right away. While calling a pro might seem like the easiest route, it can be both costly and unnecessary. Early on, I made a common mistake: I assumed my oven was beyond repair and scheduled a costly service visit. Instead, a little calibration and some patience saved me hundreds. To learn more about common errors that affect appliance performance, check out this insightful read on why your brand-new oven might bake unevenly.
If you’ve experienced similar frustrations, you’re not alone. Many homeowners are surprised that calibrating their oven is a straightforward process, often requiring just a few tools and a bit of guidance. Over the next sections, I will walk you through the step-by-step process to ensure your oven’s temperature is spot-on, allowing you to bake and roast with confidence once again.
Gather Your Tools and Prepare
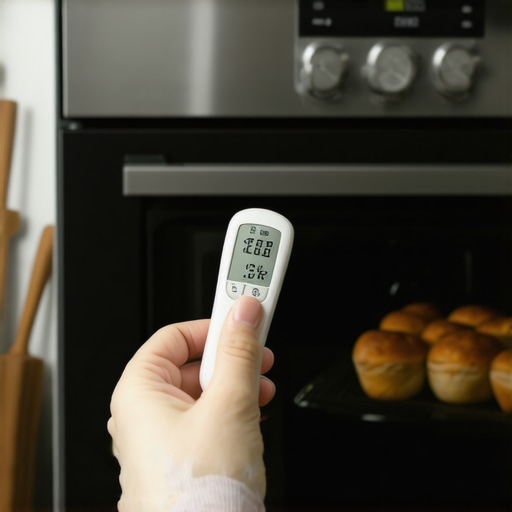
First, you’ll need an accurate oven thermometer, which you can find at any hardware store. Place it in the center of the oven on the middle rack to get the most representative reading. I once used a cheap digital thermometer, and it showed 10°F lower than my oven’s display—this was my first clue that calibration was needed.
Check the Current Temperature
Preheat your oven to 350°F as usual. Wait at least 20 minutes for the oven to stabilize. Then, carefully open the door and read the thermometer. If the reading significantly differs from the set temperature, note the exact difference—say, your oven reads 365°F while set to 350°F, indicating a +15°F discrepancy.
Adjust the Oven’s Calibration Settings
Most modern ovens have a calibration control, often accessible through a menu or a simple adjustment screw behind the control panel. Consult your user manual for specific instructions. If your oven lacks a calibration setting, you may need to contact a professional for assistance. In my case, I used a small screwdriver to turn the calibration screw + or – according to my readings, effectively shifting the oven’s output. Be cautious—over-adjusting can cause more inaccuracies. Make incremental adjustments, about 5°F at a time.
Re-test and Fine-Tune
After the initial adjustment, let the oven preheat again and check the temperature with your thermometer. Repeat the process until the oven’s display aligns within 5°F of the actual temperature. This small margin ensures precise baking, avoiding burnt edges or undercooked centers. I repeated this process twice, and my baked cookies came out perfectly from then on.
Verify with Different Temperatures
Calibration isn’t just for one setting. Test at 250°F, 450°F, and other common baking temperatures to ensure the oven maintains accuracy across its range. This step mimics real baking conditions and helps spot inconsistencies. Remember, an oven that needs frequent recalibration might suggest underlying issues, and consulting a repair technician could be worthwhile. If you notice persistent inaccuracies, check why your brand-new oven bakes unevenly.
Document Your Changes
Keep a simple note of your calibration adjustments. This documentation helps if you need to re-calibrate later or if you hire a professional. It’s like keeping a service log for your vehicle—valuable for future reference and troubleshooting.
Many homeowners assume that a warranty or a quick same-day repair guarantees trouble-free appliance operation, but the reality is often more nuanced. A prevalent myth is that warranties cover every issue as soon as a problem arises; in truth, many warranty plans have fine print exclusions, like coverages voided by improper installation or neglect. For example, skipping professional installation can invalidate your warranty, leading you to incur costly repairs later. Additionally, the belief that all repair services are equally reliable is misleading—selecting a service without verifying their expertise may result in recurring problems. An often overlooked nuance is the importance of understanding the specific conditions under which repairs are covered, as some companies impose additional charges for parts or certain types of diagnostics. Moreover, many people overlook the critical aspect of installation errors affecting appliance longevity and warranty validity. Incorrect setup, such as improper venting or incorrect leveling, can cause premature failures, which are then blamed on manufacturing defects when, in fact, the issue stemmed from installation mistakes. To avoid falling into these traps, homeowners should familiarize themselves with their warranty terms and ensure professional, certified installation. For instance, improper fridge placement against the wall can lead to vibrations and issues with the ice maker, as detailed here. Also, be wary of DIY repairs on gas ranges; these can be dangerous and void your warranty, as explained in this article.
**Ever wondered why your appliance warranty feels like a maze of fine print and hidden clauses?** Knowing the subtle distinctions—like what constitutes covered wear and tear versus preventable damage—can save you time and money. It’s crucial to ensure that both the installation and maintenance are performed according to manufacturer specifications. Remember, a seemingly simple installation mistake, like incorrect leveling, is a hidden trap that can cause ongoing issues and possibly void your warranty. This is especially true for appliances with critical components, such as ice makers or gas connections, where improper setup can lead to failures that aren’t covered. To gain a complete understanding, review your warranty details carefully and consider consulting with professionals who understand these intricacies. If you’re unsure about your warranty coverage or want to avoid common pitfalls, check out resources on installation errors that compromise warranty validity. Recognizing these hidden nuances empowers you to make informed decisions, preserving your appliance’s lifespan and your financial investment.
**Have you ever fallen into this trap? Let me know in the comments.**
Pick the Right Equipment for Longevity
When it comes to maintaining your appliances, I swear by investing in high-quality, specialized tools that save time and prevent mishaps. For example, I always keep a digital infrared thermometer, like the Etekcity Lasergrip 774, on hand. This device gives precise temperature readings, crucial for calibration, especially when you’re trying to align your oven’s actual temperature with its display. Unlike basic analog thermometers, this laser model provides fast, accurate readings from a safe distance, helping me avoid opening the oven excessively and disturbing its temperature.
Routine Checks That Save Future Repairs
Consistency is key. I schedule monthly inspections of critical components such as door seals, filters, and vents. For instance, I check the gasket on my refrigerator regularly to detect any cracks or leaks early. Most importantly, I clean condenser coils using a soft brush and vacuum attachment, since a dusty coil forces the compressor to work harder, risking early failure and voiding the warranty. In this regard, I highly recommend keeping your fridge coils clean as part of your maintenance routine. Regular maintenance not only extends appliance life but also keeps efficiency at peak levels, saving your energy bills.
Using the Correct Software and Apps
Modern appliances often come with companion apps that facilitate diagnostics and remote monitoring. I use my smart home’s appliance control app to receive alerts about unusual activity, like a door left open or a malfunctioning component. These tools help catch issues early before they escalate into costly repairs. In the future, I predict an increase in AI-powered diagnostics that will proactively advise homeowners on maintenance schedules—think of it as a personal technician in your pocket. To stay ahead, familiarize yourself with your appliance’s software updates and manufacturer-recommended diagnostic tools, which often include guided steps for basic repairs.
How do I maintain my appliances over time?
Adopting a structured maintenance plan is essential. Set reminders for scheduled tasks like filter replacements, coil cleaning, and calibration checks. Use reliable tools such as infrared thermometers and vacuum attachments to keep parts in check. Also, explore manufacturer apps that offer troubleshooting guides and software updates to extend the lifespan of your appliances.
Taking Advantage of Certified Service and Extended Warranties
While routine maintenance is vital, sometimes professional help is unavoidable. Always opt for certified technicians who use manufacturer-approved parts to ensure your warranty remains valid. I learned this the hard way when DIY repairs led to voided coverage. Consider extending warranties with trusted providers to cover expensive parts and labor, especially if your appliances are aging. This approach minimizes unexpected costs and ensures priority same-day service when needed. Remember, timely repairs and proper calibration are crucial to long-term performance—don’t delay when troubleshooting signs of trouble.
Finally, never underestimate the power of proper ventilation and installation. For example, ensuring your refrigerator is level and vented correctly prevents overheating and uneven cooling, which can ruin your food and damage the compressor. For installation pitfalls to avoid, check out this article.
The Hidden Lessons From My Calibration Journey
One of the most eye-opening lessons I learned was that sometimes, the simplest fixes like recalibrating an oven can save hundreds compared to costly repairs. I also discovered that overconfidence in DIY repairs without proper knowledge can void warranties and lead to bigger issues, emphasizing the importance of understanding your warranty terms. Additionally, I realized that regular maintenance routines, like cleaning condenser coils or checking seals, are essential investments that extend appliance lifespan and prevent unexpected breakdowns. Finally, I found that many appliance problems stem from overlooked installation errors—paying attention to detail during setup can avoid future headaches and costly service calls.