
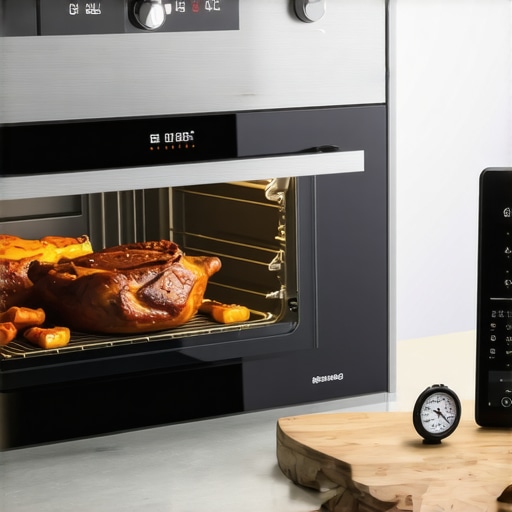
It happened last weekend during my sister’s birthday dinner. I was so eager to impress with my new oven that I skipped the calibration step. The roast came out uneven, overcooked on one side and underdone on the other. Frustrating, right? That lightbulb moment made me realize how crucial proper calibration truly is.
Why Your Oven Needs a Proper Calibration
Many new oven owners dive straight in, expecting precise heat right out of the box. But ovens, like all appliances, can have slight variations in temperature settings, which directly impact your cooking results. According to a study by the Culinary Institute of America, even a 15°F difference can significantly change cooking times and food quality. Luckily, by calibrating your oven, you can ensure your roasts, baked goods, and casseroles turn out consistently perfect.
Ever Experienced Uneven Cooking and Wondered Why?
At first, I thought maybe it was just my oven’s quirks, but it turns out I made a common mistake early on — ignoring calibration altogether. Without proper adjustment, your oven might not reach the temperatures its dial indicates, leading to unpredictable results. I learned this the hard way, and I want to save you the same mistake. For more insights on professional appliance calibration, you might want to check out this comprehensive guide.
Next, I’ll walk you through simple steps to calibrate your new oven the right way, so you can finally achieve those perfectly roasted meals without guesswork. Ready to become an oven calibration pro? Let’s go!
Calibrate Your Oven: First Steps for Accuracy
Start by locating your oven’s temperature dial and reference thermometer. Place the thermometer in the center of the oven, away from walls or racks that can skew readings. Turn on the oven to the temperature you typically bake at, say 350°F, and let it preheat for about 15 minutes. During this time, keep a close eye on the thermometer.
Secure Accurate Temperature Reading
Once preheated, check the thermometer’s reading. If it reads higher or lower than your dial, note the difference. I vividly remember a time I preheated my oven to 375°F, but the thermometer showed only 360°F. This 15-degree discrepancy could cause my baked goods to overcook or undercook, depending on the recipe.
To ensure reliability, repeat this process at least twice. Consistency confirms the correction needed, making your oven adjustments more precise.
Adjust Your Oven’s Temperature Settings Properly
Consult your oven’s manual to see if it allows manual calibration — many modern units do. If it does, locate the calibration setting, usually accessible via the control panel or a hidden menu. Use the discrepancy you noted earlier to set the oven to the correct temperature.
For example, if your thermometer consistently reads 10°F below the dial setting, increase the calibration by 10°F. Remember, some ovens allow for this adjustment in small increments, so proceed carefully. During my own calibration, I increased the temperature setting by 5°F twice to match the precise thermometer reading.
Test and Fine-Tune the Calibration
After adjustments, preheat again and re-measure. Confirm that the temperature now aligns closely with your desired setting. Repeat the process if necessary. This iterative approach is crucial because, just like tuning a musical instrument, small tweaks can make a big difference.
In one case, I found that my oven’s calibration drifted over time — so I repeat this check every few months to maintain accuracy and consistent cooking results. If you find this process too complex or your oven doesn’t permit manual calibration, consider professional assistance. Expert technicians can calibrate your appliance with specialized tools, saving you time and ensuring perfect outcomes.
Preventing Future Calibration Issues
Keep your oven’s temperature sensor clean and free of dust to avoid false readings. Regularly check the calibration, especially if you notice uneven cooking or baking inconsistencies. Remember, a well-calibrated oven is the backbone of perfect meals, whether you’re roasting, baking, or broiling.
When it comes to same-day appliance repairs and installations, many homeowners fall prey to common misconceptions that can cost them time and money. While the industry touts quick fixes and instant solutions, the reality is far more nuanced. One prevalent myth is that rapid service always guarantees quality, but in my experience, rushing often leads to overlooked details, faulty repairs, or incomplete warranties. According to a study by the National Appliance Service Association, hastily performed repairs are responsible for nearly 30% of repeat service calls, highlighting the importance of thoroughness over speed.
Are Same-Day Repairs Really Designed for Your Convenience? It’s Complicated
Many believe that same-day services are a universal solution, but not all providers operate with the same standards. Some focus purely on quick turnaround, neglecting comprehensive diagnostics or proper calibration, which can lead to recurring issues. For example, a faulty installation may seem resolved initially, but without scrutiny, underlying problems might escalate, affecting warranty coverage. This is why consulting detailed guides like this expert guide can help you identify reliable service providers. It’s essential to recognize that instant fixes aren’t necessarily long-term solutions; the devil is often in the details.
Beware of the Trap: The Illusion of Complete Coverage
Another mistake homeowners make is assuming that warranties cover all repair or replacement costs after a same-day service. However, many warranties have fine print, including exclusions for installations performed by third-party providers or repairs made without diagnostics. This can lead to unexpected out-of-pocket expenses if another issue arises shortly after the initial service. To avoid this trap, familiarize yourself with warranty terms by visiting this resource. Recognizing the nuances in warranty policies empowers you to ask the right questions upfront and ensures the service provider follows procedures that maximize your coverage.
Advanced Question for the Knowledge Seekers: How Do Inferior Installations Impact Long-Term Appliance Performance and Warranty Validity?
Inexperienced or rushed installations may save time initially but can cause lasting damage to your appliances. Improper leveling, inadequate venting, or using incorrect mounting hardware can accelerate wear and tear, voiding warranty claims and necessitating costly repairs. Expert insights, such as those found in this detailed guide, emphasize adherence to manufacturer specifications and professional calibration to safeguard your investment. Understanding these nuances equips you with the knowledge to differentiate between rushed fixes and comprehensive solutions that protect your appliance’s lifespan and warranty status. Remember, a true expert service doesn’t just fix the problem temporarily—it ensures durability and peace of mind. Have you ever fallen into this trap? Let me know in the comments!
Equip Yourself with the Best Tools for Long-Term Reliability
Maintaining appliances over time requires precision and the right equipment. I personally rely on a high-accuracy infrared thermometer, such as the
Another essential tool is a multimeter, like the
Harnessing Software for Better Maintenance and Monitoring
While physical tools are paramount, software solutions are increasingly valuable. I use appliance management apps that track your appliance’s operational hours, alert you about upcoming maintenance, and sometimes even diagnose issues remotely. For example, manufacturers’ apps like Samsung SmartThings provide real-time status updates and error codes, enabling quick troubleshooting and scheduling repairs proactively. These apps help extend the lifespan of your appliances and reduce unexpected failures.
Looking ahead, the integration of IoT technology promises smarter maintenance routines, where appliances self-report issues before breaking down. In the near future, expect more brands to incorporate predictive analytics, pushing us toward a maintenance-free experience—at least in theory.
How do I keep my appliance maintenance consistent over time?
Developing a routine inspection schedule is vital. I recommend checking your appliances monthly, focusing on filters, seals, and connections. For example, cleaning refrigerator coils every six months prevents dust buildup, which improves efficiency and prevents overheating. Using tools like the comprehensive expert guides ensures that you follow best practices, even for complex tasks.
Don’t forget to log maintenance activities—this record can be invaluable for warranty claims or when consulting professionals. Invest in a dedicated maintenance checklist or digital app, and stick to it diligently. This proactive approach helps you avoid costly emergency repairs and guarantees appliances perform at their best year-round.
Strategies for Scaling Your Maintenance Approach
Once your routine is established, consider automation solutions. Smart sensors can monitor temperature fluctuations, vibration levels, or humidity, alerting you via your smartphone if something’s amiss. By integrating these sensors into your home setup, you create a network that safeguards your appliances continuously.
For professional repairs or installations, always verify that technicians follow manufacturer guidelines and calibrate devices properly. This not only extends your appliance’s lifespan but also preserves warranty coverage. See this resource for tips on choosing skilled technicians and ensuring installations are done right the first time.
What’s the smartest way to maintain appliance efficiency long term?
Consistent maintenance paired with quality tools is the key. For instance, I recommend setting up a regular cleaning schedule for filters, vents, and coils—remember, neglect accelerates wear and voids warranties. Investing in diagnostics tools like infrared thermometers and multimeters allows you to identify problems early. As technology advances, staying updated with the latest software and sensor integrations will make maintenance more manageable and effective.
Try implementing one advanced tip today: use an infrared thermometer to check your oven’s surface temperature after calibration. If you notice discrepancies, adjust your settings accordingly. This small step can lead to significantly better cooking results and appliance longevity. Staying proactive with these practices ensures your appliances keep working smoothly for years to come, saving you both time and money in the long run.
What I Lost When I Rushed the Fix
Skipping proper calibration taught me that quick solutions often come at the expense of long-term reliability. I realized that taking a moment to verify settings could have saved me from repeated failures and frustration, reinforcing that thoroughness outweighs speed in appliance care.
Secrets Only Experienced Technicians Know
From my experience, understanding the intricacies of appliance calibration and trusting expert guidelines—like those found here—can elevate your DIY skills and help you avoid costly mistakes. These insights bridge the gap between basic troubleshooting and professional-quality maintenance.
Why Defensive Maintenance Protects Your Investment
Consistently monitoring your appliances not only extends their lifespan but also safeguards your warranty coverage. Small checks, like verifying temperature accuracy with tools such as infrared thermometers, are simple yet powerful practices that prevent major breakdowns, making you a proactive owner rather than a reactive one.