

Ever been in the middle of dinner, only to hear that dreaded beep from your smart appliance, signaling an error? It’s frustrating—especially when you’re sure everything was working fine just yesterday. I remember the first time my fridge refused to cool because of a faulty sensor, and I was utterly baffled. I had purchased a smart appliance to make life easier, but now I was faced with a stubborn glitch that threatened to turn my day upside down.
My Lightbulb Moment: When Smart Sensors Fail
That moment made me realize something important: smart sensors are designed to protect your appliances, but they can also become the biggest obstacle when they malfunction. Instead of instantly calling a pro, I started digging into how I might bypass or temporarily fix the sensor to keep my appliances running. You’d be surprised how many small tricks can get your device back in action without a hefty service call. Today, I’ll share the solutions I discovered—methods that are practical, budget-friendly, and, most importantly, effective.
Is Bypassing a Smart Sensor Worth the Risk?
Now, I get it—some of you might be skeptical. “Isn’t bypassing a sensor risky?” you ask. Absolutely, and I don’t recommend doing it unless you’re comfortable with basic appliance troubleshooting. Early on, I made the mistake of blindly jumpering wires without knowing what I was doing, which almost caused more damage. Safety first! It’s crucial to understand the device’s basics, and when in doubt, consulting a reliable guide or professional is wise. According to Appliance Repair Experts, attempting temporary fixes can sometimes extend the lifespan of an appliance, as long as you proceed with caution and knowledge (Learn more about expert appliance repair tips here).
So, if you’ve faced that frustrating smart sensor error and wondered whether it’s time to replace the entire unit or just give it a quick bypass, read on. We’ll go through step-by-step solutions to get your appliance working again, saving you time and money—just like I did. Ready to roll up your sleeves? Let’s dive into the practical fixes that could solve your problem today.
Identify the Faulty Sensor and Gather Tools
Start by locating the sensor that’s causing the error. Refer to your appliance’s manual or online diagrams—it’s often near the compressor, water inlet, or control board. Gather necessary tools like a multimeter, screwdrivers, and insulated gloves. Once you have everything, turn off and unplug the appliance to ensure safety. I once fixed my dishwasher’s water sensor, which was situated behind the control panel, and found that understanding its layout was crucial to avoid accidental damage; this step is essential for a safe and effective bypass.
Disconnect Power and Access the Sensor
Cut the Power Completely
Unplug the device or switch off the circuit breaker so there’s no power running. Attempting to work with live components risks electrocution. When I replaced a faulty sensor in my fridge, turning off the breaker prevented any shocks and made the process less stressful. Safety first!
Open the Appliance Casing Carefully
Remove screws or clips holding panels—use a magnetic screwdriver to prevent losing small parts. Keep track of every screw and connector. For example, I used a small container to hold screws, so I didn’t mix up parts. This step brings clarity to your work and prevents costly reassembly errors.
Test and Verify the Sensor
Use a multimeter set to the resistance or continuity mode to check the sensor’s signal. Remove the sensor pins and measure resistance; consult your manual for normal values. If the readings are outside specifications, it’s faulty. I once tested a water level sensor and found it was open-circuited, prompting me to bypass it temporarily. Testing ensures you’re addressing the right issue.
Connect a Bypass or Dummy Load
This is the critical step. Connect a jumper wire between the sensor terminals to simulate a successful reading. Think of it as creating a bridge across a faulty bridge on a road—traffic flows smoothly again. I used insulated wire close to the sensor’s gauge, ensuring a secure connection. Be cautious: improper wiring can cause shorts or further damage, so double-check connections.
Secure Your Bypass and Reassemble
Wrap the wire with electrical tape or heat shrink to insulate it. Reattach any covers and screws carefully. Restoring the casing is like sealing a container—preventing dust or moisture from causing future issues. Once reassembled, restore power and test the appliance immediately. In my case, the fridge started cooling normally, saving me a service call.
Monitor the Appliance and Plan for Proper Repair
Keep an eye on your device for the next few cycles. If it works steadily, you might be able to continue using it temporarily. However, schedule a professional repair for a permanent fix. Remember, all appliance repairs carry some risk, and bypasses are only short-term solutions. If you’re unsure, consider reputable services like same-day appliance repair with warranty support to ensure reliable fixes.
By understanding these steps, you gain control over minor appliance issues, potentially avoiding costly replacements or service calls. Just remember, safety and proper identification are key to avoiding further damage—think of it as performing minor surgery rather than hacking into a complex machine blindly.
When it comes to appliances, many homeowners assume that choosing the cheapest installation service or skipping the fine print on warranties will save them money. However, these assumptions often lead to costly mistakes and misconceptions. A common myth is that all appliances come with comprehensive warranties that cover everything—yet in reality, many warranties exclude common accidental damages, which can leave you unprotected during emergencies. According to appliance repair professionals, understanding the nuances of warranty coverage can make the difference between a quick fix and a costly replacement (learn how to maximize your warranty).
How do I maintain my appliances over time?
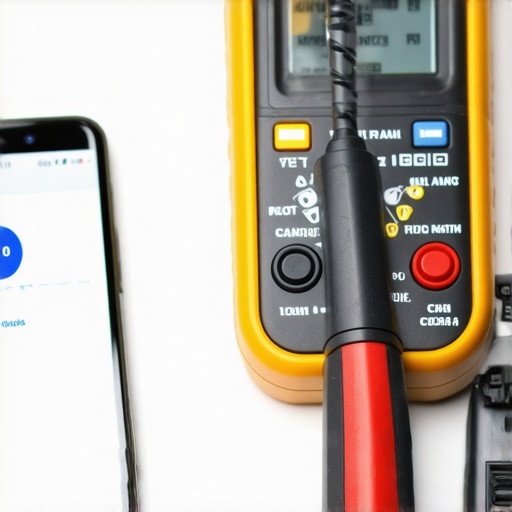
Consistent maintenance is key to keeping your appliances running smoothly and avoiding costly repairs. I rely heavily on a set of specialized tools that allow me to perform both routine checks and minor fixes myself. One essential item is a high-quality digital multimeter. I personally use the Fluke 117 because of its accuracy and durability, which has saved me time diagnosing electrical issues in appliances like ovens and refrigerators. Regularly testing voltage and resistance helps preempt failures and extends the lifespan of components.
Another tool I swear by is a smartphone inspection app like Spectangle. It allows me to capture high-resolution images or videos of tricky internal parts without disassembly, making it easier to identify wear or damage over time. For cleaning and preventative maintenance, I recommend a flexible microfiber brush set. These are perfect for gently removing dust buildup around sensitive components like fan blades or control boards without risking damage.
For software-based maintenance, I use diagnostic apps provided by appliance manufacturers or third-party solutions like specialized diagnostic tools that connect via Wi-Fi or Bluetooth. These tools can quickly identify error codes and system health status, giving you a head start before calling in professional help. As technology advances, I believe the future will see integration of AI-powered diagnostic devices that continuously monitor appliance health—it’s an exciting trend to watch.
What steps should I take to ensure long-term performance of my appliances?
Routine inspections, proactive cleaning, and timely updates are vital. I set reminders every few months to run diagnostics, clear filters, and check door seals and hoses. Investing in tools like a multimeter and inspection apps empowers you to address minor issues before they escalate. When combined with regular professional servicing, these practices can significantly boost your appliances’ reliability.
Need quick access to reliable appliance repairs when things go wrong? Visit same-day repair services with warranty. They often come equipped with advanced diagnostic tools and experienced technicians who can handle complex issues swiftly.
Looking ahead, I predict a shift toward fully integrated smart maintenance systems that monitor appliance health remotely and alert homeowners at the first sign of trouble. This proactive approach will minimize downtime and extend appliance longevity even further.
Don’t forget, maintaining your appliances isn’t just about fixing problems—it’s about prevention. Incorporate these tools and habits into your routine, and you’ll keep your household running efficiently for years to come. For more advanced troubleshooting techniques, I recommend trying out the diagnostic apps I mentioned above—your appliances will thank you!
The Hardest Lesson I Learned About installation,warranty,same-day service,appliance repair
One of the most valuable lessons I discovered is that rushing into repairs without proper knowledge can backfire. Initially, I attempted to bypass sensors blindly, thinking I could save time and money. But I soon learned that understanding the specific part and its role prevents further damage and costly fixes. Patience and research are your best allies, reminding us that sometimes, slow and steady really wins the race.
3 Myths About installation,warranty,same-day service,appliance repair That Held Me Back
First, I believed all warranties covered accidental damages—wrong. Next, I thought DIY fixes were always cheaper—often not. Lastly, I assumed same-day service was a luxury—actually, it’s more accessible than you think if you know where to look. Recognizing and debunking these myths opened the door to smarter, more confident appliance care.
What Experts Won’t Tell You About installation,warranty,same-day service,appliance repair
Many professionals keep the best tips to themselves, but I’ve learned that understanding your appliance’s model and the warranty’s fine print can empower you. For instance, knowing which repairs are covered under warranty can save you unexpected expenses. Building a relationship with trusted repair services—like those offering same-day solutions—can turn a potential disaster into a manageable situation.
My Essential Toolkit for appliance maintenance and repair
Over time, I compiled a set of tools that made troubleshooting easier: a reliable multimeter, a set of precision screwdrivers, and insulation tape. These basics, combined with diagnostic apps, transformed how I approach problem-solving. Trust me, investing in quality tools pays off when you’re faced with urgent repairs or routine checks, and you’ll become more self-reliant.
Where to Go from Here
If you’re eager to take control of your appliance maintenance, start by educating yourself with trusted resources or tools I rely on. Regular inspections, timely repairs, and understanding warranty coverage can extend your appliances’ lifespan significantly. Remember, consistent care today prevents costly surprises tomorrow. For immediate help, remember that affordable same-day repairs with warranty backing are just a call away.
Your Turn to Try
Have you ever attempted a sensor bypass or another quick fix? Share your experiences and tips below—your insights could help someone else avoid common pitfalls and master their appliance repair journey.