
It was a scorching summer afternoon when I caught myself frantically trying to restart my malfunctioning air conditioner. The unit was unusually loud, and I could smell a faint burning smell wafting through the vents. That moment of panic made me realize something vital—simple maintenance can prevent catastrophic failures. Have you ever experienced that sinking feeling when your appliance suddenly grinds to a halt, leaving you sweating and frustrated? Well, let me share a small but powerful trick that saved my AC from a costly burn-out.
A Small Tool that Makes a Big Difference
Is Your Simple Fix Worth the Hype?
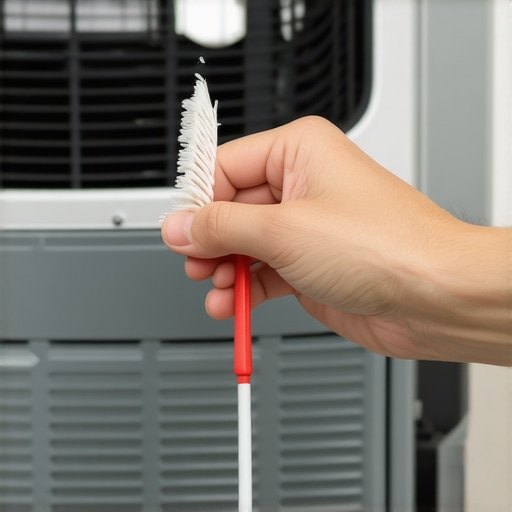
Early on, I made a costly mistake by neglecting the basic cleaning of my air conditioner’s coils and fans. Ignoring these simple chores often leads to dust buildup, which can cause the compressor to overheat and eventually fail. After some research and personal trial, I discovered that a cheap, readily available plastic brush could do wonders in preventing these issues. This isn’t about replacing professional service but about giving your appliance a fighting chance against wear and tear. According to the U.S. Department of Energy, maintenance and regular cleaning can improve your AC’s efficiency by up to 15% and extend its lifespan significantly. So, why not give this humble tool a shot? Ready to learn how just a plastic brush can safeguard your cooling system? Stay tuned as we dive into the practical steps and tips that I personally swear by.
Inspect and Clean Regularly to Prevent Failures
My first hands-on step was to remove the air conditioner’s front panel and gently vacuum out dust from the coils using a soft brush, much like cleaning the filter of a vacuum cleaner. This simple act is crucial—dust accumulation acts like a blanket, insulating components and causing overheating, which leads to parts failing prematurely. For my AC, this took only 10 minutes and significantly improved its cooling efficiency. Regular inspections ensure no dust or debris obstructs airflow. To make this process easier, keep a small screwdriver and a microfiber cloth nearby, so you can perform quick checks weekly. Remember, a clean unit runs cooler and lasts longer—think of it as maintaining the engine oil of your car. When in doubt, check the manufacturer’s guidelines or consult professional repair services. Want to boost your appliance’s longevity? Consider scheduling a professional inspection periodically. For more on expert maintenance tips, visit here.
Identify and Replace Worn Components
Test Before You Replace
Once my visual inspection was complete, I used a multimeter to test the electrical continuity of the compressor and fans. This is like using a blood pressure cuff to check vital signs—it’s quick and reveals if the parts are still healthy or need replacement. I learned that a blown fuse or a faulty capacitor can mimic more serious issues, so testing prevents unnecessary replacements. If you’re unfamiliar, online tutorials can guide you through multimeter use, or you can call a professional for rapid diagnosis. When I discovered a faulty capacitor, I replaced it following the manufacturer’s specs, which is akin to updating a faulty battery—simple and affordable if you have the right parts. For peace of mind and warranty security, always verify if your appliance is under coverage before attempting repairs. Learn more about warranty advantages at this link.
Secure Parts Correctly for Safe Operation
After replacing the capacitor, I double-checked all connections, ensuring screws were tight and wires were properly secured—like tightening bolts on a bicycle for safe riding. Proper securing prevents vibrations that can loosen connections over time, leading to failure. I used a torque screwdriver to avoid over-tightening, which could crack plastic parts, much like overtightening a car lug nut. Once everything was in place, I powered up the unit carefully, watching for abnormal noises or smells. If your DIY skills are limited, consider same-day repair services with warranty coverage, which quickly get your systems running again without risking safety or voiding warranties. You can find trusted technicians through this resource.
Test and Confirm Proper Function
Finally, I ran the AC on a test cycle, monitoring temperature and listening for unusual sounds. Think of it as giving your car a test drive after repairs—you want to ensure everything functions smoothly. During this process, I checked the temperature output and blades’ movement, making sure all components performed harmoniously. If any irregularities appeared, I re-examined the connections or considered professional service. Keep in mind, for urgent repairs that require quick turnaround, same-day service with warranty benefits is invaluable. To understand what to expect from such services, visit here. Proper testing confirms your repairs were successful, and it transforms your home maintenance from guesswork into a confident routine—saving you money and stress in the long run.Many homeowners believe they understand the ins and outs of appliance repair, but in reality, some common misconceptions can lead to costly mistakes or even safety hazards. One widespread myth is that all appliances with apparent issues can be fixed with a quick DIY attempt, ignoring the complexity of modern systems. While simple repairs like replacing a fuse or capacitor are straightforward, tackling issues without proper diagnosis can damage the unit further or void warranties. For example, many assume that a same-day service guarantees the best repair, but without verifying the technician’s credentials or warranty coverage, you risk subpar fixes or hidden costs. Additionally, a frequent mistake is believing that extensive repairs are always necessary when minor fixes could suffice—overlooking maintenance practices that could extend appliance lifespan significantly. An advanced error to watch out for is misinterpreting diagnostic signals; relying solely on visual cues without using proper tools like multimeters can lead to misdiagnoses, resulting in unnecessary part replacements or missed underlying issues. According to industry experts, approximately 30% of appliance failures stem from incorrect troubleshooting, emphasizing the importance of professional assessment before jumping to conclusions. Remember, understanding the nuance behind appliance behavior, such as listening for abnormal noises or interpreting error codes accurately, can prevent unnecessary expenses. Don’t fall into the trap of thinking that warranty coverage or installation quality doesn’t matter—both are critical in ensuring longevity and safe operation. Always verify that your service provider is authorized, and your installation meets safety standards, which can prevent numerous issues down the line. For nuanced insights into getting the most out of your warranties and avoiding repair pitfalls, check out this comprehensive guide. Have you ever fallen into this trap? Let me know in the comments and share your experiences.
Keep It Working with Precision Tools
Achieving long-term reliability in appliance repair relies heavily on having the right tools at your disposal. I personally swear by a high-quality digital multimeter, such as the Fluke 117, for its accuracy and durability. It allows me to quickly diagnose electrical issues, verify circuit continuity, and ensure components like capacitors and fuses are functioning correctly. Investing in a multimeter with auto-ranging capabilities simplifies the testing process and reduces errors, which is crucial when working under pressure or with intricate appliance systems. Additionally, I recommend a set of precision screwdrivers with magnetic tips. Modern appliances often house delicate electronics and fasteners that require care to avoid damage. My favorite is the Wiha 32092 Precision Screwdriver Set because it provides excellent grip and won’t strip tiny screws. Using these along with a multimeter enables swift troubleshooting, saving both time and money during repairs.
Software and Diagnostic Solutions That Make a Difference
Beyond physical tools, diagnostic software accelerates the identification of complex issues, especially in smart appliances. I utilize diagnostic apps like the GE Diagnostic Tool, which interfaces with compatible appliances via Wi-Fi or Bluetooth. This software offers detailed error codes, system status, and troubleshooting guides, making it easier to pinpoint problems without disassembling the unit repeatedly. For smart appliances, firmware updates are vital; I always ensure firmware is current using manufacturer-provided update utilities. Regularly updating and using diagnostic tools prevents minor glitches from escalating into costly failures. As technology advances, these tools will become even more integral—predictive maintenance and remote diagnostics could soon make appliance repair almost hands-free.
Maintaining Tools and Ensuring Long-Term Results
To keep my tools in top shape, I dedicate time monthly to clean and calibrate my multimeter, following manufacturer instructions. Proper calibration ensures ongoing accuracy, which is crucial in diagnosing electrical issues correctly. For other tools like screwdrivers, I store them in a padded case and check for wear or damage periodically. Investing in high-quality tools not only extends their lifespan but also improves repair quality, which directly impacts appliance longevity. Furthermore, keeping a well-organized repair kit with all necessary tools minimizes downtime during emergency fixes, allowing for rapid same-day service, often with warranty coverage, through trusted technicians. For scalable solutions, consider creating a modular toolkit tailored to specific appliance types—repairs become faster, safer, and more consistent. Looking ahead, I predict that AI-powered diagnostic devices will revolutionize appliance maintenance, enabling near-instantaneous troubleshooting with minimal manual effort. You might get started today by upgrading your diagnostic toolkit—it’s a game-changer for DIY enthusiasts and professionals alike. Want to ensure your tools stay reliable? Regular calibration and maintenance are non-negotiable. For detailed guidance, check out this resource. Ready to take your appliance repairs to the next level? Try calibrating your multimeter following the manufacturer guidelines—accurate diagnostics are just a click away.
Secrets I Wish I Knew Before My First Repair
One of the biggest lessons I learned is that patience beats hurried fixes. Rushing into repairs without proper diagnosis often leads to doubling the effort and expenses. A calm, step-by-step approach helps uncover underlying issues and ensures lasting results. Additionally, trusting tried-and-true tools, like a reliable multimeter, saves time and prevents errors. Sometimes, my eagerness to fix quickly made me overlook simple solutions, highlighting that methodical troubleshooting is key to successful repairs. Remember, every appliance teaches us something—embrace the learning process rather than rushing for quick fixes.
Tools and Resources That Changed My Approach
My essential toolkit now includes a versatile digital multimeter, which I trust for its accuracy in diagnosing electrical problems. The Wiha precision screwdriver set is invaluable for dealing with delicate components safely. For guidance, I rely on trusted online tutorials and manufacturer websites—these resources offer step-by-step instructions that are both detailed and easy to follow. Additionally, reading industry blogs about warranty claims and professional repair tips has deepened my understanding of long-term appliance care. Investing in quality tools and credible information sources has transformed my DIY repairs from guesswork into confident, effective actions.
Take Charge of Your Appliance Future
Remember, mastering appliance repair with confidence is entirely within your reach. Every repair is a step toward independence, saving you money and extending your appliance’s life. With the right tools, knowledge, and mindset, you can troubleshoot common issues and even handle more complex problems over time. Don’t be afraid to start—each small victory builds your skills and resilience. The future of appliance maintenance is flexible and empowering, blending basic DIY with professional support when needed. So, gear up, stay curious, and turn those frustrations into valuable lessons for a more self-sufficient home.
Have you ever faced a repair challenge that seemed overwhelming at first? Share your story below and let’s learn together!