
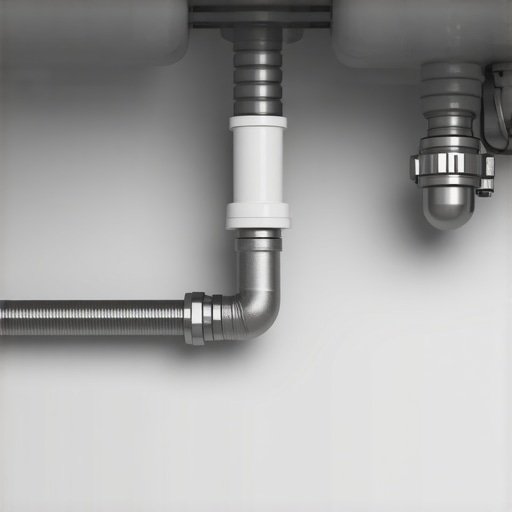
I sat there with my morning coffee, staring at my brand-new, ultra-quiet dishwasher. I had spent a small fortune on that specific model because the salesperson promised it was virtually silent. But as the cycle started, a rhythmic, wet gurgling sound erupted from my sink—it sounded like a swamp monster was living in my pipes. It was maddening. I realized in that moment that while I followed the manual for the mounting brackets, I had completely ignored the physics of gravity. I made the classic rookie mistake of thinking that as long as the water went down, the job was done. Today, I am going to show you how to master the drainage slope rule so you can finally get the peace and quiet you paid for.
Stop the Gurgle Before it Ruins Your Kitchen Peace
Getting a dishwasher to run quietly isn’t just about the insulation around the tub; it is about how the water leaves the machine. I used to think ‘the steeper the better’ for drainage, but that is a myth that leads to air pockets and noisy splashing. If you have ever dealt with a kitchen sink that gurgles when the dishwasher runs, you know exactly what I am talking about. The real secret lies in the 1/4-inch-per-foot rule. According to the International Plumbing Code (IPC), horizontal drainage pipes must maintain a minimum slope of 1/4 inch per foot to ensure that both water and food particles move together without leaving sludge behind. When I first installed mine, I had the hose sagging in the middle like a wet noodle. That sag created a standing pool of stinky water that forced the pump to work twice as hard, creating that vibrating hum that kept me up at night.
Is a truly silent kitchen actually worth the extra DIY effort?
You might be wondering if obsessing over a half-inch of slope is overkill. Trust me, it isn’t. Beyond the noise, improper drainage is the leading cause of that ‘old gym bag’ smell that wafts out when you open the door. By following the drain line slope rule for an odor-free dishwasher, you ensure that every drop of dirty water exits the building. Have you ever noticed a pool of water at the bottom of the tub after a cycle? That was my life for a month until I realized my slope was actually running backward toward the machine. If you are currently staring at a puddle in your appliance, you should check out why your dishwasher is still full of water to see if your slope is the culprit. We want a smooth, downhill ride for that waste water. Once you nail the angle and pair it with the leveling secret for a silent dishwasher, the difference is night and day. It transforms a clunky appliance into a ghost in the kitchen. Have you ever had to pull your dishwasher out three times just to fix a noise you couldn’t find? Tell me your horror stories in the comments below, because I’ve definitely been there.
Measure Your Run Before Mounting Anything
To nail the 1/4-inch-per-foot rule, you need to start with a tape measure, not a screwdriver. I once saw a DIY job where the owner guessed the distance to the sink; he ended up with a slope so shallow that the water just vibrated in the pipe instead of flowing. Measure the horizontal distance from where the hose exits the dishwasher to where it enters the drain or disposal. If that distance is four feet, you need a total drop of exactly one inch from the highest point of the hose to the connection point. Think of it like a playground slide: if the slide is too flat, you get stuck halfway down; if it is too steep, you crash at the bottom. A steady, predictable decline ensures that the ‘gray water’ carries food debris all the way out. If you are worried about getting these measurements wrong, it is often worth looking into how to ensure reliable appliance installation in 2025 to see how the pros map out these lines before the first screw is turned.
Eliminate the Sag with Rigid Support
The biggest enemy of a quiet dishwasher is the ‘u-bend’ sag. When I was fixing my own swamp-monster sound, I realized the flexible plastic hose was dipping between the cabinet wall and the sink. This creates a secondary trap where water sits and rots. To fix this, use plastic pipe straps or even heavy-duty zip ties to secure the hose to the back of your cabinetry. You want a straight, taut line that maintains that 1/4-inch drop. In one of my messiest projects, I used cheap duct tape that peeled off after three steam cycles, causing the hose to fall and flood the floorboards. Now, I always recommend using permanent mounting brackets. If you find your hose is already damaged from years of sagging and vibrating, you might need same-day appliance repair quick solutions with warranty support to replace the line before it develops a hairline fracture.
The High Loop That Saves Your Nose
Even with a perfect slope, you can still get odors if you skip the high loop. This is the practice of routing the drain hose as high as possible under the countertop before it heads down to the sink drain. It acts as a physical barrier that prevents dirty sink water from backflowing into your clean dishwasher. I remember a friend who complained about a ‘dead fish’ smell for months; it turned out every time she ran her sink, a little bit of waste water was trickling back into her dishwasher. By securing the hose to the very top of the cabinet frame, you create a natural gravity break. This is a critical part of the drain line slope rule for an odor-free dishwasher. Without this loop, your slope—no matter how perfect—cannot fight the pressure of a backed-up sink.
Don’t Forget the Disposal Knockout and Angle
The final connection is where most people get lazy. If you are connecting to a garbage disposal, ensure the hose approaches from above. If the hose enters the disposal at an upward angle, you are essentially asking water to run uphill at the final hurdle, which causes that loud splashing sound. Also, double-check that the knockout plug inside the disposal is completely removed. I’ve seen homeowners burn out a pump because they had a perfect slope leading to a blocked hole. If you’re dealing with a brand-new setup, remember that expert guide to appliance repair and installation today can help clarify these final plumbing steps. Keeping your installation within the manufacturer’s specs is also the only way to protect yourself later. Understanding the difference between a factory warranty and a service contract is vital here, as a botched DIY slope can sometimes void your coverage if it leads to a motor failure.While we have spent a lot of time on the physical slope, there is a bureaucratic slope that can just as easily ruin your kitchen experience. Most homeowners believe that as long as a licensed professional does the work, the manufacturer is obligated to cover any future failures. I have seen this backfire more times than I can count. The truth is, if your installer does not explicitly log the installation parameters—like the specific drain line angle or the static water pressure—a warranty claim can be denied on the grounds of improper environment. This is exactly why the document every technician needs to see for a valid warranty visit is something you should have ready before the van even pulls into your driveway.
Don’t Let a Fast Install Void Your Protection
I have always been a fan of efficiency, but in the world of high-end appliances, speed is often the enemy of precision. Many people rush to find fast trustworthy appliance installation near you without realizing that a rushed job often skips the calibration phase. For instance, the Association of Home Appliance Manufacturers (AHAM) notes that modern energy-efficient units have incredibly tight tolerances. If your slope is even an eighth of an inch off, it might not leak today, but it will strain the pump over eighteen months. If you do not have proof that it was installed to exact manufacturer specs, you will be stuck learning how to avoid paying the service fee for a denied warranty claim the hard way.
Can a Same-Day Repair Actually Protect Your Long-Term Warranty?
This is the million-dollar question for anyone facing a broken machine. Everyone wants what to expect from same-day appliance repair experts to be a magic fix, but sometimes the fast fix involves using universal components rather than OEM (Original Equipment Manufacturer) parts. I once worked with a homeowner who allowed a tech to use a universal drain pump because it was the only one on his truck that afternoon. It worked for a week, then fried the main control board. Because it was not a certified OEM part, the factory warranty was voided instantly. To protect yourself, always prioritize top tips for same-day service warranty coverage and demand to see the part numbers. Clarifying the difference between a factory warranty and a service contract is your best defense here. A service contract might allow for third-party parts, but your factory warranty usually will not. Have you ever had a warranty claim denied for a reason that felt like a total loophole? Let me know in the comments, because navigating warranty-backed appliance services you can rely on should not feel like a legal battle.Once you have the warranty paperwork tucked away, the real work of homeownership begins: preventing the need for that warranty in the first place. I have found that the difference between a machine that lasts five years and one that lasts fifteen often comes down to the gear you use during the initial setup. For me, a standard bubble level is not enough when I am dealing with that 1/4-inch-per-foot requirement. I use a digital torpedo level because it gives me a precise percentage of slope. If I am at 2.1%, I know the water will flow perfectly; if I am at 1.5%, I am inviting a backup.
How can I keep my dishwasher drainage perfect for years?
Maintenance is not just about cleaning the filter; it is about checking the integrity of your slope every few months. Vibrations from heavy cycles can occasionally loosen the plastic straps or zip ties holding your drain hose in place. I make it a habit to peek under the sink once a month. If you see even a slight dip or a new ‘u-shape’ forming, you are risking the drain line clog that always happens after a holiday dinner. I also recommend a quarterly flush with a specialized citric acid cleaner. This prevents the ‘biofilm’—that slippery, grey gunk—from building up inside the hose and narrowing the passage, which effectively changes your drainage physics over time. If you start noticing a slow drain, do not wait for a flood. Look into affordable same-day appliance fixes with warranty benefits to get a professional eye on the system before a component actually fails. I predict that within the next five years, we will see ‘smart’ drain hoses equipped with internal flow-rate sensors. These will alert your phone the second the drainage velocity drops below 0.5 gallons per minute, effectively diagnosing a clog before it causes an overflow. Until then, we have to rely on manual precision. The Plumbing-Heating-Cooling Contractors Association (PHCC) explicitly warns that even minor deviations in horizontal waste piping can lead to ‘siphonage’—where the water is pulled out of the trap, allowing sewer gases into your home. This is why I obsess over the ‘High Loop’ I mentioned earlier. If you find yourself in a bind where the DIY path has hit a wall, you need to be careful about who you call. Rushing into a repair can sometimes do more harm than good if the technician is not familiar with your specific brand’s quirks. Always check how to verify your new appliance is covered under the original warranty before authorizing a teardown. I have seen people lose hundreds in coverage because they let an uncertified tech open the chassis. My best advice? Grab a digital level today and re-verify your dishwasher’s slope. It takes ten minutes and could save you a decade of headaches. If the angle is off, fix it now—your ears and your wallet will thank you.I sat there with my morning coffee, staring at my brand-new, ultra-quiet dishwasher. I had spent a small fortune on that specific model because the salesperson promised it was virtually silent. But as the cycle started, a rhythmic, wet gurgling sound erupted from my sink—it sounded like a swamp monster was living in my pipes. It was maddening. I realized in that moment that while I followed the manual for the mounting brackets, I had completely ignored the physics of gravity. I made the classic rookie mistake of thinking that as long as the water went down, the job was done. Today, I am going to show you how to master the drainage slope rule so you can finally get the peace and quiet you paid for.
Stop the Gurgle Before it Ruins Your Kitchen Peace
Getting a dishwasher to run quietly isn’t just about the insulation around the tub; it is about how the water leaves the machine. I used to think ‘the steeper the better’ for drainage, but that is a myth that leads to air pockets and noisy splashing. If you have ever dealt with a kitchen sink that gurgles when the dishwasher runs, you know exactly what I am talking about. The real secret lies in the 1/4-inch-per-foot rule. According to the International Plumbing Code (IPC), horizontal drainage pipes must maintain a minimum slope of 1/4 inch per foot to ensure that both water and food particles move together without leaving sludge behind. When I first installed mine, I had the hose sagging in the middle like a wet noodle. That sag created a standing pool of stinky water that forced the pump to work twice as hard, creating that vibrating hum that kept me up at night.
Is a truly silent kitchen actually worth the extra DIY effort?
You might be wondering if obsessing over a half-inch of slope is overkill. Trust me, it isn’t. Beyond the noise, improper drainage is the leading cause of that ‘old gym bag’ smell that wafts out when you open the door. By following the drain line slope rule for an odor-free dishwasher, you ensure that every drop of dirty water exits the building. Have you ever noticed a pool of water at the bottom of the tub after a cycle? That was my life for a month until I realized my slope was actually running backward toward the machine. If you are currently staring at a puddle in your appliance, you should check out why your dishwasher is still full of water to see if your slope is the culprit. We want a smooth, downhill ride for that waste water. Once you nail the angle and pair it with the leveling secret for a silent dishwasher, the difference is night and day. It transforms a clunky appliance into a ghost in the kitchen. Have you ever had to pull your dishwasher out three times just to fix a noise you couldn’t find? Tell me your horror stories in the comments below, because I’ve definitely been there.
Measure Your Run Before Mounting Anything
To nail the 1/4-inch-per-foot rule, you need to start with a tape measure, not a screwdriver. I once saw a DIY job where the owner guessed the distance to the sink; he ended up with a slope so shallow that the water just vibrated in the pipe instead of flowing. Measure the horizontal distance from where the hose exits the dishwasher to where it enters the drain or disposal. If that distance is four feet, you need a total drop of exactly one inch from the highest point of the hose to the connection point. Think of it like a playground slide: if the slide is too flat, you get stuck halfway down; if it is too steep, you crash at the bottom. A steady, predictable decline ensures that the ‘gray water’ carries food debris all the way out. If you are worried about getting these measurements wrong, it is often worth looking into how to ensure reliable appliance installation in 2025 to see how the pros map out these lines before the first screw is turned.
Eliminate the Sag with Rigid Support
The biggest enemy of a quiet dishwasher is the ‘u-bend’ sag. When I was fixing my own swamp-monster sound, I realized the flexible plastic hose was dipping between the cabinet wall and the sink. This creates a secondary trap where water sits and rots. To fix this, use plastic pipe straps or even heavy-duty zip ties to secure the hose to the back of your cabinetry. You want a straight, taut line that maintains that 1/4-inch drop. In one of my messiest projects, I used cheap duct tape that peeled off after three steam cycles, causing the hose to fall and flood the floorboards. Now, I always recommend using permanent mounting brackets. If you find your hose is already damaged from years of sagging and vibrating, you might need same-day appliance repair quick solutions with warranty support to replace the line before it develops a hairline fracture.
The High Loop That Saves Your Nose
Even with a perfect slope, you can still get odors if you skip the high loop. This is the practice of routing the drain hose as high as possible under the countertop before it heads down to the sink drain. It acts as a physical barrier that prevents dirty sink water from backflowing into your clean dishwasher. I remember a friend who complained about a ‘dead fish’ smell for months; it turned out every time she ran her sink, a little bit of waste water was trickling back into her dishwasher. By securing the hose to the very top of the cabinet frame, you create a natural gravity break. This is a critical part of the drain line slope rule for an odor-free dishwasher. Without this loop, your slope—no matter how perfect—cannot fight the pressure of a backed-up sink.
Don’t Forget the Disposal Knockout and Angle
The final connection is where most people get lazy. If you are connecting to a garbage disposal, ensure the hose approaches from above. If the hose enters the disposal at an upward angle, you are essentially asking water to run uphill at the final hurdle, which causes that loud splashing sound. Also, double-check that the knockout plug inside the disposal is completely removed. I’ve seen homeowners burn out a pump because they had a perfect slope leading to a blocked hole. If you’re dealing with a brand-new setup, remember that expert guide to appliance repair and installation today can help clarify these final plumbing steps. Keeping your installation within the manufacturer’s specs is also the only way to protect yourself later. Understanding the difference between a factory warranty and a service contract is vital here, as a botched DIY slope can sometimes void your coverage if it leads to a motor failure.While we have spent a lot of time on the physical slope, there is a bureaucratic slope that can just as easily ruin your kitchen experience. Most homeowners believe that as long as a licensed professional does the work, the manufacturer is obligated to cover any future failures. I have seen this backfire more times than I can count. The truth is, if your installer does not explicitly log the installation parameters—like the specific drain line angle or the static water pressure—a warranty claim can be denied on the grounds of improper environment. This is exactly why the document every technician needs to see for a valid warranty visit is something you should have ready before the van even pulls into your driveway.
Don’t Let a Fast Install Void Your Protection
I have always been a fan of efficiency, but in the world of high-end appliances, speed is often the enemy of precision. Many people rush to find fast trustworthy appliance installation near you without realizing that a rushed job often skips the calibration phase. For instance, the Association of Home Appliance Manufacturers (AHAM) notes that modern energy-efficient units have incredibly tight tolerances. If your slope is even an eighth of an inch off, it might not leak today, but it will strain the pump over eighteen months. If you do not have proof that it was installed to exact manufacturer specs, you will be stuck learning how to avoid paying the service fee for a denied warranty claim the hard way.
Can a Same-Day Repair Actually Protect Your Long-Term Warranty?
This is the million-dollar question for anyone facing a broken machine. Everyone wants what to expect from same-day appliance repair experts to be a magic fix, but sometimes the fast fix involves using universal components rather than OEM (Original Equipment Manufacturer) parts. I once worked with a homeowner who allowed a tech to use a universal drain pump because it was the only one on his truck that afternoon. It worked for a week, then fried the main control board. Because it was not a certified OEM part, the factory warranty was voided instantly. To protect yourself, always prioritize top tips for same-day service warranty coverage and demand to see the part numbers. Clarifying the difference between a factory warranty and a service contract is your best defense here. A service contract might allow for third-party parts, but your factory warranty usually will not. Have you ever had a warranty claim denied for a reason that felt like a total loophole? Let me know in the comments, because navigating warranty-backed appliance services you can rely on should not feel like a legal battle.Once you have the warranty paperwork tucked away, the real work of homeownership begins: preventing the need for that warranty in the first place. I have found that the difference between a machine that lasts five years and one that lasts fifteen often comes down to the gear you use during the initial setup. For me, a standard bubble level is not enough when I am dealing with that 1/4-inch-per-foot requirement. I use a digital torpedo level because it gives me a precise percentage of slope. If I am at 2.1%, I know the water will flow perfectly; if I am at 1.5%, I am inviting a backup.
How can I keep my dishwasher drainage perfect for years?
Maintenance is not just about cleaning the filter; it is about checking the integrity of your slope every few months. Vibrations from heavy cycles can occasionally loosen the plastic straps or zip ties holding your drain hose in place. I make it a habit to peek under the sink once a month. If you see even a slight dip or a new ‘u-shape’ forming, you are risking the drain line clog that always happens after a holiday dinner. I also recommend a quarterly flush with a specialized citric acid cleaner. This prevents the ‘biofilm’—that slippery, grey gunk—from building up inside the hose and narrowing the passage, which effectively changes your drainage physics over time. If you start noticing a slow drain, do not wait for a flood. Look into affordable same-day appliance fixes with warranty benefits to get a professional eye on the system before a component actually fails. I predict that within the next five years, we will see ‘smart’ drain hoses equipped with internal flow-rate sensors. These will alert your phone the second the drainage velocity drops below 0.5 gallons per minute, effectively diagnosing a clog before it causes an overflow. Until then, we have to rely on manual precision. The Plumbing-Heating-Cooling Contractors Association (PHCC) explicitly warns that even minor deviations in horizontal waste piping can lead to ‘siphonage’—where the water is pulled out of the trap, allowing sewer gases into your home. This is why I obsess over the ‘High Loop’ I mentioned earlier. If you find yourself in a bind where the DIY path has hit a wall, you need to be careful about who you call. Rushing into a repair can sometimes do more harm than good if the technician is not familiar with your specific brand’s quirks. Always check how to verify your new appliance is covered under the original warranty before authorizing a teardown. I have seen people lose hundreds in coverage because they let an uncertified tech open the chassis. My best advice? Grab a digital level today and re-verify your dishwasher’s slope. It takes ten minutes and could save you a decade of headaches. If the angle is off, fix it now—your ears and your wallet will thank you.
The Hardest Lessons I Learned Managing My Own Plumbing
After years of troubleshooting kitchen noise, the hardest lesson I learned was that ‘good enough’ usually leads to a service call in eighteen months. I used to think a visible decline was sufficient, but modern high-efficiency pumps are incredibly sensitive to back-pressure. My lightbulb moment came when I realized that a slight sag in the hose doesn’t just trap water; it creates a siphon effect that can pull dirty water back into the machine. I also discovered that documentation is your best friend. If you don’t have proof of your installation specs, including the document every technician needs to see for a valid warranty visit, you’re leaving your wallet exposed to technicalities.
The Gear I Use to Keep Things Flowing
If you’re ready to get serious about a silent kitchen, I recommend a few tools that go beyond the standard toolbox. First, swap your bubble level for a digital torpedo level to ensure that 1/4-inch drop is exact. Second, use heavy-duty nylon mounting clips instead of temporary ties to prevent long-term sagging. Finally, I trust a quarterly flush with citric acid crystals to prevent the bio-film buildup that can effectively change your pipe’s diameter. If you ever hit a wall during this process, maximize your appliance warranty during emergency repairs by calling a certified tech who understands these specific plumbing tolerances.
Stop Living with a Gurgling Kitchen
You don’t have to accept a loud, smelly kitchen as a standard household feature. By mastering the the drain line slope rule for an odor-free dishwasher, you’re taking a proactive step toward a more peaceful home and a longer-lasting appliance. It’s a small adjustment that offers a massive return on investment. If you’ve already faced a claim denial because of installation issues, learning how to avoid paying the service fee for a denied warranty claim can help you navigate the system better next time. Now it’s your turn to inspect your sink cabinet. Have you ever found a hidden ‘u-bend’ sag that was causing your dishwasher to smell? Let me know in the comments!