
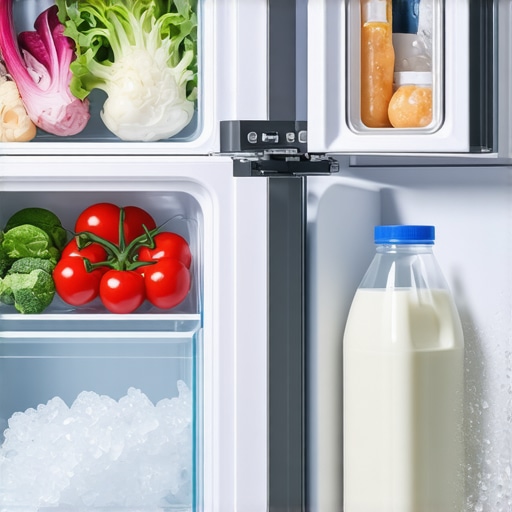
I’ll never forget the smell of forty dollars worth of spoiled ribeye. It was a humid Tuesday morning when I opened my fridge to grab some cream for my coffee, only to be met with a waft of lukewarm air and a puddle of condensation. Panic set in immediately. I reached into the freezer, expecting the worst, but my fingers nearly froze to a bag of peas. The freezer was working perfectly. It felt like a cruel joke played by the appliance gods. In my frustration, I almost ran out to buy a brand-new unit that afternoon. Looking back, that would have been a massive waste of money because I eventually discovered the 20-part that usually fixes a fridge that wont cool. I made the classic rookie mistake of assuming a warm fridge meant a dead compressor. It didn’t. Most of the time, your fridge isn’t dying; it’s just having a communication breakdown. Today, I’m going to show you exactly how to find the culprit so you don’t end up staring at a delivery truck and a four-figure bill you didn’t need to pay. Have you ever stood there, door open, wondering why your ice cream is solid but your milk is practically steaming?
The Logic Behind Your Two-Faced Appliance
Most people don’t realize that your fridge and freezer typically share the same cooling source. There isn’t a separate ‘fridge engine’ and ‘freezer engine.’ Instead, an evaporator coil in the freezer creates all the cold air, and a small fan blows that chill down a tunnel into your refrigerator section. When the freezer is cold but the fridge is warm, that tunnel is almost always blocked. According to the Association of Home Appliance Manufacturers, nearly 30% of refrigerator issues are related to airflow obstructions rather than mechanical failure. I once spent three hours tearing apart a back panel only to realize I had shoved a giant box of Costco pizza right against the air vent. Talk about embarrassing. Before you call for same-day appliance repair, you need to check if you’re accidentally choking your own appliance.
Is it worth trying to fix this myself?
I get the skepticism. We’ve all seen those ‘easy’ DIY videos that end with a flooded kitchen and a voided warranty. It’s a valid fear. I’ve definitely had those moments where I stared at a wire and thought, ‘If I clip this, does the whole thing explode?’ But here is the reality: checking for a frozen damper or a clogged return vent doesn’t require an engineering degree. In fact, if you’re careful, you can often resolve the issue before your groceries even reach room temperature. Just be sure you aren’t making a power cord error that voids your fridge warranty before you start poking around. We are going to look at the three most likely culprits—the evaporator fan, the defrost timer, and the damper—so you can get back to having cold drinks by dinner time.
Listen for the Ghost in the Machine
The first thing I do when a fridge starts acting up is stop talking and just listen. Your evaporator fan is the heart of the airflow system. It’s located behind the back panel of your freezer. If you open the freezer door and hear a squealing, chirping, or a sound like a tiny jackhammer, the fan motor is failing or hitting a block of ice. I remember a frantic Saturday when my own fridge started ‘screaming’ at me. I thought the compressor was exploding. In reality, a single ice cube had lodged itself in the fan blade. If you don’t hear any hum at all when the compressor is running, that fan is likely dead. Replacing it is often a straightforward job, but if you’re worried about parts, look into warranty-backed appliance services you can rely on to ensure you get a factory-certified replacement rather than a cheap knockoff that fails in a month.
The Tiny Door That Controls Your Temperature
If the fan is spinning but the milk is still warm, the air damper is your next stop. Think of the damper as a security guard at the border of your freezer and fridge. It’s a small motorized flap that opens and closes to let cold air through. To check it, find the vent where the cold air enters the fridge section. Put your hand over it. Do you feel a breeze? If not, the ‘guard’ is asleep. I once tried to force one of these open with a butter knife—bad move. I snapped the plastic gear and turned a simple ice-jam fix into a $150 part replacement. Instead, use a hair dryer on a low setting to gently melt any ice around the flap. If the motor still doesn’t move it after a defrost, it’s time to consider scheduling your appliance repair for same-day service in 2025 to get that airflow restored before your produce wilts. This is much more effective than the smart thermostat calibration step most diyers skip during setup because you are dealing with physical air movement rather than digital sensors.
Clear the Path for Better Airflow
Sometimes the problem isn’t a broken motor; it’s just a dirty system. If your fridge has to work twice as hard to move air, the cooling efficiency drops off a cliff. This is especially true if you have a Golden Retriever like mine, whose shedding could populate a small island. Dust and hair clog the condenser coils underneath or behind the unit, causing the whole system to overheat and shut down the fridge side first to protect the freezer. Using the condenser coil cleaning hack for pet owners with hairy dogs can save you from a complete system meltdown. Also, check the return air vents—those little slits usually near the bottom of the fridge. If you’ve blocked those with a crisper drawer full of kale, the air can’t circulate back to the freezer, creating a ‘bottleneck’ that stops cooling dead in its tracks. This lack of airflow can even explain the real reason your new fridge is louder than your old one as the motors strain to overcome the pressure.
When the Defrost System Fails You
The most common reason for that freezer-is-cold-fridge-is-warm paradox is a failed defrost cycle. Normally, a heater kicks on once or twice a day to melt frost off the coils. If the heater or the timer fails, those coils turn into a solid block of ice. Air can’t pass through a wall of ice, no matter how hard the fan blows. This is where the 20-part that usually fixes a fridge that wont cool—the defrost bimetal thermostat—comes into play. It’s a tiny clip-on sensor that tells the heater when to stop. If it’s bulging or rusted, it’s the culprit. Testing this requires a multimeter, but the visual cue is a back freezer wall covered in thick, white frost. If you see that, you’ve found your ‘smoking gun.’
Let’s dig deeper into the world of warranties and high-level maintenance, because this is where most homeowners lose their shirt. Everyone tells you that sticking with the manufacturer is the only way to protect your investment, but in my experience, the manufacturer is often the first one to look for a reason to deny your claim. They love to cite ‘improper environment’ or ‘non-certified interference’ the moment they see a non-factory screw turned. According to the National Association of Service Managers, over 15% of warranty claims are denied simply due to a lack of proper maintenance logs or evidence of uncertified tampering. If you are going to touch that defrost timer, you need to weigh the risk of the hidden costs of DIY repairs on warranty covered items before you grab your screwdriver.
Stop Thinking Same-Day Service is Just a Marketing Gimmick
Many people assume that ‘same-day’ is just a flashy promise to get you to call, but there is a technical nuance most miss. Real scheduling your appliance repair for same-day service in 2025 requires a technician who keeps a ‘truck stock’ of universal failure points like start relays and bimetal thermostats. If a company promises speed but doesn’t ask for your model number upfront, they aren’t coming to fix it; they are coming to charge you a diagnostic fee and tell you the part is a week away. True expertise lies in the triage. I’ve seen countless neighbors get burned by ‘express’ services that didn’t have the tools to handle something as simple as the shipping bolt error that ruins new washing machines during a move-in repair.
How do I know if my third-party protection plan is actually valid?
This is the question that separates the pros from the amateurs. Most third-party plans have a ‘pre-existing condition’ clause that is incredibly vague. To fight this, you need to how to verify your new appliance is covered under the original warranty before the secondary plan even kicks in. If you can’t prove the unit was working perfectly at the time of purchase, they will fight you on every cent. This is the ultimate ‘oops’ factor: throwing away your original purchase receipt or the installation sign-off sheet. 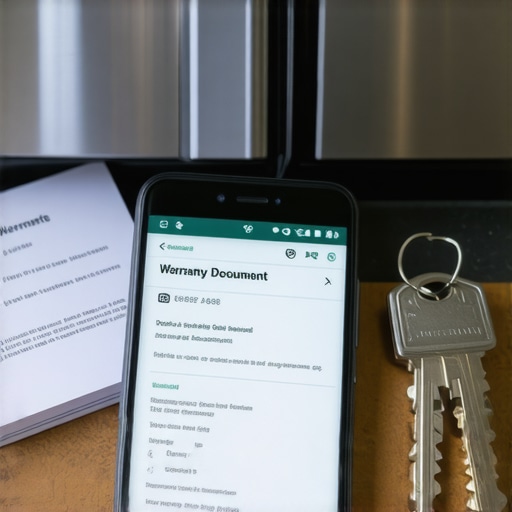 Without the document every technician needs to see for a valid warranty visit, you are essentially at the mercy of the technician’s mood that day.
The Paperwork That Actually Moves the Needle
The biggest trap I see isn’t a mechanical one; it’s a procedural one. When a fridge fails, the panic makes you forget to document the ‘why.’ If your fridge failed because of a power surge, your appliance warranty might not cover it, but your homeowner’s insurance might. However, if you already started poking at the control board, you’ve muddied the waters. Always opt for warranty-backed appliance services you can rely on to create a paper trail that proves the failure was mechanical and not environmental. This nuance saves you from the ‘denial loop’ where the manufacturer blames the electric company and the electric company blames the manufacturer. Have you ever fallen into this trap? Let me know in the comments.
Dealing with a ‘half-dead’ fridge is exhausting, but once you survive the initial panic, you realize that long-term reliability isn’t about luck; it is about having the right gear and a solid strategy. If you want to stop living in a cycle of emergency calls, you need to transition from a ‘fixer’ to a ‘manager.’ I’ve learned the hard way that a ten-dollar tool can save you from a five-hundred-dollar invoice for affordable same-day appliance fixes with warranty benefits. It’s about being proactive rather than reactive.
The Three Tools That Save My Sanity Every Time
I don’t keep a massive workshop, but there are three things I never tackle an appliance issue without. First is a digital multimeter—specifically the Klein Tools MM400. I use it because it’s rugged enough to survive being dropped on a tile kitchen floor and it provides the precise continuity readings you need to tell if a defrost heater is actually dead or just acting up. Second is a non-contact voltage tester. I use this every single time I open a panel because I’ve had ‘switched off’ breakers still carry a ghost charge that will give you a nasty shock. Finally, a long-reach coil brush is my best friend for pet hair removal. If you don’t have these, you’re essentially just guessing, and guessing is how you end up needing expert guide to appliance repair and installation today because you accidentally shorted a control board.
Don’t Neglect the First Hour of Your Appliances Life
Most people think the ‘maintenance’ phase starts a year after purchase, but it actually starts the moment the delivery truck pulls away. As noted in the Association of Home Appliance Manufacturers (AHAM) technical bulletins, improper leveling during the first week of use is a leading cause of premature compressor seal failure and door gasket warping. If the unit isn’t pitched slightly backward, the door won’t seal tightly, and your fridge side will get warm while the freezer works overtime to compensate. This is why I always recommend looking for fast trustworthy appliance installation near you rather than letting the delivery guys just drop it and run. Taking the time for how to ensure reliable appliance installation in 2025 means checking things like floor stability and dedicated circuit amperage—details that ‘same-day’ delivery services often ignore in their rush.
Can simple habits really prevent a four-figure repair bill?
Absolutely. The secret to maintaining your fridge over time isn’t complex engineering; it’s consistency. Every six months, I pull my fridge out and vacuum the coils. If you have a built-in unit, this is even more critical because the airflow is already restricted. I also recommend ‘exercising’ your water dispenser and ice maker shut-off valves twice a year to ensure they don’t seize up from hard water deposits. This type of routine care makes it much easier to maximize your appliance warranty during emergency repairs because you can provide a documented history of care. When a technician sees a clean machine, they are far more likely to advocate for you with the manufacturer when a part fails prematurely.
Smart Sensors and the Death of the Guesswork Repair
We are entering an era where your fridge will likely tell you what’s wrong before you even notice the milk is warm. I’m already seeing a trend toward ‘Digital Twins’—virtual models of your specific appliance that technicians can analyze remotely. In the near future, sensors will detect the exact vibration frequency of a failing evaporator fan weeks before it stops spinning. Until your kitchen is that smart, though, you have to be the sensor. Pay attention to the sounds and the smells. If you catch a problem early, you can often secure scheduling your appliance repair for same-day service in 2025 before the weekend rush hits. My best advice? Before you close this tab, grab a vacuum and clean your condenser coils—it’s the single most effective five-minute task you can do today to protect your investment. Don’t wait for the ice cream to melt to start caring about your airflow.
Hard Truths from My Kitchen Floor Repair Sessions
The most expensive mistake I ever made wasn’t the repair itself; it was losing the paper trail. If you want to maximize your appliance warranty during emergency repairs, you have to treat your service logs like tax documents. I once had a claim denied because I couldn’t prove the coils had been cleaned in two years. I’ve also learned that the maintenance contract clause that saves you on labor costs is often hidden in the fine print—always read the ‘Exclusions’ section first. #IMAGE_PLACEHOLDER_E# Another lightbulb moment? Realizing that ‘Pro’ doesn’t always mean ‘Expensive.’ Sometimes, knowing how to negotiate a repair instead of a replacement with your warranty provider is as simple as showing them you understand the failure point. If you know it’s a $20 bimetal thermostat, they are much less likely to push a $2,000 replacement unit on you.
The Gear That Lives in My Junk Drawer
I don’t believe in buying every gadget at the hardware store, but three things are non-negotiable for me. I swear by my digital multimeter; it’s the only way to stop guessing and start knowing if a part is dead. I also keep a flexible coil brush specifically for those hard-to-reach condenser areas where pet hair goes to die. Finally, I constantly refer back to the expert guide to appliance repair and installation today whenever I encounter a model I’ve never opened before. It’s better to read for ten minutes than to spend three hours fixing a mistake.
Take Back Control of Your Kitchen Temperature
Dealing with a warm fridge doesn’t have to be a catastrophe that ruins your week. By understanding the airflow and keeping up with the small stuff, you move from being a victim of your appliances to being the boss of them. Whether you decide to tackle the defrost timer yourself or opt for affordable same-day appliance fixes with warranty benefits, the key is acting before the food spoils. You’ve got the knowledge now—go check that damper and get your kitchen back to peak performance. Have you ever found a weird object blocking your fridge vents that you’re too embarrassed to admit? Let me know in the comments below!