

I was standing in my kitchen at 2 AM, staring at a puddle of water leaking from the bottom of my fridge, while my Golden Retriever, Barnaby, looked up at me with those “it wasn’t me” eyes. Except, it was him. Or rather, it was the tumbleweeds of his golden fur that had migrated under the appliance, choking the life out of the condenser coils. I’d spent a small fortune on this stainless-steel beauty, and here I was, fearing I’d need same-day appliance repair just to save my expensive groceries. It was a wake-up call. I realized that being a dog parent means you aren’t just a vacuuming specialist; you’re an amateur appliance technician by necessity. Today, I’m going to share the exact routine that saved my kitchen and my sanity.
Your Refrigerator is Literally Choking on Pet Fur
Most homeowners assume a fridge fails because of a faulty computer board or a mechanical defect. In reality, it is usually just simple neglect. When those coils get caked in a thick felt of dander and hair, the compressor has to work double time just to keep your milk cold. According to data from the U.S. Department of Energy, dirty condenser coils can increase energy consumption by as much as 30 percent. That is money flying out of your pocket every single month just because of Fido. I learned the hard way that ignoring this buildup leads to situations where even the starter relay trick won’t be enough to jumpstart a compressor that has been running hot for three months straight.
Is this cleaning hack actually worth the effort?
You might be thinking that a quick pass with a vacuum once a year is enough. It isn’t. My biggest mistake early on was using a standard vacuum attachment that barely reached the first three inches of the coil rack. I left a solid wall of fur in the back that eventually caused a total system overheat. I nearly lost my coverage because I couldn’t prove I’d performed basic maintenance, which is a common reason for warranty claim rejections. Have you ever pulled your fridge out only to find a second dog made entirely of lint and fur living underneath? If you’ve seen those ‘tumble-fur’ bunnies rolling across your hardwood, your fridge is already in the danger zone. I’m going to walk you through a DIY method that uses common household items to deep-clean those coils without you having to spend a dime on professional appliance repair services.
Cut the Power Before You Touch Anything
The very first thing you must do is unplug the unit. This isn’t just a basic safety tip; it is a critical step to protect the sensitive electronics that govern modern cooling cycles. I once thought I could skip this and just work fast, but a stray static spark from the vacuum nearly forced me to call for same-day appliance repair after the display panel went dark. Beyond safety, you need the compressor to be completely off and cooling down. If you have an ice maker, remember to shut off the water valve as well to prevent any accidental leaks while you are moving the unit. Using the the power cord error that voids your fridge warranty as a cautionary tale, ensure the cord is tucked away and not pinched as you proceed to the next step.
Get Behind the Machine Without Ruining Your Floors
Most modern refrigerators are on rollers, but that doesn’t mean they won’t gouge your hardwood or crack your tile if there is a tiny pebble trapped underneath. I highly recommend laying down a piece of thin plywood or specialized appliance sliders. If the fridge feels stuck or won’t move straight, you might be dealing with an uneven base. This is a great time to apply the leveling trick for a fridge that rattles your kitchen floor all night to ensure that once you push it back, it sits perfectly still. Gently pull the unit out just enough to get your vacuum hose and your body behind it. If you find the space is too tight or the connections are rigid, you may need to consult an expert guide to appliance repair and installation today to avoid snapping a copper water line.
Attack the Grime with a Coil Brush
The vacuum alone isn’t enough because pet hair doesn’t just sit on the coils; it weaves itself into them. You need a long-handled, flexible coil brush. I remember the first time I did this with Barnaby’s fur everywhere—I tried using a leaf blower in the kitchen. Bad idea. I spent the next four hours cleaning a layer of fine grey dust off every single spice jar in my pantry. Instead, use the brush to loosen the felt-like buildup and follow it immediately with the vacuum nozzle. 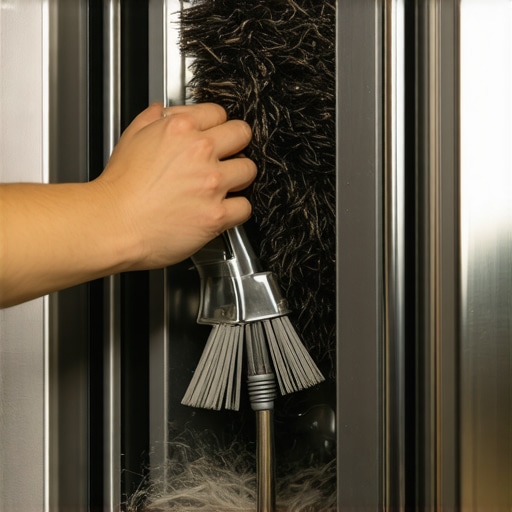 Focus on the areas where the hair is thickest, usually near the intake fan. This manual scrubbing ensures you aren’t leaving behind an insulation layer that forces the motor to redline. If you see physical damage to the fins, stop and check if you are still covered, as how to prove periodic maintenance to keep your warranty valid often requires you to show you didn’t use abrasive tools.
Documentation is Your Shield Against Denied Claims
Once the coils are shiny again, take a photo. This might seem like overkill, but having a digital timestamp of your clean condenser is the ultimate leverage. I’ve seen homeowners get hit with massive bills because a technician claimed ‘environmental neglect’ caused a compressor failure. By keeping the one maintenance record that saves your appliance warranty claim, you have proof that the failure was mechanical and not due to your dog. This simple habit turns a potential $800 repair into a covered service call. Before you slide the unit back, give the door seals a quick wipe to ensure the door gasket fix that cuts refrigerator energy bills is also working in your favor. If you’re nervous about the reconnection process, look for fast trustworthy appliance installation near you to help reset the unit safely.It’s easy to think that once the coils are clean, you’re in the clear. But here is where most people get tripped up: the assumption that a service contract is an all-access pass to free repairs. In my experience, relying solely on a basic policy without knowing the nuances is like driving without a seatbelt. Everyone says you should wait for the manufacturer’s ‘preferred’ technician, but I’ve found that same-day appliance repair from a qualified local expert often prevents the secondary damage that manufacturers won’t cover anyway. While you wait three days for the ‘official’ guy, your compressor is melting down, and the warranty company might later claim you failed to mitigate the loss. This is one of the top tips for same-day service warranty coverage: speed isn’t just about convenience; it’s about evidence preservation.
Stop Falling for the Deductible Trap
A massive mistake I see constantly—and I almost fell for it myself—is ignoring the deductible trap in most third-party appliance protection plans. You might have a $500 ‘protection plan,’ but if the service fee is $125 and the parts aren’t fully covered, you’re basically paying for the privilege of a discount. According to a study by Consumer Reports, the median cost of an appliance repair is often close to the cost of the service contract itself, making the ‘peace of mind’ a very expensive illusion unless you know how to leverage the terms. 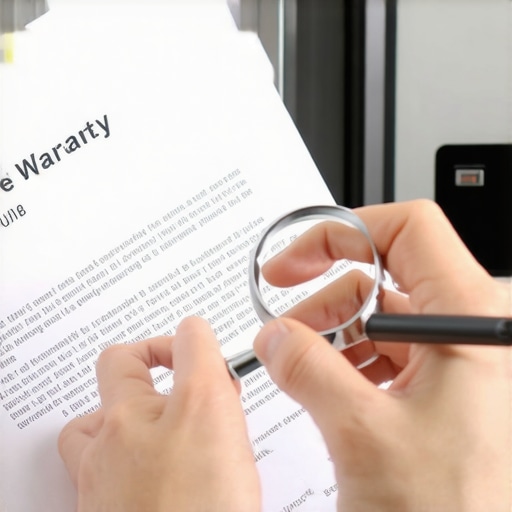
Is your DIY weekend project actually voiding your protection?
Most people think that as long as they don’t break something, ‘looking under the hood’ is fine. It isn’t. The moment you open a sealed component or bypass a safety sensor, you trigger the hidden costs of diy repairs on warranty-covered items. I once tried to swap a simple relay on my washer, only to have a technician later point out the scratched screw heads as proof of ‘unauthorized tampering.’ If you’re dealing with a high-end unit, it is much safer to rely on warranty-backed appliance services you can rely on from the start. You need a paper trail that shows professional hands touched the machine.
The Myth of the ‘Expert’ Installer
We often assume the person delivering the fridge knows how to install it perfectly. Often, they are delivery specialists, not master technicians. This leads to issues like the power cord error that voids your fridge warranty or improper leveling that causes internal frame torque. If you want to sleep soundly, you have to verify the work or look into how to ensure reliable appliance installation in 2025 by checking for proper grounding and clearance. Have you ever fallen into this trap where a ‘free’ installation ended up costing you a massive repair bill a month later? Let me know in the comments. It’s a common headache, but one you can avoid by being just a little more skeptical than the average homeowner.If you really want to scale your maintenance from ‘guy with a vacuum’ to ‘proactive homeowner,’ you need to stop guessing. I used to think my eyes were enough to diagnose a failing fridge, but I was wrong. Now, my ‘survival kit’ for the kitchen includes a digital multimeter and a specialized 36-inch flexible crevice tool. Why a multimeter? Because it allows me to perform the starter relay trick with actual scientific certainty. Instead of hoping a part works, I check for continuity. This $20 tool has saved me from calling for same-day appliance repair at least three times in the last two years. When you can prove to a technician that you’ve already narrowed down the electrical fault, the entire dynamic of the service call changes. You aren’t just a customer; you’re an informed advocate for your own wallet.
Stop Guessing and Start Measuring
One specific tool I swear by is a non-contact infrared thermometer. I use it to scan the back of my fridge every month. If I see a 10-degree spike in temperature around the compressor housing compared to my last check, I know those pet-hair tumbleweeds are back. The Association of Home Appliance Manufacturers (AHAM) notes in their technical briefs that even a minor increase in operating temperature can degrade the lubricant inside a sealed system, leading to ‘sludging.’ Once that happens, no amount of cleaning will save you. By catching these heat spikes early, you ensure your warranty-backed appliance services you can rely on actually cover the fix, rather than being denied due to ‘long-term heat stress’ caused by neglect. 
How do I keep my appliances running like new for over a decade?
The secret isn’t just cleaning; it is calibration. Every six months, I check the leveling of the unit and the tightness of the door hinges. If your fridge isn’t level, the frame can warp slightly over time, causing the gaskets to pull away. I’ve seen people lose hundreds of dollars in energy bills because of a 2-degree tilt. I always refer back to an expert guide to appliance repair and installation today to make sure my measurements align with factory specs. This isn’t just about the fridge, either; applying these ‘specs-first’ habits to your dishwasher or stove prevents the small vibrations that eventually rattle components loose.
Smart Sensors are the Future of Maintenance
I predict that within the next five years, we won’t be cleaning coils manually at all. We are already seeing the rise of AI-driven pressure sensors that can detect airflow blockages and send a push notification to your phone before the compressor even breaks a sweat. This will revolutionize top tips for same-day service warranty coverage because the ‘proof of maintenance’ will be automated. Until then, we have to be the sensors. If you’re currently dealing with a new unit, make sure you know how to ensure reliable appliance installation in 2025 by insisting on a post-install vibration test. It sounds technical, but it just means making sure the thing doesn’t shake when the motor kicks in. Try this advanced tip: Use a smart power plug with energy monitoring on your older appliances. If you see the ‘base’ energy usage climbing over a week, it’s a red flag that your coils are dirty or a motor is failing. Catching it early is the difference between a $15 brush and a $1,500 replacement bill. If you’ve been putting off that deep clean, this is your sign to grab your multimeter and get to work.
What My Golden Retriever Taught Me About Compressor Longevity
Looking back at that 2 AM puddle, I realized that modern appliances are essentially high-performance computers that happen to store food. The biggest takeaway? Don’t wait for a breakdown to read your manual. I learned that the deductible trap in most third-party appliance protection plans is often a penalty for those who ignore routine care. If you keep the machine clean, you avoid the arguments over ‘environmental neglect’ that adjusters love to use. Another ‘lightbulb moment’ was realizing that while the starter relay trick that fixes a warm refrigerator works in a pinch, it won’t solve the underlying heat stress caused by dander. Finally, the true value of same-day appliance repair is the professional diagnostic you get, which is much easier to manage when you aren’t acting out of pure desperation.
My Essential Kit for a Hair-Free Kitchen
If you’re serious about skipping the stress of a dead fridge, you need a few specific items beyond a standard vacuum. First, get a long-reach flexible coil brush—it’s the only way to reach the back of the unit where the hair weaves into the metal. Second, I swear by a non-contact thermometer to spot heat spikes before they become total mechanical failures. Third, keep a dedicated folder for your service receipts; I call it the one maintenance record that saves your appliance warranty claim and it stays in my kitchen utility drawer. I also highly recommend keeping an expert guide to appliance repair and installation today bookmarked on your phone so you aren’t guessing during an emergency. #IMAGE_PLACEHOLDER_E#
Take Charge of Your Kitchen’s Heartbeat
Cleaning your fridge coils isn’t exactly a glamorous weekend project, but it is the single most effective way to prevent a massive financial headache. You don’t need to be a master technician to keep your kitchen running smoothly; you just need to be more persistent than the pet hair drifting across your floors. By taking these small steps, you ensure that you’re always prepared, whether you need to perform a quick DIY check or call for same-day appliance repair to handle a complex component failure. Your fridge works hard for you 24/7—give it some room to breathe. Have you ever pulled your fridge out and found a ‘second pet’ made of fur underneath? Let me know in the comments how much hair you found!