

I was standing on my kitchen floor, nose inches from the tiles, sniffing like a bloodhound while my wife stared at me from the doorway. We had just finished a successful install, or so I thought. I’d sprayed every inch of that flex line with the highest-quality soap solution I could find, and not a single bubble appeared. Yet, that metallic, sulfurous odor lingered like an uninvited guest. It’s a maddening scenario that I’ve faced more times than I care to admit. You follow the rules, you check the seal, and the bubbles tell you everything is fine—but your nose knows better. Dealing with a gas line that refuses to show its secrets is enough to make any DIYer want to give up and call for what to expect from same-day appliance repair experts. But before you throw in the towel, let me share what I learned the hard way about those invisible micro-leaks.
Stop Smelling Gas When the Bubbles Say You’re Safe
The truth is, the soap bubble test is great for big, obvious failures, but it often misses the tiny, pressurized seeps that happen at the very back of a flare fitting. I learned this years ago when I nearly stripped the threads on a new stove because I thought tighter is better. Spoiler alert: it’s not. In fact, over-tightening is a classic rookie mistake that actually deforms the brass and creates a permanent leak path. I’ve spent years refining my approach to an expert guide to appliance repair and installation today, and I’ve found that the soap test is only the beginning of a truly safe setup. Today, I’m going to show you how to identify the specific failure points in your gas line that the bubbles are ignoring, ensuring your home is actually safe and not just bubble-safe.
Is the soap test actually as foolproof as we think?
Many homeowners assume that no bubbles equals zero risk, but that’s a dangerous misconception. According to the National Fire Protection Association (NFPA), gas leaks are a primary factor in thousands of home fires annually, and many of these stem from sealed connections that weren’t quite right. If you’ve ever noticed why your new gas range flame is orange instead of blue, you might already be dealing with pressure issues or air-to-gas ratios that suggest a connection problem. The biggest skepticism I hear is whether a DIYer can really get a professional-grade seal. The answer is yes, but only if you stop relying on one-cent soap and start looking at the mechanics of the flare.
Why Flare Fittings Fail Even When They Look Perfect
My biggest blunder early on was using thread sealant on the flare itself. I thought I was being extra careful! But flare connections rely on metal-to-metal contact, and adding goop in the wrong place actually prevents the pieces from seating correctly. It’s the same logic behind why you need the correct way to ground a gas range during a new install; there is a specific mechanical requirement that can’t be bypassed with extra materials. Have you ever spent an entire afternoon tightening and re-tightening a connection only to still catch a whiff of gas an hour later? If so, you aren’t alone, and it’s likely not the soap’s fault—it’s the surface of the metal. We’re going to look at how to prep those surfaces so they seal the first time, every time.
Clean Your Brass Before You Turn the Wrench
The flare fitting is a marvel of engineering because it doesn’t need gaskets or messy tape. It’s just two pieces of soft metal hugging each other. If there is a speck of drywall dust, a stray hair, or a tiny burr on that mating surface, the seal is doomed from the start. I remember one specific Saturday I was rushing to finish a dryer install. I dropped the brass connector on the garage floor and saw a tiny nick on the rim. I figured the nut would just smash that flat once I cranked it down. Three hours later, I was back at the store buying a new connector because that tiny nick acted like a highway for gas. To how to ensure reliable appliance installation in 2025, you have to treat those surfaces like they are made of fine crystal. Wipe both the male and female ends with a lint-free cloth and inspect them under a bright light before they ever touch. 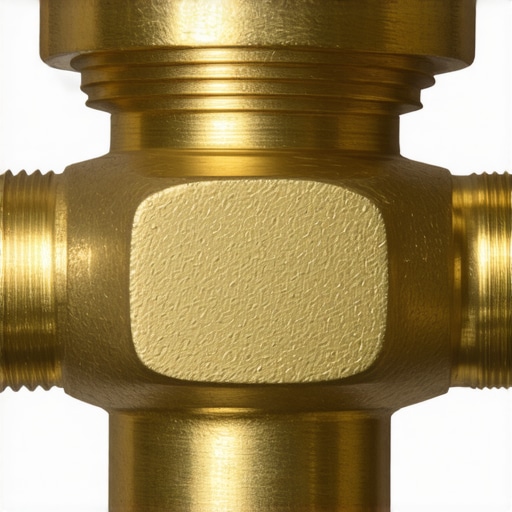
How Much Force is Too Much for a Gas Line?
Wrenching on a gas line isn’t a feat of strength; it’s about precision. You want the fitting snug plus a quarter turn. If you go beyond that, you risk thinning the flare wall, which makes the metal brittle and prone to cracking under the vibration of the appliance. This is where most people panic and think they need more leverage. If you’ve already over-tightened and the seal is failing, you might notice why your gas range is taking 10 seconds to ignite because the internal orifice has been slightly deformed or the pressure is dropping. A good rule of thumb is to tighten by hand until the nut won’t move anymore, then use two wrenches—one to hold the valve body steady and one to turn the nut—to give it that final, gentle nudge.
The Professional Leak Liquid You Actually Need
Ditch the bottle of Dawn dish soap. While it’s great for dishes, it’s far too thick for micro-leaks and contains chlorides that can actually corrode brass over time. Professionals use a specialized, non-corrosive leak detector solution that has a much lower surface tension. It’s thinner, so it penetrates those microscopic gaps where a tiny seep might be hiding. If you’re still smelling that faint sulfur scent but seeing no bubbles with your DIY mix, the leak might be inside the appliance cabinet or at a factory-sealed joint that was jarred during shipping. In these cases, seeking affordable same-day appliance fixes with warranty benefits is your smartest move. It helps you avoid the hidden costs of diy repairs on warranty covered items, especially since a pro has electronic sensors that detect gas concentrations in parts per million. Remember, just because you don’t see a bubble doesn’t mean the air is clear. Following an expert guide to appliance repair and installation today means knowing when to trust your nose over a bottle of soapy water.It’s easy to think that if you’ve tightened a few nuts and checked for bubbles, you’ve outsmarted the system and saved a significant amount in labor. But here is the contrarian truth: that professional fee is often the cheapest insurance policy you’ll ever buy. I’ve seen homeowners successfully install a range, only to have a control board fry six months later. When the manufacturer asks for the professional installation receipt and you can’t provide it, you’re suddenly on the hook for a massive bill. This is one of the hidden costs of diy repairs on warranty covered items that no one talks about until it’s too late. Most people assume warranties cover defects, but data from the Association of Home Appliance Manufacturers (AHAM) suggests that nearly 25% of service calls for new appliances are actually related to improper installation rather than mechanical failure. If you’re the one who did the install, the manufacturer has a very easy way to deny your claim. Have you ever fallen into this trap? Let me know in the comments because I’ve definitely learned this lesson the hard way.
The Paperwork Trap That Voids Your Peace of Mind
It’s not just about the physical installation; it’s about the trail of evidence you leave behind. Many homeowners think they are safe as long as they have the original receipt from the store. However, you need to be aware of the one maintenance record that saves your appliance warranty claim. For gas appliances, this often includes a pressure test log or a CO2 clearance report. If you’re calling for what to expect from same-day appliance repair experts, you’re paying for more than just a wrench-turn; you’re paying for a certified paper trail that holds the manufacturer accountable. 
Can you prove a manufacturing defect versus user-error vibration?
This is the question that trips up even the most seasoned DIYers. Let’s say your new front-load washer starts sounding like a jet engine. If a pro didn’t install it, the technician might point to the shipping bolt error that ruins new washing machines as the root cause. Even if you removed them, without a professional’s sign-off on the leveling and floor stability, the warranty company can argue the wear and tear was accelerated by your setup. To how to ensure reliable appliance installation in 2025, you have to look past the physical wrenches and look at the legal fine print.
Watch Out for the Grounding and Polarity Pitfall
Another nuance that DIYers miss—especially with modern smart gas ranges—is electrical polarity. I’ve seen beautiful gas installs fail because the outlet wasn’t properly grounded. We focus so much on the gas leak that we ignore the correct way to ground a gas range during a new install. A floating ground can cause the igniters to tick indefinitely or, worse, fry the sensitive microprocessor that controls the oven’s convection fan. It’s a sophisticated failure that a standard bubble test will never reveal, and it’s why affordable same-day appliance fixes with warranty benefits are often the safer bet for high-end electronics. Don’t risk a expensive stove to save an hour of professional labor.
I used to think my beat-up adjustable wrench was a universal tool that could handle anything in the house. I was wrong, and my realization came at the cost of a ruined brass fitting on a high-end range. If you want to move beyond basic DIY and achieve a professional-grade seal, you need to stop using tools that ‘just fit’ and start using tools designed for the job. Personally, I never touch a gas line without my set of flare nut wrenches, also known as crowfoot wrenches. Unlike a standard open-ended wrench that only grips two sides of a nut, a flare nut wrench wraps almost entirely around it. This is crucial because gas fittings are made of soft brass that deforms under high pressure. If you round off those corners, you’re not just looking at a leak; you’re looking at a total replacement of the valve. Using the right steel makes all the difference in how to ensure reliable appliance installation in 2025.
The Digital Manometer is My Secret Weapon
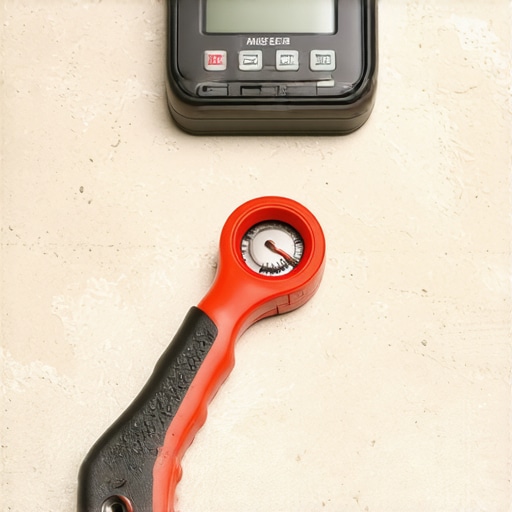
While most homeowners rely on their nose or a bottle of soap, I’ve started carrying a digital manometer for every gas-related project. This little device measures gas pressure in inches of water column (WC). It might sound like overkill, but it’s the only way to verify that your appliance’s internal regulator is actually doing its job. I’ve seen cases where a ‘faulty’ stove was actually just receiving the wrong pressure from the house line. If you don’t check this, you’ll find yourself searching for why your new gas range flame is orange instead of blue forever without finding a fix. A manometer gives you the hard data you need to prove to a manufacturer that the fault is internal, which is a massive win for top-tips for same-day service warranty coverage. It turns a guessing game into a scientific certainty.
How do I keep my gas appliances running safely for years?
Long-term reliability isn’t a ‘set it and forget it’ situation. I recommend a three-step annual checkup. First, visually inspect the flex line for any signs of kinking or corrosion, especially if you move the appliance for cleaning. Second, use a handheld electronic combustible gas detector—they are relatively cheap now and far more sensitive than the human nose. Third, keep a dedicated maintenance log. This isn’t just for your peace of mind; it is essential for how to prove periodic maintenance to keep your warranty valid. In the eyes of a warranty provider, if it isn’t written down, it didn’t happen. By keeping these records, you ensure that you can always access warranty-backed appliance services you can rely on without a fight.
The Future is Built-In Smart Diagnostics
Looking ahead, I predict that the manual soap test will become a thing of the past within the next decade. We are already seeing high-end European models with integrated flow sensors that can detect micro-drops in pressure and send an alert directly to your smartphone. These systems will eventually talk to local service centers automatically. Until then, we have to bridge the gap with better techniques and professional oversight. The International Fuel Gas Code (IFGC) Section 404.14 actually specifies very strict rules about how these lines are protected from physical damage, and I expect these codes to become even more stringent as smart homes become the norm. My best advice? Try using a dedicated leak detector solution instead of dish soap just once. You’ll see the difference in bubble size and persistence immediately. If you’re ever in doubt about the integrity of your seal, don’t hesitate to reach out through our contact us page for expert guidance.
I was standing on my kitchen floor, nose inches from the tiles, sniffing like a bloodhound while my wife stared at me from the doorway. We had just finished a successful install, or so I thought. I’d sprayed every inch of that flex line with the highest-quality soap solution I could find, and not a single bubble appeared. Yet, that metallic, sulfurous odor lingered like an uninvited guest. It’s a maddening scenario that I’ve faced more times than I care to admit. You follow the rules, you check the seal, and the bubbles tell you everything is fine—but your nose knows better. Dealing with a gas line that refuses to show its secrets is enough to make any DIYer want to give up and call for what to expect from same-day appliance repair experts. But before you throw in the towel, let me share what I learned the hard way about those invisible micro-leaks.
Stop Smelling Gas When the Bubbles Say You’re Safe
The truth is, the soap bubble test is great for big, obvious failures, but it often misses the tiny, pressurized seeps that happen at the very back of a flare fitting. I learned this years ago when I nearly stripped the threads on a new stove because I thought tighter is better. Spoiler alert: it’s not. In fact, over-tightening is a classic rookie mistake that actually deforms the brass and creates a permanent leak path. I’ve spent years refining my approach to an expert guide to appliance repair and installation today, and I’ve found that the soap test is only the beginning of a truly safe setup. Today, I’m going to show you how to identify the specific failure points in your gas line that the bubbles are ignoring, ensuring your home is actually safe and not just bubble-safe.
Is the soap test actually as foolproof as we think?
Many homeowners assume that no bubbles equals zero risk, but that’s a dangerous misconception. According to the National Fire Protection Association (NFPA), gas leaks are a primary factor in thousands of home fires annually, and many of these stem from sealed connections that weren’t quite right. If you’ve ever noticed why your new gas range flame is orange instead of blue, you might already be dealing with pressure issues or air-to-gas ratios that suggest a connection problem. The biggest skepticism I hear is whether a DIYer can really get a professional-grade seal. The answer is yes, but only if you stop relying on one-cent soap and start looking at the mechanics of the flare.
Why Flare Fittings Fail Even When They Look Perfect
My biggest blunder early on was using thread sealant on the flare itself. I thought I was being extra careful! But flare connections rely on metal-to-metal contact, and adding goop in the wrong place actually prevents the pieces from seating correctly. It’s the same logic behind why you need the correct way to ground a gas range during a new install; there is a specific mechanical requirement that can’t be bypassed with extra materials. Have you ever spent an entire afternoon tightening and re-tightening a connection only to still catch a whiff of gas an hour later? If so, you aren’t alone, and it’s likely not the soap’s fault—it’s the surface of the metal. We’re going to look at how to prep those surfaces so they seal the first time, every time.
Clean Your Brass Before You Turn the Wrench
The flare fitting is a marvel of engineering because it doesn’t need gaskets or messy tape. It’s just two pieces of soft metal hugging each other. If there is a speck of drywall dust, a stray hair, or a tiny burr on that mating surface, the seal is doomed from the start. I remember one specific Saturday I was rushing to finish a dryer install. I dropped the brass connector on the garage floor and saw a tiny nick on the rim. I figured the nut would just smash that flat once I cranked it down. Three hours later, I was back at the store buying a new connector because that tiny nick acted like a highway for gas. To how to ensure reliable appliance installation in 2025, you have to treat those surfaces like they are made of fine crystal. Wipe both the male and female ends with a lint-free cloth and inspect them under a bright light before they ever touch.
How Much Force is Too Much for a Gas Line?
Wrenching on a gas line isn’t a feat of strength; it’s about precision. You want the fitting snug plus a quarter turn. If you go beyond that, you risk thinning the flare wall, which makes the metal brittle and prone to cracking under the vibration of the appliance. This is where most people panic and think they need more leverage. If you’ve already over-tightened and the seal is failing, you might notice why your gas range is taking 10 seconds to ignite because the internal orifice has been slightly deformed or the pressure is dropping. A good rule of thumb is to tighten by hand until the nut won’t move anymore, then use two wrenches—one to hold the valve body steady and one to turn the nut—to give it that final, gentle nudge.
The Professional Leak Liquid You Actually Need
Ditch the bottle of Dawn dish soap. While it’s great for dishes, it’s far too thick for micro-leaks and contains chlorides that can actually corrode brass over time. Professionals use a specialized, non-corrosive leak detector solution that has a much lower surface tension. It’s thinner, so it penetrates those microscopic gaps where a tiny seep might be hiding. If you’re still smelling that faint sulfur scent but seeing no bubbles with your DIY mix, the leak might be inside the appliance cabinet or at a factory-sealed joint that was jarred during shipping. In these cases, seeking affordable same-day appliance fixes with warranty benefits is your smartest move. It helps you avoid the hidden costs of diy repairs on warranty covered items, especially since a pro has electronic sensors that detect gas concentrations in parts per million. Remember, just because you don’t see a bubble doesn’t mean the air is clear. Following an expert guide to appliance repair and installation today means knowing when to trust your nose over a bottle of soapy water.It’s easy to think that if you’ve tightened a few nuts and checked for bubbles, you’ve outsmarted the system and saved a significant amount in labor. But here is the contrarian truth: that professional fee is often the cheapest insurance policy you’ll ever buy. I’ve seen homeowners successfully install a range, only to have a control board fry six months later. When the manufacturer asks for the professional installation receipt and you can’t provide it, you’re suddenly on the hook for a massive bill. This is one of the hidden costs of diy repairs on warranty covered items that no one talks about until it’s too late. Most people assume warranties cover defects, but data from the Association of Home Appliance Manufacturers (AHAM) suggests that nearly 25% of service calls for new appliances are actually related to improper installation rather than mechanical failure. If you’re the one who did the install, the manufacturer has a very easy way to deny your claim. Have you ever fallen into this trap? Let me know in the comments because I’ve definitely learned this lesson the hard way.
The Paperwork Trap That Voids Your Peace of Mind
It’s not just about the physical installation; it’s about the trail of evidence you leave behind. Many homeowners think they are safe as long as they have the original receipt from the store. However, you need to be aware of the one maintenance record that saves your appliance warranty claim. For gas appliances, this often includes a pressure test log or a CO2 clearance report. If you’re calling for what to expect from same-day appliance repair experts, you’re paying for more than just a wrench-turn; you’re paying for a certified paper trail that holds the manufacturer accountable.
Can you prove a manufacturing defect versus user-error vibration?
This is the question that trips up even the most seasoned DIYers. Let’s say your new front-load washer starts sounding like a jet engine. If a pro didn’t install it, the technician might point to the shipping bolt error that ruins new washing machines as the root cause. Even if you removed them, without a professional’s sign-off on the leveling and floor stability, the warranty company can argue the wear and tear was accelerated by your setup. To how to ensure reliable appliance installation in 2025, you have to look past the physical wrenches and look at the legal fine print.
Watch Out for the Grounding and Polarity Pitfall
Another nuance that DIYers miss—especially with modern smart gas ranges—is electrical polarity. I’ve seen beautiful gas installs fail because the outlet wasn’t properly grounded. We focus so much on the gas leak that we ignore the correct way to ground a gas range during a new install. A floating ground can cause the igniters to tick indefinitely or, worse, fry the sensitive microprocessor that controls the oven’s convection fan. It’s a sophisticated failure that a standard bubble test will never reveal, and it’s why affordable same-day appliance fixes with warranty benefits are often the safer bet for high-end electronics. Don’t risk a expensive stove to save an hour of professional labor.
I used to think my beat-up adjustable wrench was a universal tool that could handle anything in the house. I was wrong, and my realization came at the cost of a ruined brass fitting on a high-end range. If you want to move beyond basic DIY and achieve a professional-grade seal, you need to stop using tools that ‘just fit’ and start using tools designed for the job. Personally, I never touch a gas line without my set of flare nut wrenches, also known as crowfoot wrenches. Unlike a standard open-ended wrench that only grips two sides of a nut, a flare nut wrench wraps almost entirely around it. This is crucial because gas fittings are made of soft brass that deforms under high pressure. If you round off those corners, you’re not just looking at a leak; you’re looking at a total replacement of the valve. Using the right steel makes all the difference in how to ensure reliable appliance installation in 2025.
The Digital Manometer is My Secret Weapon
While most homeowners rely on their nose or a bottle of soap, I’ve started carrying a digital manometer for every gas-related project. This little device measures gas pressure in inches of water column (WC). It might sound like overkill, but it’s the only way to verify that your appliance’s internal regulator is actually doing its job. I’ve seen cases where a ‘faulty’ stove was actually just receiving the wrong pressure from the house line. If you don’t check this, you’ll find yourself searching for why your new gas range flame is orange instead of blue forever without finding a fix. A manometer gives you the hard data you need to prove to a manufacturer that the fault is internal, which is a massive win for top-tips for same-day service warranty coverage. It turns a guessing game into a scientific certainty.
How do I keep my gas appliances running safely for years?
Long-term reliability isn’t a ‘set it and forget it’ situation. I recommend a three-step annual checkup. First, visually inspect the flex line for any signs of kinking or corrosion, especially if you move the appliance for cleaning. Second, use a handheld electronic combustible gas detector—they are relatively cheap now and far more sensitive than the human nose. Third, keep a dedicated maintenance log. This isn’t just for your peace of mind; it is essential for how to prove periodic maintenance to keep your warranty valid. In the eyes of a warranty provider, if it isn’t written down, it didn’t happen. By keeping these records, you ensure that you can always access warranty-backed appliance services you can rely on without a fight.
The Future is Built-In Smart Diagnostics
Looking ahead, I predict that the manual soap test will become a thing of the past within the next decade. We are already seeing high-end European models with integrated flow sensors that can detect micro-drops in pressure and send an alert directly to your smartphone. These systems will eventually talk to local service centers automatically. Until then, we have to bridge the gap with better techniques and professional oversight. The International Fuel Gas Code (IFGC) Section 404.14 actually specifies very strict rules about how these lines are protected from physical damage, and I expect these codes to become even more stringent as smart homes become the norm. My best advice? Try using a dedicated leak detector solution instead of dish soap just once. You’ll see the difference in bubble size and persistence immediately. If you’re ever in doubt about the integrity of your seal, don’t hesitate to reach out through our contact us page for expert guidance.
The Hardest Lesson I Learned About Cutting Corners
Over the years, I’ve realized that the most dangerous part of a DIY gas project isn’t the gas itself—it’s the false sense of security that a cheap bottle of dish soap provides. I once spent an entire Saturday afternoon chasing a ‘phantom smell’ only to realize that my DIY soap solution was actually drying too fast to capture the micro-seep at the manifold. I also learned that the hidden costs of diy repairs on warranty covered items often manifest as a flat-out denial when you need a repair later. If you can’t show a professional sign-off, you’re essentially self-insuring a $2,000 appliance. Lastly, remember that brass is incredibly soft; if you feel it ‘crunch’ while tightening, you’ve already gone too far and likely ruined the seat.
The Gear That Separates Rookies from Pros
If you’re determined to handle the mechanical side of things, don’t show up with a pair of pliers. I swear by my flare nut wrench set, which distributes pressure across the entire nut to prevent rounding. I also highly recommend picking up a dedicated leak detection fluid—it’s engineered to stay wet longer and form ‘cocoons’ around even the smallest leaks. For the ultimate peace of mind, a digital manometer is the only way to ensure your house pressure matches what the appliance requires. These tools don’t just make the job easier; they make it measurable. By sticking to these standards, you can better prepare for top-tips for same-day service warranty coverage should a component ever fail.
Take Pride in a Professional Standard Seal
At the end of the day, your kitchen is the heart of your home, and it deserves more than just a ‘good enough’ seal. By prioritizing safety and following how to ensure reliable appliance installation in 2025, you aren’t just hooking up a stove; you’re protecting your family and your financial investment. Don’t be afraid to call for same-day appliance repair quick solutions with warranty support if the smell persists or if you want a certified expert to verify your work. It’s the mark of a true pro to know when a second pair of eyes is the smartest tool in the box. Have you ever successfully found a leak that the soap test missed? Let me know in the comments below!