
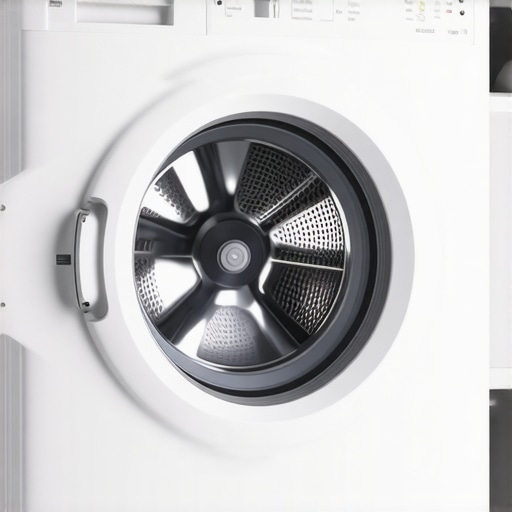
I remember staring at my Bosch washer three years ago, a mountain of wet towels mocking me from behind the glass door. The cycle had just stopped. No beep, no warning, just a drum full of gray, stagnant water and a blinking light that felt like a personal insult. If you have ever been there, you know that cold spike of panic. You start calculating the cost of same-day appliance repair experts before you even try to find a screwdriver. But here is the thing: European washers are a different breed. They are compact and efficient, but they have a secret trap door that most owners don’t even know exists until their laundry room is a pond. Today, I am going to show you exactly where that filter is hiding and how to clear it without calling for backup. I have spent enough time mopping up my own mistakes to know that once you find this little guy, 90% of your drainage nightmares disappear instantly. Have you ever stood over a full washer wondering why it suddenly decided to quit on you?
Stop Hunting and Look at the Bottom Right Corner
The first time I had to do this, I spent twenty minutes looking behind the machine. I thought I needed a specific error code to tell me the pump was dead, but the answer was right in front of me the whole time. On almost every European-style front-loader, there is a small rectangular or circular flap on the bottom-right of the front panel. It looks like it is part of the trim, but it is actually the gatekeeper to your washer’s health. I made the classic rookie mistake of thinking a pressure switch fault that leaves your washer drum full was a total motor failure. I was ready to maximize my appliance warranty during emergency repairs when all I really needed was to pop that flap and twist a plastic cap. According to Yale Appliance, European front-loaders require much more frequent filter maintenance than traditional top-loaders, ideally every two to three months, to prevent total pump failure. Failing to do this is the fastest way to turn a high-end machine into a very expensive paperweight.
Is messing with the filter going to flood my entire kitchen?
This is the number one reason people are afraid to touch that little door. They assume that the moment they unscrew the filter, all fifty gallons of water in the drum will come rushing out like a tidal wave. I will be honest: if you do it wrong, you will get wet. I learned that the hard way during my first attempt, when I unscrewed the cap too fast and watched a gallon of funky water soak my favorite rug. But these machines actually have a tiny auxiliary drain hose hidden right next to the filter specifically to prevent this. We are going to use that hose first to drain the bulk of the water into a shallow tray, making the actual filter removal a dry, boring affair. Trust me, taking five minutes to do this yourself is much better than waiting for quick solutions with warranty support for something as simple as a trapped coin or a stray sock.
Grab Your Shallowest Tray and a Stack of Towels
Before you even touch that plastic cap, you need to prepare for the ‘drip factor.’ Most people skip this and end up soaking their floor, which eventually leads to wood rot and a frantic search for expert guide to appliance repair and installation today. I once used a baking sheet because it was the only thing thin enough to slide under the machine’s frame. It’s like performing surgery; you want your tools ready before you make the first cut. Lay your towels flat against the base of the machine to catch any rogue splashes. This isn’t just about cleanliness; it’s about protecting the electronics. I’ve seen owners accidentally short out a wire because they let a gallon of soapy water rush under the machine, turning a simple maintenance task into a need for scheduling your appliance repair for same-day service in 2025.
Drain the Emergency Hose Before You Open the Floodgates
Look closely next to the large circular filter cap. You will see a small, black rubber hose tucked into a clip. This is your best friend. Pull it out, remove the tiny plug at the end, and let the water flow into your tray. It will feel like it’s taking forever—like trying to empty a bathtub with a straw—but this step is the difference between a controlled drain and a kitchen swamp. 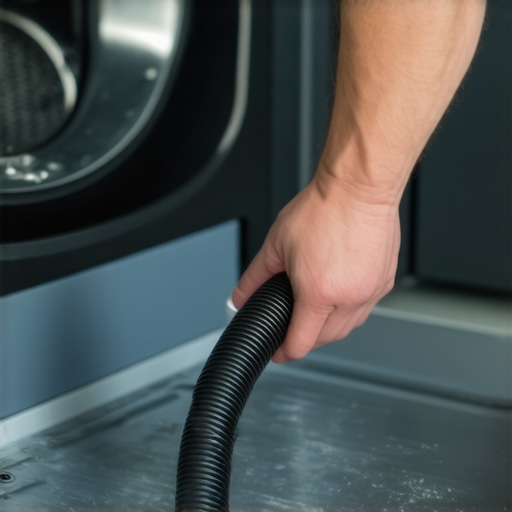 If the water stops flowing but you know the drum is still full, the hose itself might be clogged with sediment. I remember one specific Saturday where I had to use a toothpick to clear a clump of lint out of that tiny hose just to get the water moving. It’s tedious, but it’s how you how to prove periodic maintenance to keep your warranty valid if a technician ever asks for your service logs.
What to Do When the Filter Is Jammed Solid
Once the hose is empty, it’s time to unscrew the main filter. Turn it counter-clockwise. If it won’t budge, don’t use pliers yet. You might be fighting a bra wire or a coin that is physically wedged against the plastic threads. I once fought a filter for thirty minutes only to find a Canadian nickel was perfectly vertical, acting like a deadbolt. If it’s stuck, give it a firm but gentle wiggle. Forcing it can crack the housing, and suddenly you aren’t just cleaning a filter; you are looking for affordable same-day appliance fixes with warranty benefits because you snapped the pump assembly. If it’s rattling after you put it back, you might need the one screwdriver turn that levels a rattling washer to stabilize the whole unit.
Check the Impeller Fins for Tiny Blockages
With the filter out, reach your finger into the dark hole where the filter lived. You’ll feel a small plastic fan—that’s the pump impeller. Give it a flick. It should spin freely with a bit of magnetic resistance. If it feels mushy or won’t spin, there is a thread or hair wrapped around the shaft. This is the most common reason for the machine to throw a fit, even if the filter looks clean. Clearing this yourself is the ultimate ‘pro’ move that saves you from the the secret reset code for frustrated washing machine owners usually reserved for the pros. Scrub the filter under hot water to remove the slime, screw it back in tight, and make sure the arrow on the cap points up.
Once you have cleared that impeller and the water is finally flowing again, you might feel like an absolute DIY hero. But there is a deeper layer to this game that most people ignore until they are staring at a massive bill. I used to think that the faster a technician arrived, the better the service. I would hunt for what to expect from same-day appliance repair experts, assuming speed was the only metric that mattered. But here is the contrarian truth: the most elite technicians, the ones who actually diagnose the root cause instead of just swapping parts, are rarely sitting around waiting for your call. If a company promises a van at your door in sixty minutes, they might be sending a junior tech who is incentivized to find ‘billable’ problems rather than simple fixes like the one we just did.
Don’t Let Speed Blind You to the Quality of the Fix
I have seen this play out a dozen times. A homeowner calls for scheduling your appliance repair for same-day service in 2025, a tech shows up, sees the water in the drum, and immediately quotes $400 for a new pump without even checking the filter we just cleaned. This is the ‘Speed Trap.’ True expertise requires a methodical approach that looks at the machine’s environment. For instance, if your machine is shaking or not draining, it might not be a mechanical failure at all, but a failure to follow the how to ensure reliable appliance installation in 2025 guidelines regarding floor stability or drain pipe height. According to a study by Consumer Reports, nearly 25% of all appliance service calls could be avoided with proper initial installation and routine maintenance. When you rush the repair, you often skip the diagnostic steps that prevent the same part from breaking again in three months.
Why does the technician always blame my detergent?
It sounds like a cop-out, doesn’t it? You call for a repair, and the guy points at your box of soap. But here is the advanced nuance: modern HE (High-Efficiency) washers use so little water that even a tablespoon too much detergent creates a ‘suds lock.’ These suds act like a physical barrier, preventing the pump from catching the water. Over time, this excess soap turns into a waxy buildup called scrud, which coats the very impeller we just talked about.  This is why knowing is a manufacturer extended plan actually worth the monthly cost becomes tricky. Most people assume these plans cover everything, but if a technician finds that your pump failed because of detergent buildup—which is technically ‘user error’ or ‘lack of maintenance’—your claim could be dead on arrival. I have seen folks get blindsided by the reason your warranty claim was denied because they didn’t realize the fine print requires you to prove you have been using the machine as directed.
The Critical Link Between Installation and Warranty Protection
If you are moving into a new place or upgrading your laundry room, don’t just shove the machine into the nook and call it a day. A poor setup is the fastest way to void your protection. I once worked with a client who had a brand-new Miele that kept throwing drain codes. It turned out the ‘pro’ installer didn’t remove the shipping bolts or set the drain hose at the correct height. Because the installation was technically faulty, the manufacturer’s warranty was useless. This is why I always tell people to look for affordable same-day appliance fixes with warranty benefits that specifically include an installation audit. You want someone who will check the wear and tear clauses that might void your warranty before they even open their tool bag. Have you ever fallen into this trap where a ‘quick fix’ ended up costing you your warranty coverage? Let me know in the comments. We need to start holding these ‘speed-first’ companies to a higher standard of diagnostic honesty.
I’ve learned that a simple screwdriver isn’t enough if you want to avoid the panic of scheduling your appliance repair for same-day service in 2025. My personal secret weapon is a small, 2-gallon wet/dry vacuum. Whenever I have to drain that emergency hose, I don’t mess around with shallow trays anymore. I stick the hose directly into the vacuum nozzle. It eliminates the mess and the risk of water seeping into the subfloor, which is a common reason your warranty claim was denied when hidden mold is found later. According to the Association of Home Appliance Manufacturers (AHAM), improper drain hose positioning—specifically the lack of a proper high-loop or standpipe height—is a leading cause of premature pump burnout. This is why I always tell friends to check their how to ensure reliable appliance installation in 2025 manuals before blaming the hardware.
A Few Specialty Tools That Actually Matter
Beyond the vacuum, I always keep a long-reach needle-nose plier in my laundry kit. This is for those moments when you see a bobby pin or a coin wedged deep in the impeller and your fingers just can’t reach it. It’s a $10 tool that saves a $300 service visit. If you notice your machine is still vibrating after you’ve cleared the filter, you might need the one screwdriver turn that levels a rattling washer to ensure the feet are perfectly balanced. Proper leveling isn’t just about noise; it prevents the internal drum springs from snapping, which is a repair that rarely qualifies for affordable same-day appliance fixes with warranty benefits because it’s often classed as an installation error. This diagnostic diligence is part of an expert guide to appliance repair and installation today.
#IMAGE_PLACE_HOLDER_D#
How do I maintain my washer’s efficiency over several years?
It’s all about the monthly Hard Reset. I’m not talking about unplugging it; I mean a high-heat tub clean cycle with an active descaler. If you live in a hard-water area, minerals build up on the heating element and inside the pump housing, making the motor work twice as hard. This is where you really need to know how to prove periodic maintenance to keep your warranty valid. Keep a simple log on your phone or a physical notebook in the laundry room. When a technician asks, showing them a history of monthly cleanings immediately changes the conversation from user neglect to mechanical failure, putting the burden of cost back on the manufacturer. This is the cornerstone of warranty-backed appliance services you can rely on.
The Future of Home Repairs is Predictive
Looking ahead, I expect we will see more machines equipped with vibration and flow sensors that sync directly to your phone. Instead of waiting for a flood, your washer will send an alert saying the filter is at 80% capacity. This shift toward predictive maintenance will make what to expect from same-day appliance repair experts look very different. We won’t be calling for emergencies; we’ll be scheduling 15-minute tune-ups that keep the machine running for twenty years. For now, the best thing you can do is go into your laundry room, pop that bottom-right flap, and see what’s hiding in there. If you haven’t cleaned it in six months, I bet you’ll find at least one surprise. Grab your towels and get to work—your future self and your wallet will thank you. If you get stuck, look for same-day appliance repair quick solutions with warranty support to get back on track.
The Hard Truth About Those Quick Professional Fixes
I have learned that the most expensive repairs usually start with a tiny bit of neglect. I used to think what to expect from same-day appliance repair experts was just about getting a machine running again, but the real secret is preventing the failure in the first place. My lightbulb moment was realizing that most ‘broken’ pumps are actually just choked by lint or a stray penny. If you ignore the filter, you are basically asking for the error code that means your washer pump is dead to appear at the worst possible time.
- Regular drainage maintenance saves you from the 48-hour wait for a technician.
- Understanding your machine’s layout prevents simple blockages from becoming motor failures.
- Self-servicing the filter is the first step in being a proactive homeowner.
The Three Tools That Save My Sanity Every Month
You don’t need a professional workshop to keep your washer healthy. My personal toolkit is small but mighty. First, a 2-gallon wet/dry vacuum makes draining the emergency hose a five-second job instead of a twenty-minute mess. Second, a pair of long-reach needle-nose pliers is essential for snagging bobby pins or bra wires from the impeller. Finally, I always keep a digital maintenance log; it is the only way to how to prove periodic maintenance to keep your warranty valid if a manufacturer tries to dodge a claim. These simple additions prevent the need for affordable same-day appliance fixes with warranty benefits for issues you could have solved yourself.
Reclaim Your Laundry Room Once and For All
Taking care of a high-end European washer doesn’t have to be an intimidating chore. By mastering the filter clean and understanding how to ensure reliable appliance installation in 2025, you are taking back control of your home’s most vital systems. Don’t wait for a puddle to become an expert. Start today, and you will never have to panic about scheduling your appliance repair for same-day service in 2025 for a simple drainage clog again. Have you ever found something bizarre inside your washer’s filter? Let me know in the comments below!