
Imagine it’s a Tuesday night. You’ve just finished a massive pasta dinner, and the sink is filled with a swampy mix of lukewarm water and potato peels. You flip the wall switch, expecting that familiar growl, but instead, you get a pathetic, low-frequency hum. My heart sank the first time I heard it. I thought for sure I was looking at a $400 bill and a ruined evening. I remember vividly reaching for the phone to search for same-day appliance repair before I even checked the reset button. It’s that feeling of instant helplessness when a basic household tool decides to go on strike right when you need it most.
Get That Blade Spinning Again Without the Panic
Look, if your disposal is humming, it’s actually good news—mostly. It means the motor is still receiving power and trying to do its job; it is just physically stuck on something. I’ve learned the hard way that most of these jams are totally avoidable. Years ago, I made the amateur mistake of shoving a whole handful of fibrous celery stalks and a stray bottle cap down the drain. I almost called for appliance installation for a new unit before a neighbor showed me the ‘hex wrench trick.’ According to research by Consumer Reports, many garbage disposal issues are simple mechanical jams that homeowners can resolve in minutes without professional tools. Today, I’m going to walk you through the exact steps to clear that jam so you don’t end up with the drain clog that floods your kitchen and ruins your hardwood floors. We are going to save your disposal, your sanity, and your wallet. Have you ever dealt with a sink full of gross water while your disposal just vibrated uselessly? It’s a rite of passage for every homeowner.
Is your garbage disposal actually broken for good?
I get it. You’re skeptical. You think that hum is the final death rattle of a motor burning out. But more often than not, it’s just the internal breaker tripping or a stray cherry pit wedged under the flywheel. Have you ever stood there flipping the switch over and over, hoping it’ll magically fix itself? (Pro tip: Stop doing that immediately; you’ll actually burn out the motor for real). If you’re tired of the noise and want to know how to revive a dead garbage disposal without a plumber, you’re in the right place. Before we dive into the heavy lifting, we need to ensure you don’t void any warranty-backed appliance services you might already have. Sometimes a quick fix is better handled by a pro if your coverage is still active. Let’s get under that sink and see what we can find.
Kill the power before you reach inside
First things first: safety isn’t just a suggestion here. If that disposal decides to kick back on while your hand is near the splash guard, you are looking at a trip to the ER rather than a finished kitchen chore. I always tell my friends to treat a disposal like a loaded gun. Unplug it from the wall under the sink. If it’s hardwired, go to your breaker box and flip the switch. I’ve seen enough expert guide to appliance repair and installation today advice to know that ‘off’ at the wall switch isn’t enough. You want zero chance of electricity reaching that motor.
Give the motor a manual kickstart from underneath
Most people don’t realize there’s a secret access point at the very bottom of the unit. It’s a small hexagonal hole that acts like a manual crank for the flywheel. Think of it like the old-school crank handles used to start early 20th-century cars. You’ll need a 1/4-inch hex wrench (often called an Allen wrench). Insert it into the hole and wiggle it back and forth. 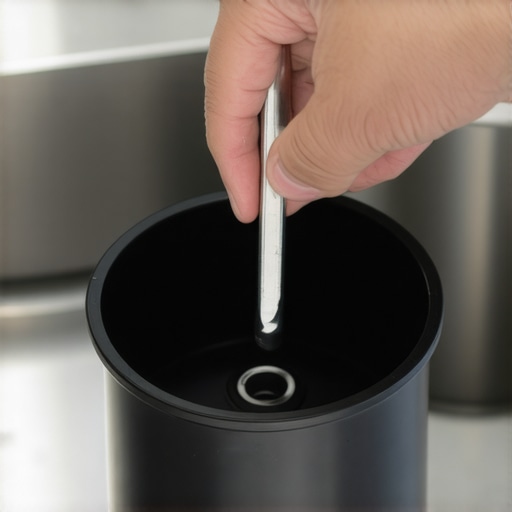 If the disposal is jammed, you’ll feel significant resistance. The goal is to force the blades to rotate 360 degrees until they move freely. I remember one humid July evening when my disposal wouldn’t budge. I was sweating under the sink, leaning into that wrench with everything I had, when suddenly—snap—the jam broke. It was just a single, stubborn popcorn kernel wedged in exactly the wrong spot. Knowing how to revive a dead garbage disposal without a plumber saved me a $150 service call that night.
The little red button that saves your motor
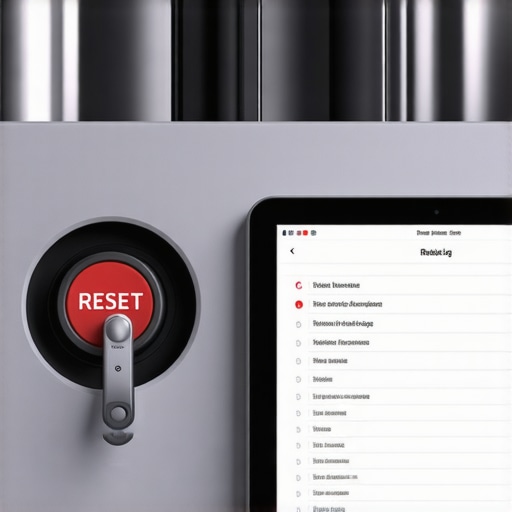
If you’ve cleared the jam but the unit still won’t turn on, the thermal overload probably tripped. This is a built-in fail-safe that cuts power to the motor to prevent it from melting itself into a plastic puddle. On the bottom of the unit, near the hex hole, look for a small red button. If it’s popped out, push it back in. This is much like resetting a circuit breaker in your house. Before you do this, make sure you’ve already checked your maximize your appliance warranty during emergency repairs paperwork; you don’t want to mess with internal components if you’re still under a strict manufacturer plan.
Dealing with the stubborn debris that won’t budge
Sometimes the hex wrench isn’t enough because the object is jammed from the top. I once had a guest accidentally drop a small metal cocktail pick down the drain. The wrench wouldn’t move it. I had to use a pair of long-needle-nose pliers to reach through the drain opening (with the power still disconnected, obviously!) to fish it out. If you’re ever in doubt about whether a part is broken or just stuck, it’s worth looking into what to expect from same-day appliance repair experts to see if the fix is beyond your tool kit. If you find yourself frequently clearing jams, it might be time for fast trustworthy appliance installation near you to get a more powerful unit that can handle your kitchen’s workload without flinching.
Now that we’ve covered the wrench and the reset button, I want to talk about something most DIY videos skip: the psychological trap of chemical drain cleaners. Everyone says to pour a gallon of caustic liquid down the drain when things get sluggish, but in my experience, that’s the fastest way to eat through your unit’s internal seals. Professionals at the Association of Home Appliance Manufacturers (AHAM) have long noted that chemical erosion causes more long-term structural failure than simple mechanical jams. If you’re searching for same-day appliance repair, a real technician will tell you to stop with the liquids and start with the mechanics. The real ‘oops’ factor I see constantly is the documentation trap. Homeowners assume a warranty is a golden ticket, but if you can’t prove you haven’t been pouring corrosive agents or glass down the sink, your claim will be dead on arrival. You absolutely need to maintain the maintenance log that saves your warranty policy to avoid out-of-pocket costs.
Why does the disposal stop again after just five minutes?
This is a classic nuance issue that separates the pros from the amateurs. You clear the jam, hit the reset, and it runs—until it suddenly dies again. Most people assume the motor is fried, but often it is just a sensitive thermal sensor reaching its limit prematurely. It is a logic very similar to the sensor that stops your dryer from heating up; the machine is simply being over-cautious to prevent a fire. If this cycle repeats, don’t just keep hitting the red button. Repeatedly resetting a thermal trip can eventually melt the housing. Instead, this is the moment to look into maximizing your appliance warranty during emergency repairs. Before you commit to a full replacement, check the fine print that voids your protection plan. Using unauthorized tools or disassembling the grinding chamber yourself can sometimes be grounds for a denial. Have you ever fallen into this trap and had a claim rejected? Let me know in the comments.
I’ve spent way too many hours on my back looking up into the dark abyss of a sink cabinet to tell you that maintenance isn’t about luck; it’s about a consistent routine. One thing I never skip is the ice and rock salt scrub. Every month, I throw two cups of ice and a cup of rock salt down the drain. The ice knocks the accumulated sludge off the grinding blades while the salt acts as a high-grit abrasive to polish the internals. If you want to avoid calling for same-day appliance repair, this two-dollar trick is your best friend. According to the Plumbing-Heating-Cooling Contractors Association (PHCC), the buildup of organic fats and starches is the leading cause of motor strain, which eventually leads to those frustrating humming jams.
How do I maintain my garbage disposal over time?
Beyond the ice trick, you need to be militant about what passes through that splash guard. I treat my disposal like a delicate helper, not a bottomless trash can. I never allow coffee grounds, eggshells, or fibrous husks like corn silks to enter the chamber. I also recommend keeping the maintenance log that saves your fridge warranty policy—simply adapt it to include your disposal’s cleaning dates. Documenting that you have regularly cleaned the splash guard and checked the mounting ring for vibrations can be a lifesaver if you ever need to maximize your appliance warranty during emergency repairs. Most homeowners don’t realize that a lack of basic upkeep can be used as grounds to deny a claim. 
Three tools that belong in your under-sink emergency kit
If you are serious about DIY, you need a dedicated kit that stays within arm’s reach of the plumbing. I don’t just use any random wrench; I have a dedicated long-arm 1/4 inch Allen key taped directly to the side of the disposal unit using a piece of heavy-duty duct tape. That way, when a jam happens mid-dishwashing, I am not digging through a messy garage in the dark. I also keep a pair of 12-inch reach-and-grip pliers. These are essential for grabbing a stray silver spoon or a peach pit without putting your fingers in the danger zone. Finally, a small bottle of biodegradable degreaser helps break down the oils that cause the motor to work harder than necessary. If you’re at the point where tools and chemicals can’t save it, you might be looking at fast trustworthy appliance installation near you for a new, high-torque model that can handle a modern family’s workload.
Where kitchen appliances are heading in the next few years
I predict we are going to see a massive shift toward smart disposals that utilize load-sensing technology. Imagine a unit that can sense the density of the waste and automatically reverse the motor’s direction to clear a jam before you even hear it hum. We already see this logic in high-end laundry systems; just look at the firmware update that keeps your smart washer from crashing. Until these futuristic units become the standard, staying on top of your top tips for same-day service warranty coverage is the only way to ensure you aren’t paying full price for a mechanical failure. My challenge to you today: go under your sink, find that hex hole at the bottom of the unit, and give it one manual test turn with a wrench. If it feels stiff or gritty, it’s time to perform that ice and salt scrub before your next big dinner party.
Hard Lessons from the Underside of a Kitchen Sink
After years of tinkering, I realized that 90% of the fear around a non-responsive unit comes from not understanding the built-in fail-safes. One major epiphany was that a disposal isn’t a woodchipper; it’s a centrifuge. If you treat it like a trash can, you will eventually find yourself searching for same-day appliance repair. I also learned that the ‘smell’ people complain about is often food rotting in the drain pipe, not the disposal itself. Always run the cold water for an extra ten seconds after the grinding stops to flush everything through the trap.
Another lightbulb moment? Knowing exactly when to stop. If that hex wrench doesn’t budge after moderate pressure, forcing it will only strip the gears or burn out the motor entirely. At that point, checking your warranty-backed appliance services is your smartest move rather than turning a minor jam into a full replacement cost. I’ve seen too many homeowners break the internal flywheel by applying too much leverage with a pry bar.
The Three-Tool Kit That Defeats Every Jam
I’ve distilled my emergency sink kit down to three non-negotiables that have saved me from calling a pro more times than I can count. First, a dedicated 1/4-inch hex key is mandatory—don’t rely on your generic toolset; buy one specifically for this purpose and tape it directly to the side of the disposal unit. Second, keep a pair of 12-inch needle-nose pliers nearby; you need the reach to pull out objects without putting your hand in the danger zone. Finally, a small bottle of bio-enzymatic drain maintainer is far superior to harsh acids because it eats organic sludge without damaging the rubber gaskets. If these tools and how to revive a dead garbage disposal without a plumber techniques don’t work, I keep the contact info for fast trustworthy appliance installation near you ready for when the motor finally hits its natural end of life.
Reclaiming Your Kitchen from Mechanical Failure
You don’t need to be a professional contractor to maintain a high-functioning kitchen. By mastering these manual resets, you have already taken the first step toward true home autonomy. Don’t let a small mechanical hum or a temporary jam ruin your evening. With a bit of patience and the right preventative routine, you can keep your kitchen running smoothly for a decade or more. The peace of mind that comes from knowing you can handle a minor appliance crisis is the best feeling a homeowner can have. What’s the strangest object you’ve ever found wedged in your disposal blades? Let me know in the comments below!