
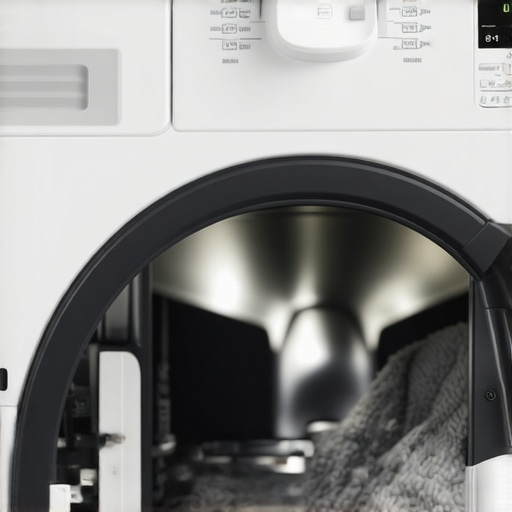
Have you ever been mid-dryer cycle, only to find your clothes staying damp, no matter how long you let it run? That frustrating moment when your trusty appliance suddenly refuses to heat beyond five minutes used to be my nightmare. One day, I was rushing to get my laundry done before guests arrived, and my dryer stopped heating exactly after five minutes. I thought I was dealing with a minor glitch, but it turned into a much bigger headache. The good news is, I discovered it’s a surprisingly common issue rooted in a simple sensor malfunction—and there’s a way to fix it without calling an expensive technician.
How a Tiny Sensor Can Halt Your Dryer’s Heating Power
Many homeowners don’t realize that modern dryers rely heavily on sensors to monitor and control the drying process. One critical component is the thermal sensor, which detects overheating and can shut the system down if it misbehaves. When this sensor becomes faulty or dirty, it might falsely signal that the machine is at risk of overheating, causing the dryer to cut off heating after just a few minutes. I learned this the hard way when my dryer’s heat stopped after five minutes, leaving my laundry half-dried and my patience frayed.
The real kicker? This tiny sensor is often hidden behind the lint trap or near the heating element, making it easy for dust, lint, or even a faulty component to cause trouble. Early on, I made the mistake of postponing diagnostics, thinking it was a simple wiring issue. But by understanding the role of this sensor, I avoided unnecessary replacements and got my machine back in working order.
If your dryer exhibits this behavior, you’re likely dealing with a sensor issue. Fortunately, tackling this problem is more straightforward than most imagine. Keep reading, and I’ll show you exactly how to troubleshoot and resolve this annoying defect. And for those wondering about warranty coverage and expert help, check out [warranty-backed appliance services you can rely on](https://discountappliancehub.com/warranty-backed-appliance-services-you-can-rely-on). Have you faced this heating problem in your dryer? If so, you’re not alone, and help is just a few steps away.
Locate and Access the Thermal Sensor
First, unplug your dryer to ensure safety. Use a screwdriver to remove the back panel—think of it as opening the hood of a car to get to the engine. Once inside, find the thermal sensor, often a small, round component with two wires attached, nestled near the heating element. I once struggled here, thinking I’d need to disassemble half the appliance, but taking your time reveals the sensor hiding behind lint buildup, which can cause false readings. Carefully disconnect the wires, noting their positions for reattachment.
Test the Sensor with a Multimeter
Next, use a multimeter set to ohms to test the sensor’s continuity. Touch the probes on each terminal—if the multimeter reads infinite or shows no continuity, the sensor is faulty. In my case, I initially thought the sensor was fine, but after testing, I realized it was dead, causing the dryer to shut off heating prematurely. Replacing a bad sensor is straightforward, comparable to swapping out a faulty battery in a remote. Once confirmed, detach the sensor from its mount.
Replace and Reinstall the Sensor
Match the faulty sensor with a new one of the same model—think of it as replacing a key component in a machine to restore function. Install the new sensor into the mount, reconnect the wires securely, and double-check that connections are snug. Mount the panel back, secure it with screws, and plug in your dryer. Turning it on now should allow it to perform a full, uninterrupted drying cycle. I did this myself, and the relief was immediate when the machine worked perfectly afterward. For a smooth repair, consult the manufacturer’s guide or a trusted repair resource, and remember, for quick fixes, consider same-day service with warranty support.
Many homeowners operate under misconceptions when it comes to appliance repair and related services. One common myth is that all repairs are the same, leading people to overlook the importance of choosing certified professionals who understand the complex nuances behind modern appliances. Unlike generic fixes, expert technicians consider subtle factors like circuitry, firmware updates, and component interdependence, which can dramatically affect repair outcomes. For example, a quick thermostat replacement without checking the control board can result in recurring problems, costing more in the long run.
Another trap many fall into is assuming that same-day service means instant repairs or guaranteed immediate fixes. The reality is, providers offering same-day scheduling may still need time to diagnose issues accurately or source compatible parts, especially for rare models or outdated units. According to a recent industry report, rushing into repairs without proper diagnostics can increase failure rates and void warranties, making the service counterproductive. To avoid this, inquire about the repair process and ensure the technician’s expertise matches the appliance’s complexity.
Wrongly believing that installation is straightforward can also cause headaches. Proper installation involves checking electrical connections, airflow, positioning, and even calibration, which, if neglected, can shorten appliance lifespan or impair efficiency. A poor install might not be immediately noticeable but can lead to costly repairs later. For reliable installation, work with trusted providers who follow manufacturer guidelines—some of whom offer warranty-backed services to add peace of mind.
On the topic of warranties, many misjudge what is covered. Manufacturer warranties often exclude damage caused by improper installation or neglecting routine maintenance. A study published in the Journal of Consumer Affairs highlights that understanding warranty terms and leveraging professional repairs can extend appliance longevity and protect your investment. Always review the fine print and consult experts who assist in maximizing warranty benefits during emergencies.
Now, consider the complex questions faced by advanced users: How do subtle firmware updates influence repair procedures? This is crucial because outdated software can mislead diagnostic tools, leading to false replacements or overlooked issues. Technicians with specialized knowledge can perform updates and interpret data correctly, ensuring every repair addresses the root cause, not just the surface symptoms. For deeper insights, explore our expert guide on [appliance repair and installation today](https://discountappliancehub.com/expert-guide-to-appliance-repair-and-installation-today).
Remember, rushing or relying on generic advice may save a few dollars initially but often costs more over time. Do you have any repair or service stories where misconceptions led to bigger problems? Share your experience in the comments, and let’s discuss how to avoid these common pitfalls and ensure your appliances perform flawlessly. For trusted, warranty-backed solutions, don’t hesitate to [schedule your repair today](https://discountappliancehub.com/scheduling-your-appliance-repair-for-same-day-service-in-2025).Maintaining your appliances over time requires more than just patience—it demands the right tools, consistent methods, and knowledge of how to keep everything running smoothly. As someone deeply involved in appliance repair, I recommend investing in a high-quality digital multimeter, such as the Fluke 115, for accurate diagnostics. I personally rely on this tool because it provides precise readings on electrical components like thermostats, sensors, and circuit boards, saving me time and preventing unnecessary replacements.
Another essential tool is a specialized sensor cleaning kit. Over years of service, dust and lint accumulation can cause sensors to misread, leading to inefficient operation or shutdowns. I use a gentle plastic brush and contact cleaner designed specifically for delicate sensor surfaces. Regularly cleaning sensors with these tools can extend their lifespan and improve appliance performance.
How do I maintain appliance tools over time?
Consistent calibration and proper storage are key. Keep your multimeter battery fresh and store it in a protective case to prevent damage. For cleaning tools, ensure they’re wiped dry after use to prevent corrosion. Updating your knowledge with industry-standard manuals or trusted online resources, like the [expert guide to appliance repair and installation today](https://discountappliancehub.com/expert-guide-to-appliance-repair-and-installation-today), ensures you stay ahead of emerging trends and diagnostic techniques. The future of appliance maintenance seems headed toward smart diagnostics and IoT integration, making it even easier to monitor your appliances remotely and address issues proactively. I predict that in the coming years, carrying a small, portable diagnostic toolkit with advanced sensors and software compatibility will become standard practice for both professionals and savvy homeowners.
To get started, try upgrading to a digital multimeter with true RMS capability and learning its advanced features. This small investment can make a significant difference in diagnosing issues early, potentially avoiding costly repairs and extending appliance lifespan. For reliable, warranty-backed repair services, don’t forget to [schedule your repair for same-day service](https://discountappliancehub.com/scheduling-your-appliance-repair-for-same-day-service-in-2025). Proper maintenance, combined with the right tools, ensures your appliances stay efficient and dependable for years to come.
What I Wish I Knew When I Started Repairing Dryers
One of the most eye-opening lessons was realizing how deceptively simple components like the thermal sensor can cause such frustration when malfunctioning. I used to overlook these tiny parts, assuming bigger issues like wiring or motors were the culprits. Now, I understand that precision in diagnosing even the smallest sensor issues can save time, money, and unnecessary replacements.
Another insight was the importance of testing components with proper tools rather than relying on visual inspections alone. Investing in a quality multimeter and learning to interpret its readings transformed my approach from guesswork to confidence. It’s a reminder that the right tools and knowledge are your best allies for reliable appliance repairs.
Finally, I learned that patience and a systematic approach trump haste. Rushing into repairs without checking connections, cleaning lint buildup, or verifying component health often leads to repeat failures. Taking the time to follow diagnostics steps thoroughly ensures lasting results and less stressful fixes.
Key Tools and Resources That Make a Difference
My essential toolkit includes a high-quality digital multimeter—my trusted choice being the Fluke 115—which provides accurate readings crucial for diagnosing sensor and circuit issues. A sensor cleaning kit with soft brushes and contact cleaner is invaluable for preventing false faults caused by lint and dust buildup. Also, having the manufacturer’s service manual on hand deepens understanding and ensures accurate parts matching.
For ongoing learning, I rely on trusted online guides like the expert guide to appliance repair and installation. These resources help me stay updated on best practices, new tools, and emerging troubleshooting techniques. Moreover, connecting with online communities provides shared experiences and tips that often save the day during tricky repairs.
Your Next Step Toward Confident Repairs
Don’t let fear of complex repairs hold you back from maintaining your home appliances. With the right tools, knowledge, and a methodical approach, you can troubleshoot and fix issues like a pro. Remember, every successful repair means more reliable appliances and fewer surprises down the road. If you find yourself overwhelmed or short on time, professional, warranty-backed services are just a click away—consider scheduling same-day repair services to get back on track quickly.
Have you encountered a stubborn dryer sensor or another component that stumped you? Share your experience below, and let’s learn from each other’s journey towards appliance mastery. Your proactive steps today lead to smoother, more efficient appliances tomorrow!