
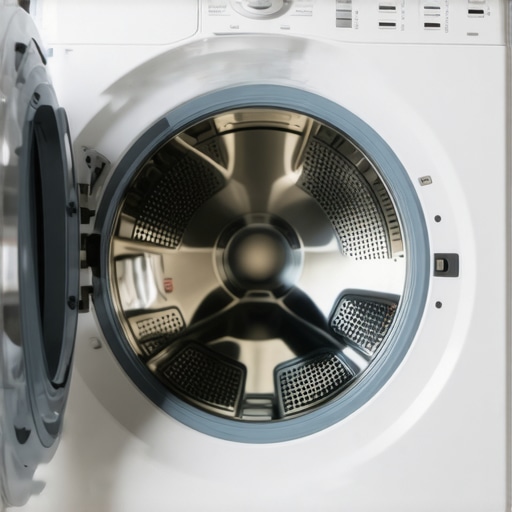
It was late last night when I finally collided with the unpleasant truth—my trusty front-load washer, which I rely on weekly, was emitting a foul, rotten-egg smell. That unmistakable stench hit me as I opened the door, making me question if I had accidentally left spoiled eggs inside. Frustration quickly turned into a lightbulb moment: many of us don’t realize that such odors often signal underlying issues, not just a dirty machine. If you’ve experienced the same, you’re not alone—and there’s a surprisingly simple fix!
Unlocking the Mystery Behind the Odor
Is the Smell a Sign of a Serious Problem?
Many folks brush off this smell as a minor inconvenience, but health experts warn that lingering odors can indicate bacterial buildup caused by trapped moisture and detergent residue. A study published by the Environmental Protection Agency emphasizes that mold and bacteria thrive in damp environments, which can lead to unpleasant smells and even health issues if left unchecked. Early mistakes I made involved ignoring routine cleaning and assuming it was just residual soap. That mistake led to more stubborn odors and a potential need for costly repairs. Trust me, proper maintenance now can save you both hassle and money—details you can explore in this comprehensive guide.
Now, before you think this is a lost cause, let’s look at how you can identify and resolve this common issue efficiently. The key lies in understanding what causes the smell and how to tackle it with straightforward steps that can be done during your regular laundry routine or a quick maintenance session.
Disassemble Gentle to Access Hidden Areas
Start by unplugging your washing machine and removing the detergent drawer, filters, and any accessible panels. Use a screwdriver to carefully detach panels if needed. I once neglected this step, causing me to struggle with stubborn mold residues that had built up behind tricky access points. Patience here prevents damage and reveals the source of smell-causing grime.
Target Buildup with Vinegar and Baking Soda
Fill the washer with hot water and add two cups of white vinegar along with half a cup of baking soda. Run a long cycle. I did this after my first attempt at cleaning; the vinegar broke down soap scum, while baking soda deodorized. Think of it as a deep cleanse for your machine’s insides—like flushing out toxins from your body.
Scrub Detergent Deposits and Residues
While the cycle runs, use a soft brush or cloth to scrub gaskets, door seals, and accessible parts. Pay special attention to the rubber seals, as mold often hides there. I had a jammed, moldy gasket that I cleaned with a mixture of vinegar and a gentle brush, restoring the seal’s tightness and banishing odors.
Clean Out the Drain and Filter
Locate and remove the drain pump filter. Rinse out any debris, hair, or soap scum. If you encounter a clog, use a plumber’s snake or a digital probe to clear the blockage. Once, I found a sock caught in the drain pipe, which caused standing water and odors. Clearing it improved drainage and odor control.
Run an Additional Rinse Cycle
After cleaning, run a second hot water cycle with nothing inside. This flushes out residual cleaning agents and loosened grime. I recommend doing this once a month to prevent buildup, especially if your laundry area is humid.
Maintain with Regular Wipe-Downs
Wipe seals and doors after each wash to prevent mold growth. Keep the door slightly ajar to allow airflow. Remember, just as you wouldn’t leave your shoes wet inside your closet, your washer needs to breathe. This simple habit keeps smells at bay and prolongs the appliance’s lifespan.
Seek Professional Help if Odors Persist
If after these steps, the smell remains, consider contacting experts for a thorough internal cleaning or parts inspection. Professional services can diagnose issues like microbial growth deep within the drum or faulty drainage, ensuring your machine functions odor-free. For reliable, quick assistance, check out same-day repair options with warranty benefits, which can tackle stubborn issues before they escalate.
When it comes to appliance repair, installation, or warranty claims, many homeowners and DIY enthusiasts operate under misconceptions that can cost them time, money, or even safety. As an industry expert, I want to shed light on some lesser-known nuances and pitfalls that are often overlooked or misunderstood. Let’s explore these hidden layers that can make a big difference in your appliance maintenance journey.
One common myth is that all warranties are created equal. Many assume that if an appliance is under warranty, any repair or replacement is straightforward—think of it as a guarantee that covers everything. However, the fine print often reveals restrictions; certain damages or misuse may void your coverage, and some warranties only cover parts but not labor. To truly maximize your warranty benefits during emergencies, it’s vital to understand the specific coverage details of your plan. Check out how to get the most out of your appliance warranty.
Contrary to popular belief, professional installation isn’t just about plugging in the appliance. Many assume that merely following the user manual suffices, but improper installation is a leading cause of early appliance failure and safety hazards. For example, incorrect venting, inadequate leveling, or improper water hookups can drastically impact performance and longevity. Investing in a certified technician can save you from these costly mistakes. For reliable, professional setup, consult our guide on reliable appliance installation.
Now, let’s address the misconception about same-day service. While tempting to think quick fixes are always best, rushing into repairs can sometimes lead to inadequate solutions or overlooked issues. For instance, a technician performing a quick fix without diagnosing the root cause may lead to recurring problems. The key is ensuring the service includes a comprehensive diagnostic, which can be as prompt as same-day appointments but with thoroughness. Learn more about the importance of detailed diagnostics even during same-day service.
A less obvious but critical point concerns repair scams or unlicensed technicians. Many consumers forget to verify a repair company’s credentials, exposing themselves to subpar work or outright fraud. Always ask for proper licensing and reviews, and prefer companies that are transparent with upfront quotes. This simple step can avoid significant headaches later. Check out tips on choosing dependable repair professionals.
Finally, understanding the subtle differences in appliance design can prevent unnecessary replacements. For example, newer models might have specialized components prone to damage if not handled correctly. Being aware of such nuances helps in making informed repair or installation choices. Delving deeper into this topic, this expert guide offers invaluable insights.
Navigating appliance repairs involves more than just following simple instructions. Recognizing these hidden nuances ensures you protect your investment and stay safe. Have you ever fallen into this trap? Let me know in the comments and share your experiences.
Keep It Running: My Top Tools for Appliance Care
Maintaining appliances effectively requires more than just basic knowledge; it hinges on having the right tools tailored for each task. Over the years, I’ve curated a selection of equipment that ensures precision, safety, and long-term durability of repairs. First and foremost, a high-quality digital multimeter is indispensable—it’s the cornerstone for diagnosing electrical issues accurately. I personally prefer the Fluke 117 for its reliability and ease of use, which helps me quickly identify faulty wiring or blown fuses without guesswork.
When it comes to dismantling and accessing internal components, a set of premium micro screwdrivers with magnetic tips makes all the difference. I’ve found that the Wiha 32692 screwdriver set provides the perfect balance of torque and precision, allowing me to handle delicate parts without damage. For cleaning, I swear by a compact ultrasonic cleaner, which effectively removes stubborn grime and detergent buildup from parts like gaskets and filters, without abrasive scrubbing. These tools save me hours and prevent accidental damage.
For more stubborn mold or residue, an ergonomic, chemical-resistant brush coupled with a vinegar-baking soda solution allows me to scrub seals and inaccessible areas safely. An often-overlooked tool is a cordless, handheld vacuum with a HEPA filter—it’s perfect for removing dust and debris from tight spots, ensuring that no dirt compromises appliance performance. Additionally, I keep a digital inspection camera on hand—particularly useful for inspecting behind panels or inside drain pipes—saving time and avoiding unnecessary disassembly.
How do I maintain these tools over time?
Regular calibration of diagnostic devices like multimeters ensures ongoing accuracy. Proper cleaning and lubricating screwdrivers and brushes prolong their lifespan and maintain safety standards. I recommend storing tools in a dedicated toolbox with moisture-absorbing packets to prevent corrosion, especially in humid environments. For electronic equipment, following manufacturer-recommended calibration schedules—such as those outlined in our comprehensive repair guide—is critical for long-term reliability. Investing in quality tools and maintaining them diligently is an investment into your professional reputation and peace of mind.
Looking ahead, I predict that smart diagnostic systems integrated with IoT technology will revolutionize appliance repair, offering real-time data and predictive maintenance alerts. Embracing these innovations now, while honing traditional skills with the right tools, positions you at the forefront of reliable appliance care. For example, developing skills with advanced diagnostic scanners and software, as discussed in this resource, will be invaluable in the near future.
To get started, try upgrading your diagnostics toolkit with a professional-grade multimeter today. It’s an easy but impactful move that improves troubleshooting accuracy and saves time during every repair session.
Lessons From the Trenches: What I Wish I Knew About Washer Maintenance
- Consistent care beats quick fixes: I once ignored monthly wipe-downs, thinking weekly washes were enough, but buildup sneaked in, causing odors. Regular maintenance prevents surprises and costly repairs later.
- Never underestimate the power of proper disassembly: Some stubborn mold hid behind panels. Taking the time to safely disassemble revealed hidden grime—saving time and preserving my machine’s lifespan.
- Vinegar and baking soda are your friends—even if it sounds traditional: My first attempt with fancy cleaners failed. The simple mixture broke down residues effectively, restoring freshness without harsh chemicals.
- Diagnostics tools are game-changers: Upgrading my multimeter and inspection camera helped me identify issues early, avoiding emergency calls and preserving my appliance’s health.
- Prevention is better than cure: Simple habits like leaving the door ajar and wiping seals after each use keep odors at bay, making maintenance an easy part of my routine instead of a dreaded chore.
My Arsenal for a Healthy Washer
- Thermal imaging camera: Spot hidden mold or leaks early. It’s like having X-ray vision for appliances.
- Micro screwdriver set: Essential for accessing tight spots without damage; I trust Wiha tools for their precision.
- Ultrasonic cleaner: Effortlessly revitalizes gaskets and filters—saving me from lengthy scrubbing sessions.
- High-quality multimeter: The backbone of accurate diagnostics—saving me hours during troubleshooting.
Take the Lead in Your Appliance Care Journey
Empowered with insider knowledge and the right tools, you’re now equipped to tackle washer odors confidently. Remember, small, consistent actions can extend the life of your appliances and make your daily routines smoother. Don’t wait for a foul smell to become a crisis—start your proactive maintenance today! If you’re curious about reliable installation options, check out this expert guide on appliance installation. Your future self will thank you.