
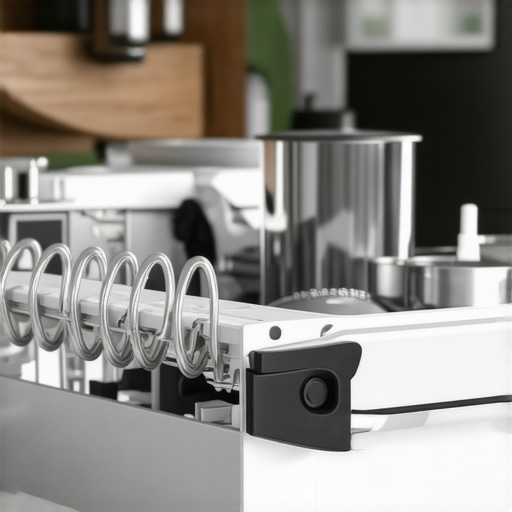
One morning, I opened my dishwasher expecting the usual hum and sparkle, only to be greeted by a door that refused to stay up, sagging and dangling like a broken limb. Frustration bubbled up because I knew this wasn’t just an inconvenience—this was a sign that those pesky springs were giving out again. I’ve faced this frustration more times than I care to admit, and each time, I wondered: Why do dishwasher door springs keep snapping?
Preventative Fixes and Simple Repairs Make a Difference
If you’ve experienced a similar issue, you’re not alone. Fortunately, understanding the cause of these spring failures and knowing how to fix or prevent them can save you time, money, and headaches. Today, I’ll walk you through what causes those springs to snap and the best ways to help your dishwasher door work smoothly once more. But first, let’s address a common concern I hear from folks like you:
Will replacing door springs really solve the problem, or is it just a temporary fix?
I used to believe that every repair was a gamble. Early in my experience, I made the mistake of rushing into a spring replacement without inspecting the underlying cause—thinking, “Well, it’s just a spring, right?” That mistake taught me that faulty or worn-out springs tend to keep breaking if the root issue isn’t addressed, like corrosion or improper alignment. Knowing this, I always advocate starting with a full assessment, perhaps even consulting a reliable professional guide to ensure a durable fix. According to recent research, improper installation or aging parts are among the leading causes of spring failure in dishwashers, making preventive maintenance crucial for longevity.
Now, before we jump into the how-to, I want to help you recognize if your own dishwasher is showing signs of failing springs, so you can avoid sudden breakdowns. Ready to learn how to keep your dishwasher door in top shape? Let’s get started with understanding what’s really behind those snapped springs and how to prevent it from happening again.
Assess the Spring Condition Carefully
Start by unplugging your dishwasher to ensure safety. Open the door fully and inspect the springs attached to the door hinges. Look for signs of wear, rust, or visible breakage. I once snapped a spring while trying to pull back the panel without proper support, leading to a frustrating search for replacement parts. Use a flashlight if necessary to get a good view and note whether the springs are intact or broken.
Remove the Damaged Springs with Precision
Use needle-nose pliers or a wrench to carefully detach the broken spring from its hook. Remember, springs are under tension, so work slowly to avoid sudden snaps that could cause injury or further damage. When I replaced my first spring, I used a towel to grip the spring and prevent it from flying off unexpectedly. Carefully set aside the broken parts and keep track of any small hardware for reinstallation.
Choose the Correct Replacement Springs
Identify the make and model of your dishwasher, then order the exact springs recommended by the manufacturer. Avoid generic parts, as they may not fit securely or function properly, leading to recurring failures. I learned this the hard way when I tried a universal spring and had to redo the fix the next week. Consult your appliance manual or visit a trusted parts supplier to get reliable replacements.
Install New Springs Safely and Effectively
Attach one end of the new spring to the hinge hook. Use the pliers to stretch the spring slowly, then connect the other end to the corresponding fixed point on the frame. I recommend wearing gloves to protect your hands from the tension. Confirm that the spring is seated properly and that the door opens and closes smoothly. If it feels too tight or loose, double-check the placement and tension before proceeding.
Test and Verify Your Repair
Plug the dishwasher back in and run a short cycle. Observe how the door behaves—opens easily, closes firmly, and stays open at any angle set during the test. Pay attention to unusual noises or resistance. I once had to readjust a spring tension after noticing my door sagging again, which taught me to test thoroughly before finishing up. This step prevents repeat failures and prolongs the lifespan of your repair.
Implement Preventative Maintenance to Last Longer
After fixing the springs, clean the door hinges and lubricate them as needed to prevent corrosion that could weaken the springs over time. Periodic inspection, about every six months, can catch early signs of spring fatigue. I set a reminder on my phone because ignoring small signs can lead to sudden, inconvenient failures—like a dishwasher door that falls open mid-cycle. Simple upkeep goes a long way in maintaining your appliance’s reliability.
When to Call a Professional for Help
If at any point the springs are stubborn or if the tension feels off, consider consulting a professional. Sometimes, a damaged hinge or warped door frame affects spring performance and requires expert adjustment. For peace of mind and a warranty-backed fix, visit our contact page. Professional repair can save you time and prevent further damage, especially when dealing with complex or recurring issues that aren’t resolved through simple replacement steps.
Many homeowners assume that warranties and same-day repairs are straightforward processes, but in reality, there are nuanced pitfalls that can lead to unexpected costs or delays. For instance, a common misconception is that all repair services are covered equally under warranty, but some warranties have strict exclusions that many consumers overlook. According to a 2022 Consumer Reports study, nearly 40% of warranty claims are denied due to technicalities or improper registration, emphasizing the importance of understanding your coverage thoroughly.
Another widespread myth is that scheduling a same-day service guarantees a quick fix. However, factors like technician availability, parts sourcing, or the complexity of the problem can extend repair times unexpectedly. This can leave consumers frustrated, especially if they’re not informed about these potential delays beforehand.
Installing appliances might seem like a straightforward task, but advanced nuances in proper installation—such as ensuring correct electrical grounding or venting—are often underestimated. Improper setup not only risks voiding warranties but can also lead to appliance malfunction or safety hazards. Experts recommend consulting professionals who follow manufacturer specifications meticulously rather than relying solely on DIY guides.
One magic bullet many believe in is that choosing the cheapest repair service guarantees savings. Yet, low-cost options sometimes come with subpar parts or inexperienced technicians, risking further damage and higher costs over time. Trustworthy services, especially those backed by warranty support, invest in certified parts and skilled labor, which may cost more upfront but provide lasting value.
For advanced users wondering about warranty claims that involve intricate troubleshooting, it’s crucial to document every step of the repair process—photos of damaged parts, detailed descriptions of issues, and correspondence with technicians. This can be vital if you need to escalate a claim or contest a denial. Experts suggest reviewing your warranty’s fine print on sites like privacy policy to fully grasp what is covered and how to maximize your benefits.
Furthermore, many overlook the importance of regular maintenance and proper use in extending appliance lifespan within warranty terms. Neglecting routine cleaning or ignoring signs of early wear can complicate warranty claims, as some providers consider lack of maintenance as grounds for denial.
In essence, navigating appliance warranties and repair services requires a blend of knowledge, vigilance, and strategic planning. Instead of accepting superficial promises, homeowners should educate themselves on service specifics and advocate for transparent, warranty-backed solutions. For an in-depth guide on safeguarding your investments, check out our Warranty-Backed Appliance Services.
Have you ever fallen into this trap? Let me know in the comments.
Maintaining your appliances effectively requires more than just basic troubleshooting skills; it demands the right tools and a strategic approach to ensure longevity and reliable performance. One of my personal favorites is a high-quality digital multimeter, such as the Fluke 117, which I use regularly to diagnose electrical issues like testing thermostats, circuit boards, or wiring integrity. Its precision and durability have saved me countless service calls and guessing games, and I recommend it to anyone serious about appliance maintenance. Why do I swear by it? Because accurate voltage readings can help you identify potential problems before they escalate into costly repairs.
Invest in Unique Maintenance Equipment
Aside from a multimeter, I find a good set of insulated screwdrivers invaluable for safe disassembly and reassembly of panels and connectors. For cleaning refrigerator coils or dryer vents, I rely on a specialized brush with a long handle—much more effective than generic household cleaners—and an air compressor to blow out stubborn debris. Using these tools as part of regular maintenance routines dramatically extends appliance lifespan and reduces emergency breakdowns.
The Role of Software in Tracking Performance
Modern appliances increasingly integrate smart technology, which can be monitored using vendor-specific apps. For example, some smart refrigerators allow you to track temperature fluctuations or compressor cycles, alerting you to potential issues early. I use appliance management apps like HomeAssistant, which can aggregate data from compatible devices, giving me a comprehensive view of my household systems. This proactive approach lets me schedule repairs or part replacements before failures occur, saving time and money.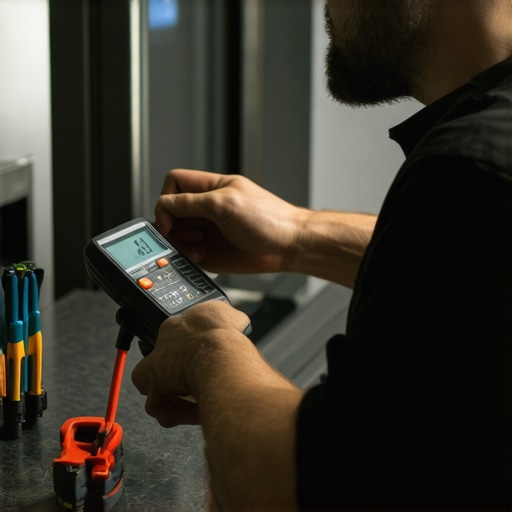
Preparing for Future Trends
Looking ahead, I predict that AI-driven diagnostics and remote monitoring will become standard in appliance maintenance. Companies are experimenting with predictive analytics that alert homeowners and technicians to issues before symptoms manifest. Staying ahead of these trends involves adopting proactive tools and embracing continuous learning about new technologies—skills that will be crucial as appliances become more integrated and complex.
How do I maintain appliances over time? Or, what’s a simple way to keep my appliances in top shape?
One of my favorite tips is regularly calibrating smart devices and sensors using manufacturer tools—like updating firmware and resetting settings—so they function accurately. This practice prevents minor glitches from developing into major issues. Additionally, establishing a maintenance schedule based on manufacturer recommendations ensures you catch potential problems early. For instance, scheduling annual compressor tests or condenser coil cleanings can prolong your appliance’s life and maintain warranty coverage. For detailed guidance on scheduling such tasks, check out this resource.
If you’re unsure about the best tools for your specific appliance, consider consulting a professional through our contact page. They can recommend equipment tailored to your needs and help you develop an effective long-term maintenance plan.
Remember, the investment in proper tools and preventive practices pays off by reducing emergency repairs and maintaining warranty benefits. For example, understanding how to interpret diagnostic data from smart devices can be a game-changer—akin to a recent case where a homeowner saved hundreds by identifying early signs of compressor wear via their app before a complete breakdown. Dive into the latest expert insights on this at this comprehensive guide. Try implementing one of these advanced tips today, and watch your appliance maintenance become more manageable and cost-effective.
Over the years, I’ve realized that the most effective appliance repairs come down to a mix of patience, knowledge, and the willingness to look beyond surface issues. One of the hardest lessons I learned was that quick fixes often lead to repeat failures if underlying problems aren’t addressed. For instance, replacing a spring without inspecting the door hinge or frame can result in snapping springs again within months. This insight has compelled me to adopt a more holistic approach, emphasizing preventive maintenance and understanding the real causes of component wear. Studies confirm that issues like corrosion or misalignment are among the leading culprits behind spring failures in dishwashers, making early detection and proper installation crucial for longevity.